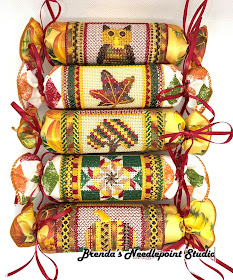
May 5, 2021--Won 2nd Place Ribbon in the Canvaswork-Multistitch category at Woodlawn's 58th Annual Needlework Exhibition in Alexandria, VA.
I'm keeping the photo of Marilyn's crackers at the end of this post for comparison purposes. If you haven't already stitched these crackers, you may want to give them a try. They'll be adorable on my side table during the Fall season.
 |
| Autumn Crackers Finished |
 |
| Decorative ribbon edges "stuffed" into seam allowance |
 |
| Decorative Ribbons used in the making of Autumn Crackers |
December 19, 2019--All the crackers are now stitched and ready for finishing. In order to start that process, I had to order some autumn themed 2.5" wired ribbons and found some nice ones on eBay. Once I determine if the ribbon colors will work with threads used, I plan to turn these canvases into "crackers" as soon as possible. Here's the last one--a leaf.
 |
| Autumn Crackers - Leaf Completed (five of five crackers) |
December 15, 2019--On a roll now--have just finished stitching the fourth cracker--a tree in Fall colors. There are even some leaves on the ground. Hope to finish the last one, a leaf, before the month is done.
 |
| Autumn Crackers - Tree Completed (four of five crackers) |
December 8, 2019--The third cracker, a quilt block pattern, is done. These are working up fast and are a lot of fun. I've stitched the centers of the Tree and Leaf crackers, so the whole set should be done by next month. Still have yet to purchase autumn themed ribbons. Stay tuned for that.
 |
| Autumn Crackers - Quilt Block Completed (three of five crackers) |
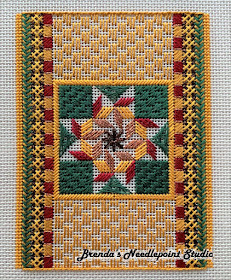
November 22, 2019--The second of five crackers is now stitched. This is an adorable pumpkin with lots of stitch and thread variety.
I found extra stretcher bars in the size I needed, so have tacked three blank pieces of canvas unto the bars and will do them all at the same time--at least each section will be completed on all three before moving to the next. The three cracker patterns to be done are Tree, Leaf and Quilt.
Here's the pumpkin cracker:
 |
| Autumn Crackers - Pumpkin Completed (two of five crackers) |
November 17, 2019--When ANG's CyberPointers Chapter offered Autumn Crackers by Marilyn Owen (part of that year's Chapter Project Book) as a group project at their July, 2017 meeting, I had to sign up. They are the cutest things and will look great in the house as autumnal themed needlepoint. Even though it has taken 2 years for me to start working on these 5 crackers, I've got one completely stitched and am working on the second. Here's a photo of the owl cracker.
| Autumn Crackers - Owl Completed (one of five crackers) |
Marilyn Owen gives lots of choices for the borders and roll areas, but also lets you know which stiches she chose. I appreciate that since I'm not very good at selecting my own. Also, her instructions on how to finish each design as a cracker are easy to follow. I just need to find some 2.5" Fall themed ribbons--easier said than done since I don't have large box craft stores near me (the small Michael's Arts & Craft store near me has moved out their Fall stuff and now has Christmas things). There are lots of ribbons on eBay, so may purchase a few rolls there and hope the colors match my threads.
Below is a project photo of all 5 crackers stitched and finished by the designer, Marilyn Owen. Love the colors.
 |
| Autumn Crackers by Marilyn Owen Project Photo |


