Statcounter

Showing posts with label Source Online Class ANG. Show all posts

Friday, August 19, 2022

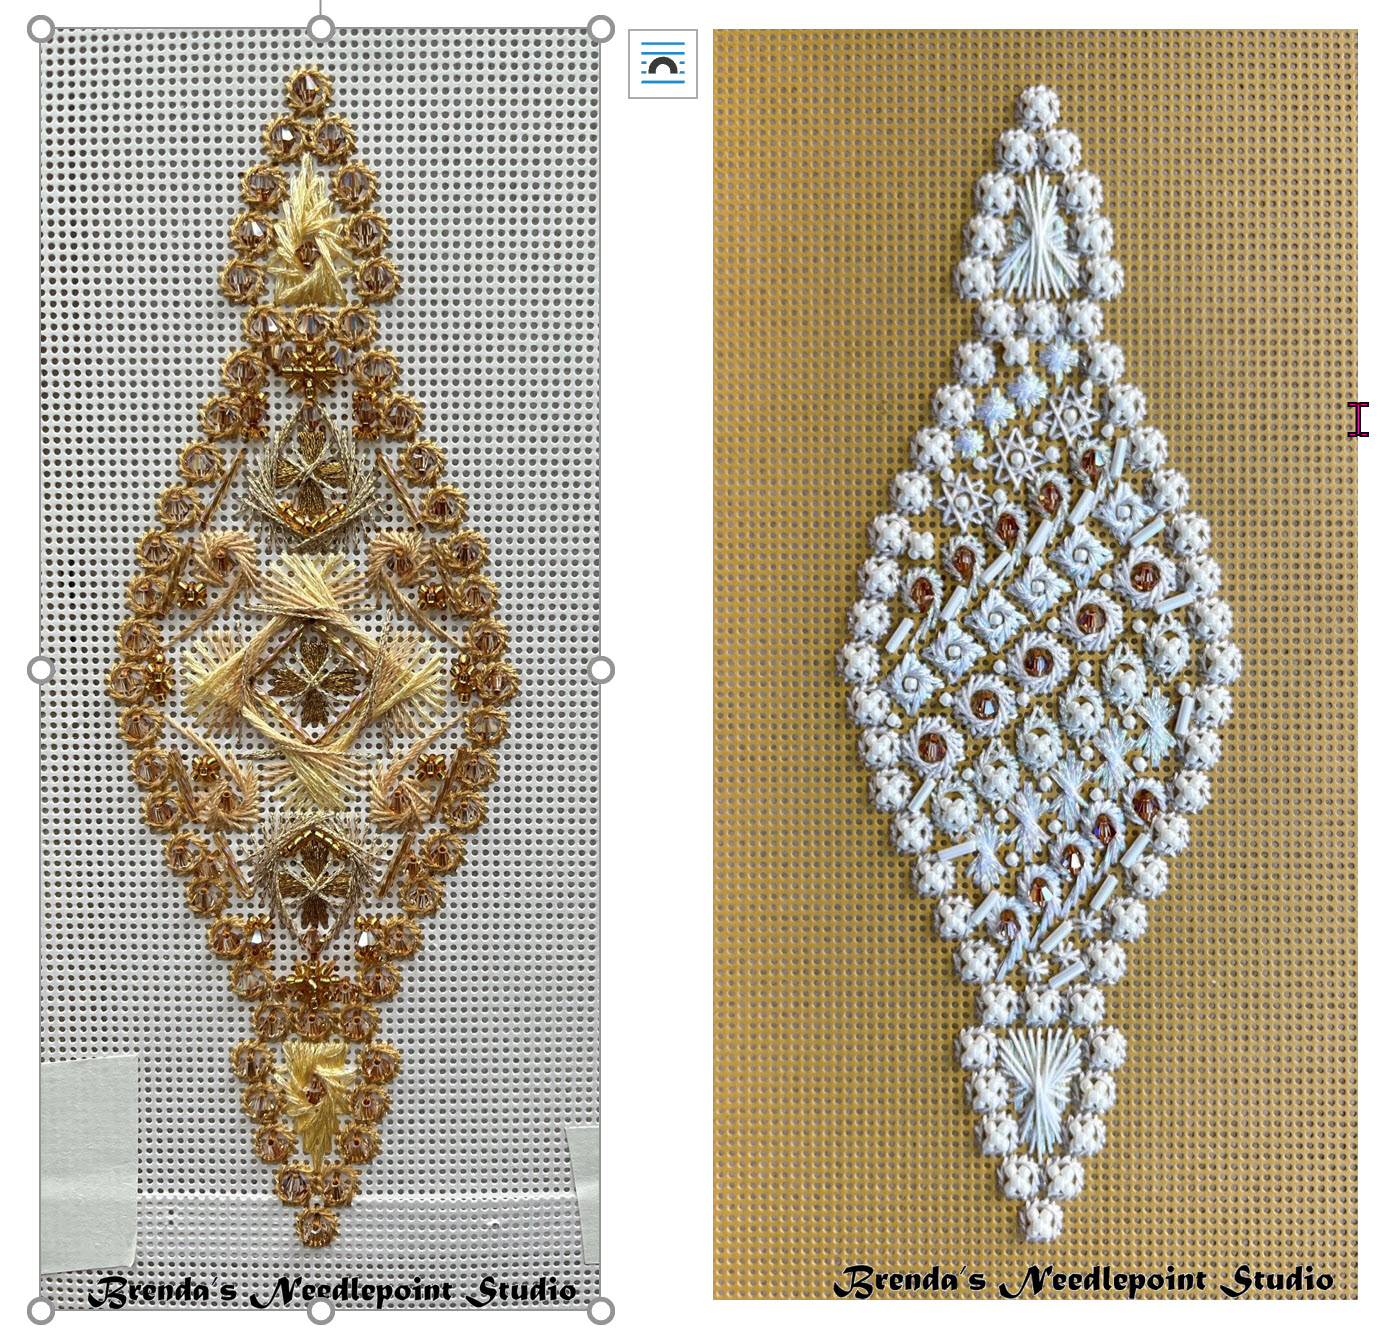
Ornament Diamond Drops - Updated 8/19/22

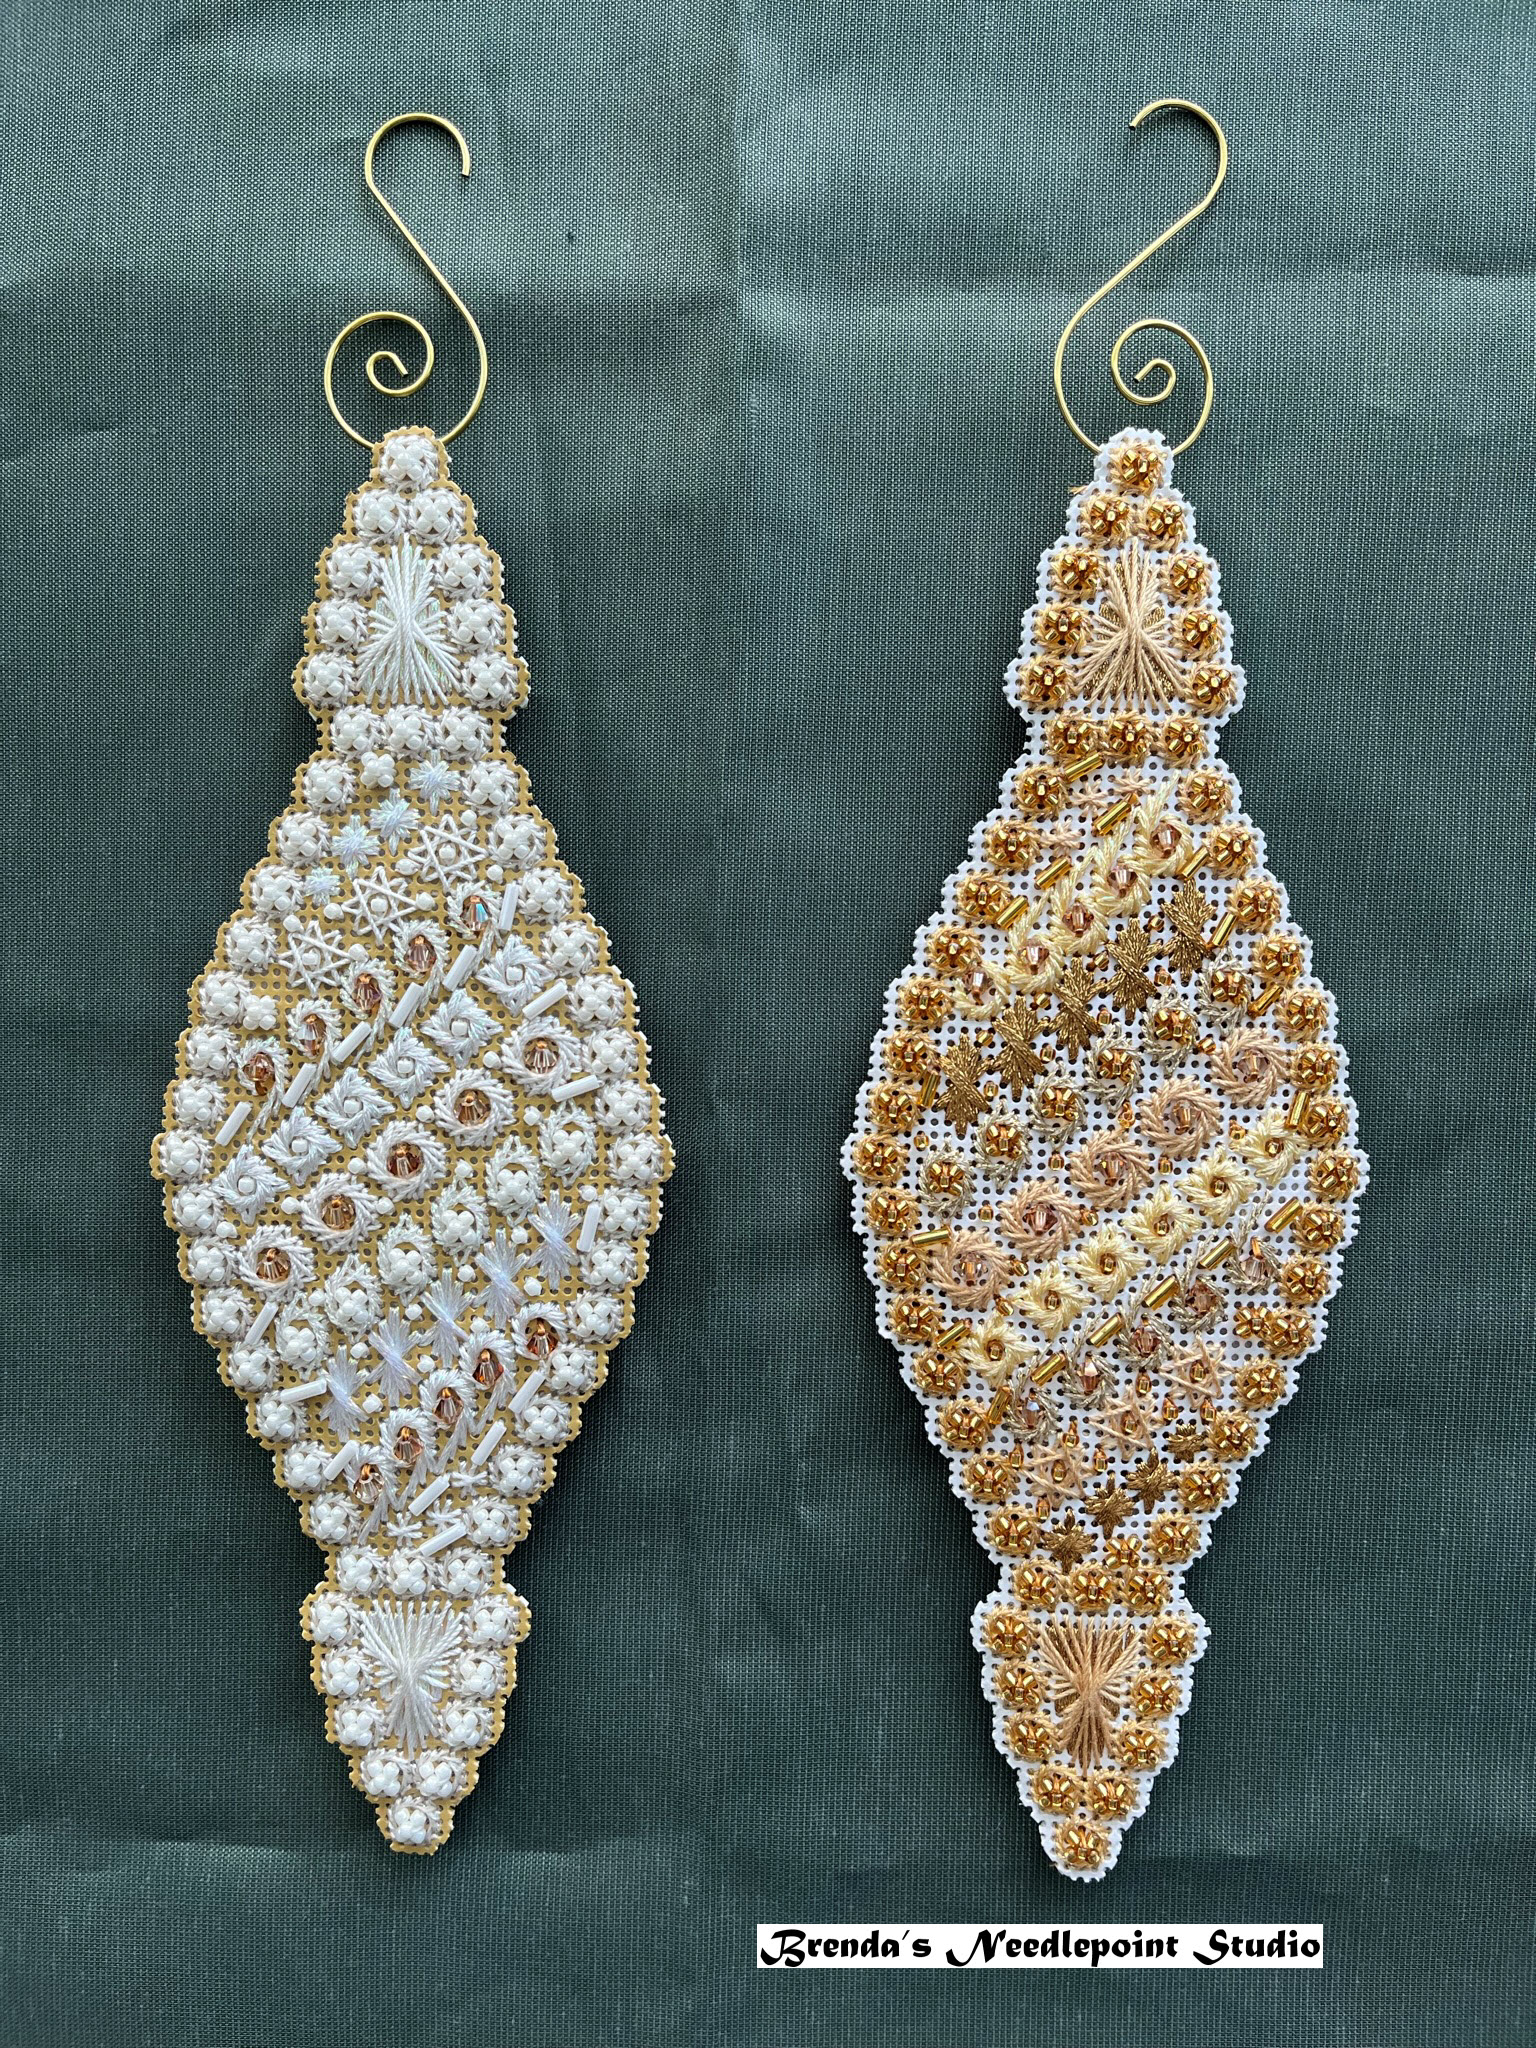
August 19, 2022--These four lovely pieces worked up on perforated paper have now been turned into two ornaments.  One ornament has the white thread on gold paper designs on each side, while the other has gold thread on white paper designs on each side.  

To make the ornaments, I trimmed each design one "hole" away from the stitches and inserted some poly batting between the two ornaments.  Then, using 6 lb. crystal clear fishing line, I sewed the two together with a running stitch.  It worked up very quickly and I love the results.

Ornament Diamond Drop Design One Finished


Ornament Diamond Drop Design Two Finished (Flip Side of Design One)


August 14, 2022--Now there are four and the stitching of these beautiful and glitzy ornaments is completed.  Next step--turn them into two double sided ornaments (white paper on one side, gold on the other--maybe). 

I asked the monthly Zoom* group I meet with as to how I should turn them into ornaments--use buttonhole stitch all around?  Linda M suggested I trim the paper close to the stitches, then sew two ornaments together with invisible thread using a running stitch.  I like that idea and will give it a go.

* The Zoom group is a breakout of the NJNA Chapter called KBZers because, for the most part, we are all working on Kurdy Biggs projects, including the SOTM for 2022.  


Ornament Diamond Drop One Gold Thread on White Paper Completed

Ornament Diamond Drop One and Two Gold Thread on White Paper
 Completed

May 9, 2022--Now there are three.  I've just stitched ornament number two, but this time with white thread on gold paper.  Here it is:

Ornament Diamond Drop Two with White Thread on Gold Paper Completed

Ornament Diamond Drop Two with White Thread on Gold Paper Completed Side View

Ornaments Diamond Drop One and Two with White Thread on Gold Perforated Paper

The left photo below is ornament number two stitched with gold thread on white perforated paper.  My next ornament will be number one stitched with gold thread on white perforated paper.


March 30, 2022--Now there are two.  I completed stitching the gold Diamond Drop Ornament on white perforated paper with gold threads and beads (the piecing of the paper is explained below on 3/24/22).  I'm very happy with how both look and plan on stitching another set but do the opposite--stitch Diamond Drop One with gold thread on white paper and Diamond Drop Two with white thread on gold paper.  They both have lots of sparkle with gold and white beads.  Here are some photos:


Diamond Drop Ornaments Two (gold on white) and One (white on gold) Completed


Diamond Drop Ornament Completed


Diamond Drop Ornament Two Side View


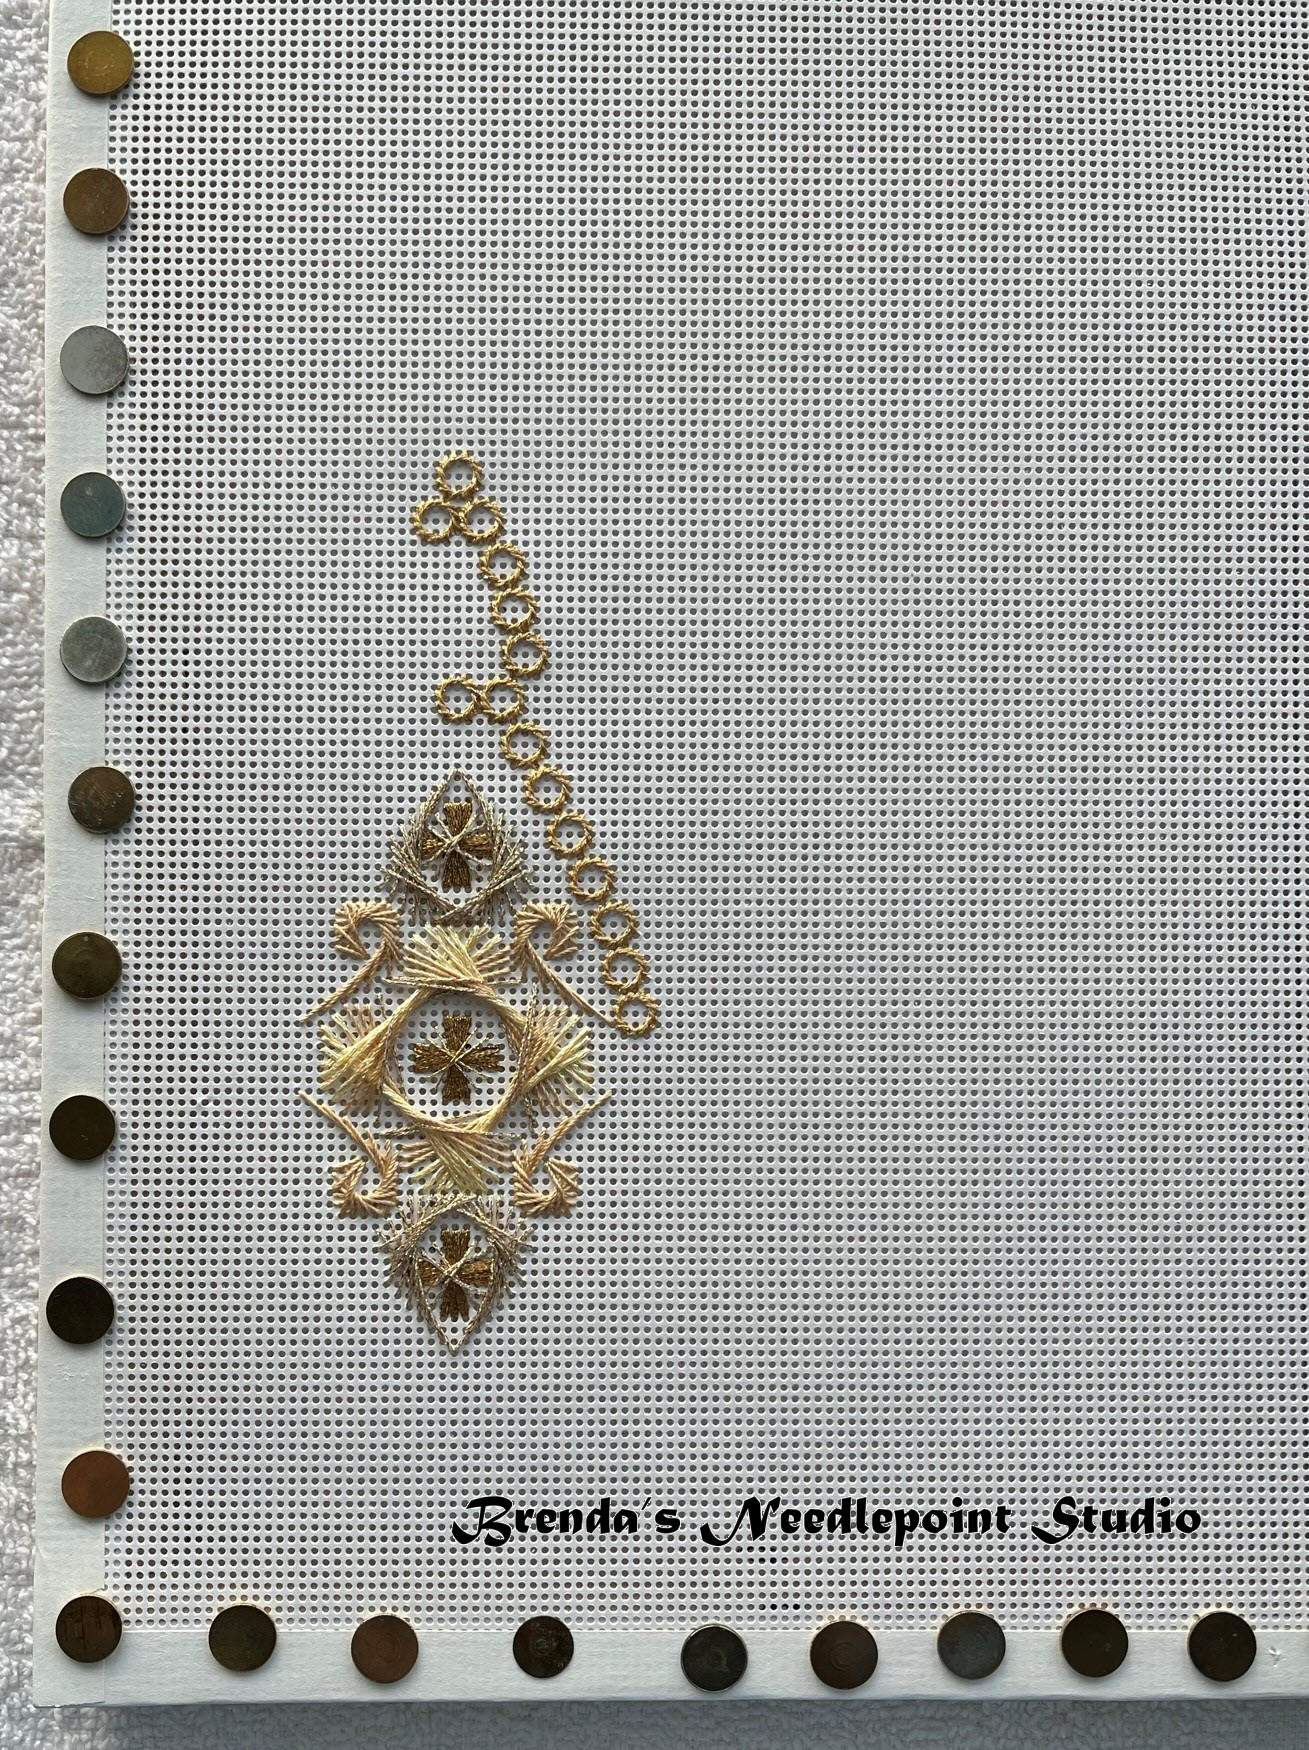
March 24, 2022-- This project has been fraught with issues--not getting the right size bugle beads, one of the gold threads is too light for the project, AND the white paper for ornament number 2 sent as part of the kit is 18 count, not 14 count as needed.  The second ornament I partially stitched (blogged about it below on 2/19/22) is on 18 count paper--too small for placement of the kitted beads and won't match the size of the first ornament.  I wrote Kurdy Biggs, the designer, about this and she told me she had to order 14 count white perforated paper since all she had was 18 count.  To date that paper hasn't come in.  Glad I ordered some from eBay and received it a few weeks ago.  I also ordered a darker gold thread RG Elegance 901 to replace the RG Elegance 900 included in the kit.  Kurdy tells us she could not find color 901, but I had no problem ordering it.  

So that's three worthless items paid for in the kit--wrong size perforated paper (needed 14 count white, not 18 count as sent), wrong size beads (needed 6 mm white bugle beads. not 12 mm as sent), wrong color thread (needed RG 901, not RG 900 as sent).

Then I made a monumentous error in stitching ornament 2 on the correct size 14 count paper.  I must have been asleep when I calculated how low to start stitching on the left side, wanting to have enough room for another ornament on the right side.   Below is a photo of how much I stitched before I realized what I had done--duh!

Ornament Diamond Drop 2 Problem--Too Low

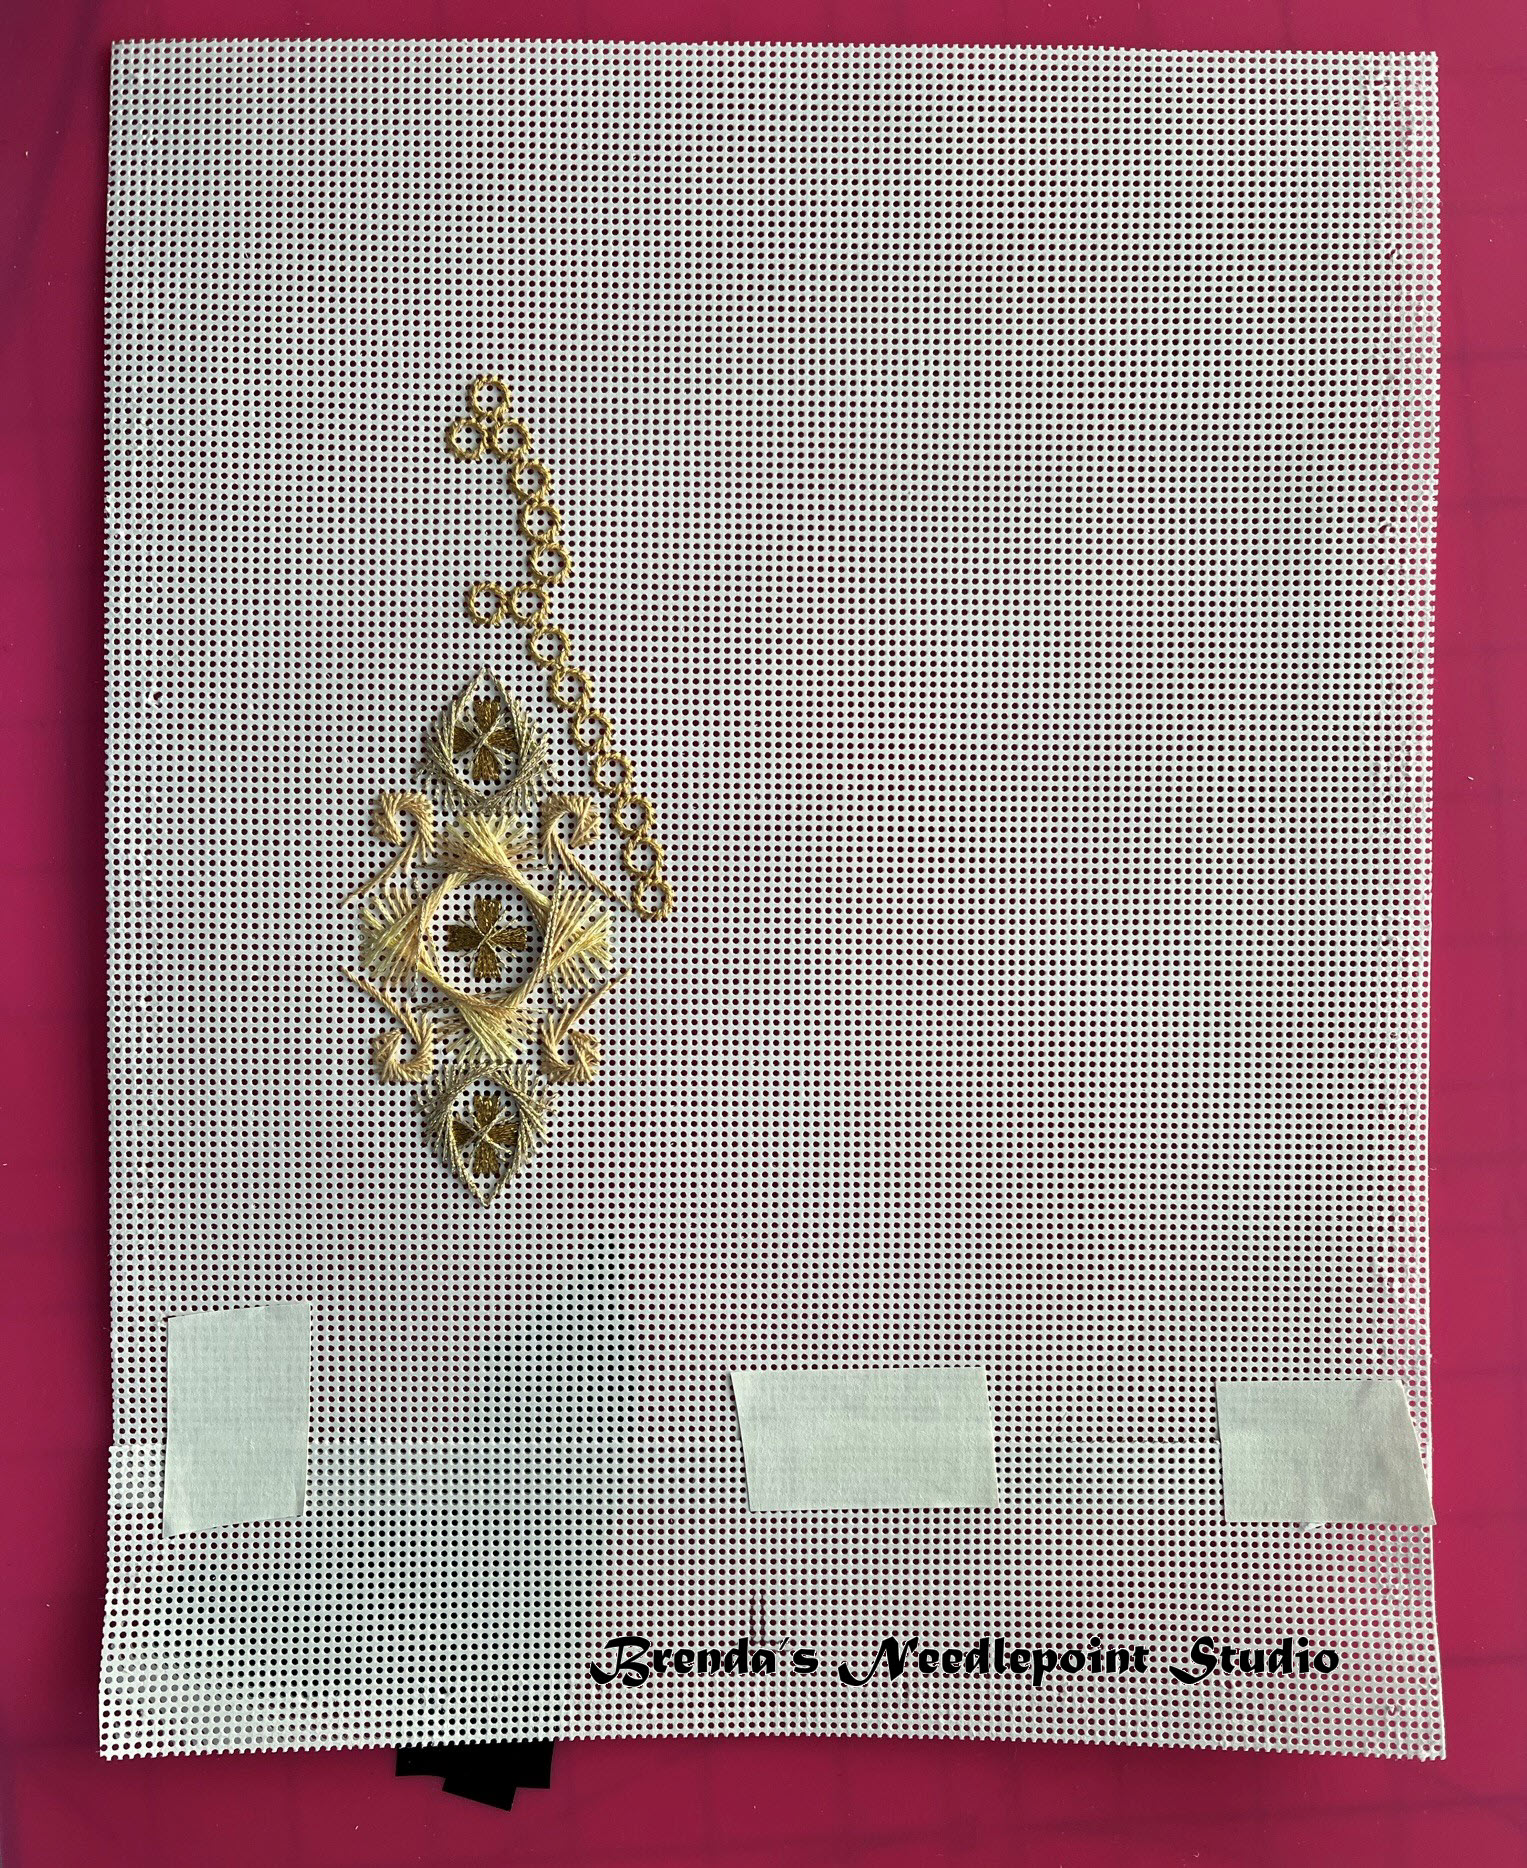
So I took the paper off the stretcher bars, cut off a few inches from the top and taped it onto the bottom to add length.  Then remounted it on stretcher bars.  Yes, that did the trick.  The edges won't show when stitches are done and the paper is cut to the ornament's shape.  BTW, I normally stitch "in the ditch", but because I needed access close to the stretcher bars on the left side to maneuver my needle when working up the Jessica stitches, I'm stitching this project "above ground", so to speak.  And yes, I do use a lot of tacks--keeps the canvas (or in this case, paper), from stretching.


Ornament Diamond Drop 2 Problem Fixed


Ornament Diamond Drop 2 Problem Fixed and on Stretcher Bars


February 19, 2022--Have begun stitching the Diamond Drop Ornament number two--gold threads on white perforated paper.  The designer of this project, Kurdy Biggs, had to swap out a number of threads in the kit I ordered from what was used to stitch the project photo, so what I have are threads that are a lot lighter than the original ones (see project photo below).  I think darker gold would be more dramatic but am not going to repurchase threads and perforated paper to start over.  I'll live with what was sent as part of the kit.

I changed the order of stitching.  We are instructed to stitch the Bracket Crescents (upper and lower stitches) first then stitch the Center Rhodes inside the Bracket Crescents.  I've learned from experience to always stitch the inside design first, then do the outside stitches.  Otherwise, you're unable to locate where the needle should go up and down because the outside stitching covers up a portion of the inside area.  Hope this makes sense.


Ornament Diamond Drop Gold Part 1 Closeup


Ornament Diamond Drop Gold Part 1


February 11, 2022--Completely finished the stitching of one Diamond Drop Ornament (white threads on gold perforated paper).  Love the shine and dimensions of the different threads and beads.  

Had one problem, though--the designer, Kurdy Biggs, wasn't able to send the 6mm bugle beads called for in her stitch guide when ordering the kit for this project--instead, she sent 12mm bugle beads which are waaaay too long for the project.  Fortunately, I had the right size in both the white and gold bugle beads in my stash, so it's not a serious problem.  Hopefully she'll be able to order the right sizes for future kits she sends out.

Next up:  stitching the ornament with gold threads on white perforated paper.   There's enough room on each sheet of paper, and I have enough threads to reverse the colors, to make a total of four ornaments.  Yay!

Ornament Diamond Drop Number One with White Thread on Gold Paper Completed Closeup

Ornament Diamond Drop Number One with White Thread on Gold Paper Completed Side View

Ornament Diamond Drop Number One with White Thread on Gold Paper Completed

January 27, 2022--I have had the pleasure over the last two years to work on ANG's Stitch of the Month (SOTM) projects with the NJNA Chapter.  This year is a little different.  Rather than work on the 2022 SOTM designed by Kurdy Biggs, I chose instead to stitch her Diamond Drop Ornaments (one in white on a gold background and another in gold on a white background) being offered as an ANG Workshop by Mail.  I love these ornaments, having done three others offered by Kurdy which were published in the 2015 November issue of Needlepoint Now Magazine (click here for more information).  Like those 2015 ornaments, this project is stitched on 14 count perforated paper.  

Luckily for me, a few NJNA Chapter members are also working on this project and/or others designed by Kurdy Biggs and have formed an online monthly stitch-along group called KBZers (Kurdy Biggs Zoomers).  This is going to be fun.   I divided this project into 12 sections (6 months for each color) so that I'm not feeling overwhelmed.  So far, I'm a little ahead of schedule and my progress to date is below.

Ornament Diamond Drop Number one with White Thread on Gold Paper Part 1 Closeup

Ornament Diamond Drop Number one with White Thread on Gold Paper Part 1


Below is a photo of the project as designed by Kurdy Biggs.

Ornaments Diamond Drops Designed by Kurdy Biggs Project Photo

1 comment:


  1. That's some journey! Looking forward to seeing more.

    ReplyDelete

Friday, April 22, 2022

Stacked Rectangles - Updated 9/29/22

September 29, 2022--Won 2nd Place Ribbon for Canvaswork/Needlepoint category at Rehoboth Beach Museum's 10th Annual Needlework Exhibition in Rehoboth Beach, DE.  So pleased.

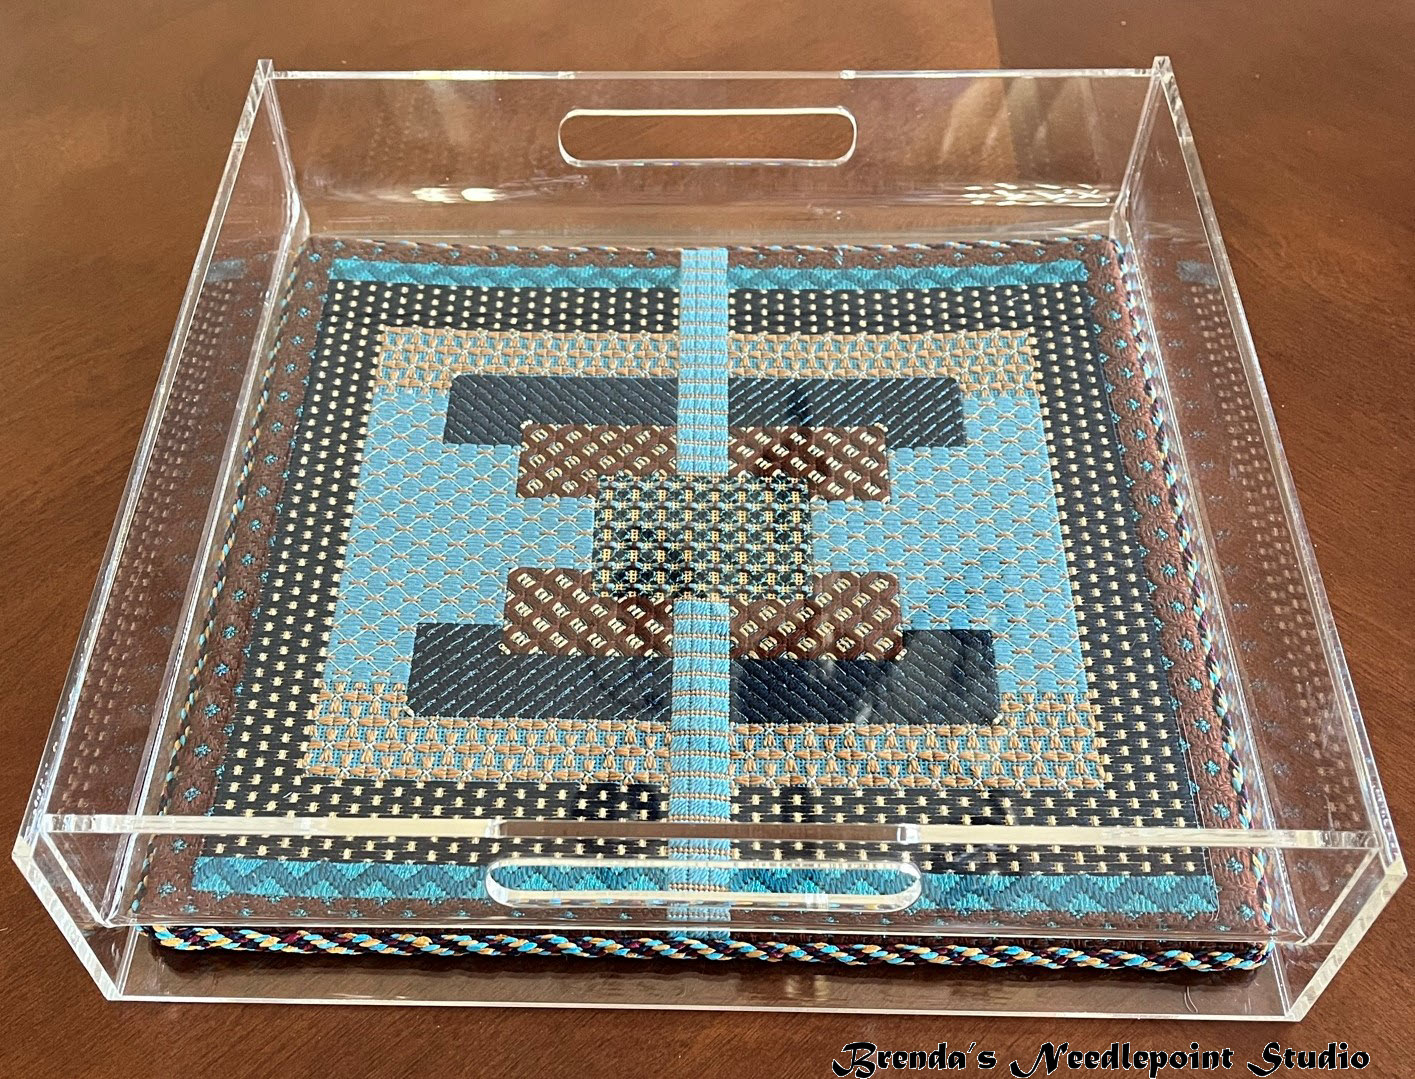
April 22, 2022--Last January I mailed this bright and colorful project to Rittenhouse Needlepoint in Philadelphia for them to finish into an acrylic serving tray and got it back a few weeks ago.  I love it.  I made the Kumihimo cording with 4 colors of ribbon (dark blue, turquoise, burgundy and gold) and it complements the rectangles beautifully.  

If I so desire, I can slide the Stacked Rectangles out of the tray bottom and insert a similarly sized project.  

Stacked Rectangles Finished Side View

Stacked Rectangles Finished Top View

May 6, 2020--Have now completed the stitching on this really cool pilot stitch project designed by Susan Hoekstra for the now canceled ANG Seminar (note this may be available as a future online class).  I would like to place it in an acrylic serving tray, thinking all these electric colors and shiny threads will look great on my outdoor furniture (and better yet holding a bottle or two of wine and glasses).


Later I'll write about my experience on locating a tray and what I need to do to prepare the piece for insertion, or if they want to do it themselves, etc.

Stacked Rectangles Completed

April 22, 2020--Earlier this month I began pilot stitching a project designed by Susan Hoekstra called Stacked Rectangles in advance of the ANG Seminar which may, or may not be held in Tucson, AZ in August.

Originally this was going to be a two day June pilot class taught to participants of the ANG New Jersey Needle Artists chapter, but because of the virus, the class was canceled.  So Susan mailed the kits to 6 of us pilot stitchers to begin immediately, and so far I am thoroughly enjoying the process of putting these challenging, yet fun, stitches on canvas.

Below is a status photo as of April 16th.  The metallic threads make each section pop.  I chose the Rocky Coast colorway with lots of turquoise, gold, navy blue and root beer colors.  My plan is to complete the stitching by month end.  Only eight more days to go.
Stacked Rectangles Status as of April 16, 2020


PS... Susan Hoekstra has approved the posting of this blog.

Saturday, December 5, 2020

Stitch of the Month 2020 - Updated 12/5/2020

December 5, 2020--All twelve months of this ANG Stitch of the Month project designed by Kathy Rees are done.  This was lots of fun with plenty of challenges.  I want to make this into a pillow and am trying to determine what type of border to add to the star so it'll have a larger surface.   Stay tuned.


SOTM 2020 through the December Lesson

November 9, 2020--The November instructions called for filling in the upper right and lower left areas.  However, as suggested by Tina of NJNA Chapter of ANG, I used the Balloon Stitch instead of the Hungarian Stitch recommended by Kathy Rees, the project designer,   It's larger than the called for stitch and reflects more light.  The December stitch should counterbalance the larger designs done in this and prior months.

SOTM 2020 through the November Lesson

October 12. 2020--October's stitch covered the second portion of the four different background patterns.  Coming to the end soon.


SOTM 2020 through the October Lesson


September 6, 2020--Below is a photo showing September's stitch, the Diamond Pavilion in the upper left and lower right blocks.  We are definitely approaching the finishing line with 3 more months of different background stitches to be done.

SOTM 2020 through the September Lesson

SOTM 2020 through the September Lesson Closeup

August 10, 2020--The August lesson is now stitched.  This lesson covered the last leg of the 8 legged star and as with all the others, got done very quickly.  The next four lessons will cover the background stitches.  This should make for easy stitching while watching TV.


SOTM 2020 through the August Lesson

SOTM 2020 through the August Lesson Closeup

July 5, 2020--Here's a photo of the 7th star leg stitched as part of the 2020 ANG Stitch of the Month (SOTM) lesson for July.    Half way through this project with one more star leg to do.  After that it's background stitches with the possible addition of a border.   Have six months to think about what would look best.


SOTM 2020 July


June 5, 2020--June's lesson for the 2020 ANG Stitch of the Month (SOTM) is the sixth star leg consisting of waffle stitches.  My favorite is worked up in the 2 corners (left and right).  Two more legs to go in blue, then the background will be next.

SOTM 2020 June Closeup 
SOTM 2020 June


May 9, 2020--Last night I stitched up May's installment (number 5) of the ANG SOTM 2020 project.  This month featured the Milanese stitch which I love when using threads that must be laid such as multiple strands of silk floss, Neon Rays types of ribbon, etc.   However, using variegated Caron Watercolours for a number of this month's sections didn't show off the stitches as well as some other type of thread could have.   But that's why I love doing these ANG SOTM projects--I learn so much and develop confidence to try new things.  Now i have to wait until the next lesson is available on June 1st to continue working on this 8 legged star.

SOTM 2020 May Closeup

SOTM 2020 May


April 5, 2020--Here's the fourth installment of the ANG Stitch of the Month project (SOTM) for 2020.  The designer, Kathy Rees, skipped a star leg and continued on with the red colors using cashmere stitch variations.  Am now thinking about a border to close up the design.  Hmmm.

SOTM 2020 April Closeup

SOTM 2020 April
The pink lines on the canvas are basting threads.


March 19, 2020--Just finished stitching March's lesson.  This third leg of the star highlights Smyrna stitches with some interesting variations.   It's a fun project to stitch...just wish I were doing this under better circumstances (no COVID-19).

SOTM 2020 March Closeup

SOTM 2020 March


February 3, 2020--It didn't take long to stitch up February's lesson.  In fact, was able to get this done while watching the Super Bowl game last night (or mostly listening to the game).  However, I did look up at the television to watch all the commercials and half-time show.  Most of the ads were very entertaining and it was interesting to see the difference in energy levels of Shakira and Jennifer Lopez.

SOTM 2020 February Closeup

SOTM 2020 February


January 25, 2020--January's lesson is stitched.   Based upon the instructions, I can tell this is going to be a lot of fun to work on.

SOTM 2020 January Closeup

SOTM 2020 January


January 2, 2020--The ANG 2020 Stitch of the Month project looks to be fun while offering stitching challenges.  The star designed by Kathy Rees will be great as a "stand up", hanging ornament, etc.  I think I'll encase mine in clear plastic and make it into a front door ornament for use on Independence Day.

So far I've downloaded the two files for January (one is an introduction and the other is January's stitching).  I really like the blue and red colors used by Kathy,  and found some of those threads in my stash.  Then  ordered what I don't have.  I already had a 12" x 12" piece of 18 count mono canvas in white, so will change the background stitches to a very pale, almost white, color rather than the ecru color Kathy used which went with her suggested egg shell colored canvas.

Below is a photo of the basted star.  I started to do the outline in #4 pencil, but feared it might look too dirty where the white background stitching met the star.  Since the design graph is based upon 6 canvas threads equaling 1 thread in the graph, I basted using a count of over/under 6 threads.  Actually faster than counting out each length.

Everything looks a bit messy now because I like having my basting thread knots in front along with their tails to keep an eye on where everything is and easier to remove as each star arm is stitched.  You can see I stitch "in the well" and mount my canvas so it sits on the back of the stretcher bars.  The tacks on the inside of the stretcher bars are for small magnets which will hold needles.

ANG Stitch of the Month 2020 Basting


Below is a photo of the project as designed and stitched by Kathy Rees.
Tuesday, August 27, 2019

SOTM 2016 - Updated 9/14/2019

September 14, 2019--Just learned this piece garnered a 2nd  place ribbon at the Rehoboth Beach Museum's 9th Annual Needlework Exhibit.  Thank you Susan Hoekstra for such a beautiful design.

August 27, 2019--Just picked this up from Aaron Brothers Framing out of Michael's Arts and Crafts.  I think they did a perfect job.  I chose a formal frame and matts since this will hang in my boudoir.


SOTM 2016 Framed


January 19, 2017--December's instructions covered couching Kreinik thread across the dividing lines of each section.  Lots and lots of couching.  It's now done and ready to be finished into a pillow.  It's a really lovely design.

PS:  Decided at the last minute to fill in the very center of the design with the lightest shade of blue using T-Stitch.  Ahhh, much better.

SOTM 2016 Completed
November 15, 2016--November's blocks, the last ones, are stitched.  Something tells me December's instructions will be to couch Kreinik thread around each section.  Plan on making a pillow out of this pretty SOTM.

It's visually interesting how the corners look like dog ears even though they are even with the other areas.  I also like the way the center recedes into the background as if you're looking down into a box.  Cool.

SOTM 2016 November Section 11 Completed
November 2, 2016--Block 10 for October is complete.  Chose beads from my stash which are in the mid-range of the blue colors.  Like how they look.

SOTM 2016 October Section 10 Completed
September 15, 2016--Finished stitching blocks 8 and 9.  Started block 8 in August, but ran out of thread and time before seminar, so now that I've been back for almost two weeks, had some time to work on this project.  The last color seems to jump from medium blue to a very pale blue, but I believe it's because the prior color has a darker blue laid on top of the lighter one.  The next two months should make the colors look different again.

SOTM 2016 August and September Section 8 and 9 Completed
July 7, 2016--Block 7 for July is done.  The corner units stitch up quickly and they are all the same size except for the ones on the last row.  It looks so much better in person.

SOTM 2016 July Section 7 Completed
June 21, 2016--June's Section 6 is stitched.  It took longer than it should have because I ran out of thread.  Got it in time to finish up in June.

Moving into the pale blues now.  Like how it's developing.

SOTM 2016 June Section 6 Completed
May 4, 2016--Section 5 for May is done.  It's interesting how different the colors are when placed next to others.  For example, the dark color used in this latest grouping is the same thread used in the very center, but it appears a bit bluer.  Also, the light blue color in this section appears darker than the one used last month, but it is in fact a bit lighter.  Must be that they're different threads and reflect light differently.

SOTM 2016 May Section 5 Completed
April 18, 2016--Section 4 for April is done.  Was able to do most of the stitching while attending the 6th Annual NJ Needle Festival last weekend.

SOTM 2016 April Section 4 Completed

March 7, 2016--Completed the stitching for March, Section 3.  A quick and easy section.  The photo was taken late in the afternoon with the sun low in the sky.  Makes a difference in how the blues appear.

SOTM 2016 March Section 3 Completed

February 6, 2016--Section 2 for February is done.  The two blues seem to be fighting each other right now, but I suspect that as more sections are completed, they'll meld together nicely.

SOTM 2016 February Section 2 Stitched
January 30, 2016--January's Block 1 is stitched.  I made some changes to the Amedeus stitch because I used perle thread instead of multiple strands of thread.


SOTM 2016 January Block 1
Below is a photo of what the Amadeus stitch looked like before I added a long thread down the middle to hide the "open area".   The two arms on the right and left side have a long stitch down the middle to cover the open area while the upper arm does not.  I also diverted from Susan's instructions by stitching the right side first, then the left.  I found it difficult to work left, right, left, right--could not see the holes in the middle.  Also, did not want to "pierce" the perle thread like you can do with stranded.  I'm pleased with the result.   Can't wait to start February's Block 2.

PS  The light threads you can barely see on the canvas are basting lines.

Block 1 with and without long center stitch
January 23, 2016--A few days ago some members of the ANG Delaware's Seashore Chapter and I drove up to Fireside Stitchery in Pennsylvania to purchase the necessary threads to stitch this year's ANG Stitch of the Month (SOTM) project.  This beautiful design by Susan Hoekstra, called Feuilles d'Ananas (Pineapple Leaves), is a study in values requiring 11 different threads from dark to light.  What fun we had comparing our color choices to Susan's dark golds/topaz to light straw colors (see project photo below).    I love blues, so naturally migrated to those colors and below is a picture of my thread selections.

Those of us in the guild who are stitching this year-long project plan on meeting once a month at each other's home to help with any challenges we may have.   Looking forward to stitching the first block this month.

ANG SOTM 2016 Designed by Susan Hoekstra


SOTM 2016 Thread Selection