March 16, 2016--Yesterday I was a teller or page (love the word page--makes me think of kingdoms and brave knights) to the judge of Rehoboth Beach Museum's 6th Annual Needlework Exhibit. Have been doing this every year and love learning what makes a stitched piece a ribbon winner and seeing all the beautiful exhibits up close and personal. Would not miss this opportunity for anything.
Hope everyone, near and far, will visit the museum to view this exhibit here at the beach in Delaware during Spring. There's no entrance fee (donation can be given) and will bring some joy to your life. See you there.
Statcounter
Wednesday, March 16, 2016
Wednesday, February 24, 2016
Downton Abbey Geometrics - 2/24/16
February 24, 2016--Gay Ann Rogers has designed some beautiful geometrics to celebrate the Downton Abbey television series running on PBS. She has made them available through to the series finale on March 6th (click here). I've ordered all three projects (photos below) and even ordered the thread kits from Kate Gaunt. I love how they so beautifully complement the costumes (pictured with the needlepoint designs). I'll post about each design individually as they are stitched.
![]() |
| Gay Ann Rogers Designs Downton Abbey Countess of Grantham Geometric |
![]() |
| Countess of Grantham Costume |
![]() |
| Gay Ann Rogers Designs Downton Abbey Lady Edith Geometric |
![]() |
| Lady Edith Costume |
![]() |
| Gay Ann Rogers Designs Downton Abbey Lady Mary Geometric |
![]() |
| Lady Mary Costume |
Monday, February 15, 2016
Kumihimo Braid Making - Updated 2/15/16
February 15, 2016--Have been experimenting with different types of thread and think I've come up with the right combination of thickness and decorative metallics. I like this one so much that I'm going to use it as the cord around my Imperial Heart project. It has a few uneven areas, but when wrapped around the heart, don't think they'll show that much, if at all.
February 11, 2016--My interest was piqued after reading about this braid making tool on D1D2's January 18th blog.
So taking advantage of some eBucks to spend on eBay, I found this Beginner's Small Kumihimo Kit. It came with two colors of cord, a Kumiloom or braiding disk, how-to instructions, thread bobbins and bits to make a necklace. Last night while watching TV I worked up the braid and now I'm hooked. It was so fast and easy to do. Next cord will be made with needlepoint stash threads for a similar look, but with a smaller diameter to use for the finishing of ornaments. Too cool!
| Kumihimo Braid for use as Ornament Cording |
February 11, 2016--My interest was piqued after reading about this braid making tool on D1D2's January 18th blog.
So taking advantage of some eBucks to spend on eBay, I found this Beginner's Small Kumihimo Kit. It came with two colors of cord, a Kumiloom or braiding disk, how-to instructions, thread bobbins and bits to make a necklace. Last night while watching TV I worked up the braid and now I'm hooked. It was so fast and easy to do. Next cord will be made with needlepoint stash threads for a similar look, but with a smaller diameter to use for the finishing of ornaments. Too cool!
| Kumihimo Braid Beginner's Kit |
Tuesday, February 9, 2016
Christmas Tree Santa - 2/9/16
February 9, 2016--Completed the stitching of this adorable santa and it, along with some others, will be sent off for professional finishing into ornaments. Love the beard.
January 11, 2016--Signed up to take an online class through Shining Needle Society called Christmas Tree Santa Ornament which is being taught by the designer herself, Janet Zickler Casey. I love these santa ornaments and plan on working three different ones at the same time (I'll write about each one separately). The face is stitched and now I'm ready to do the fun stuff--hat, beard and mustache.
| Christmas Tree Santa Completed |
January 11, 2016--Signed up to take an online class through Shining Needle Society called Christmas Tree Santa Ornament which is being taught by the designer herself, Janet Zickler Casey. I love these santa ornaments and plan on working three different ones at the same time (I'll write about each one separately). The face is stitched and now I'm ready to do the fun stuff--hat, beard and mustache.
| Christmas Tree Santa Face Stitched |
Wednesday, February 3, 2016
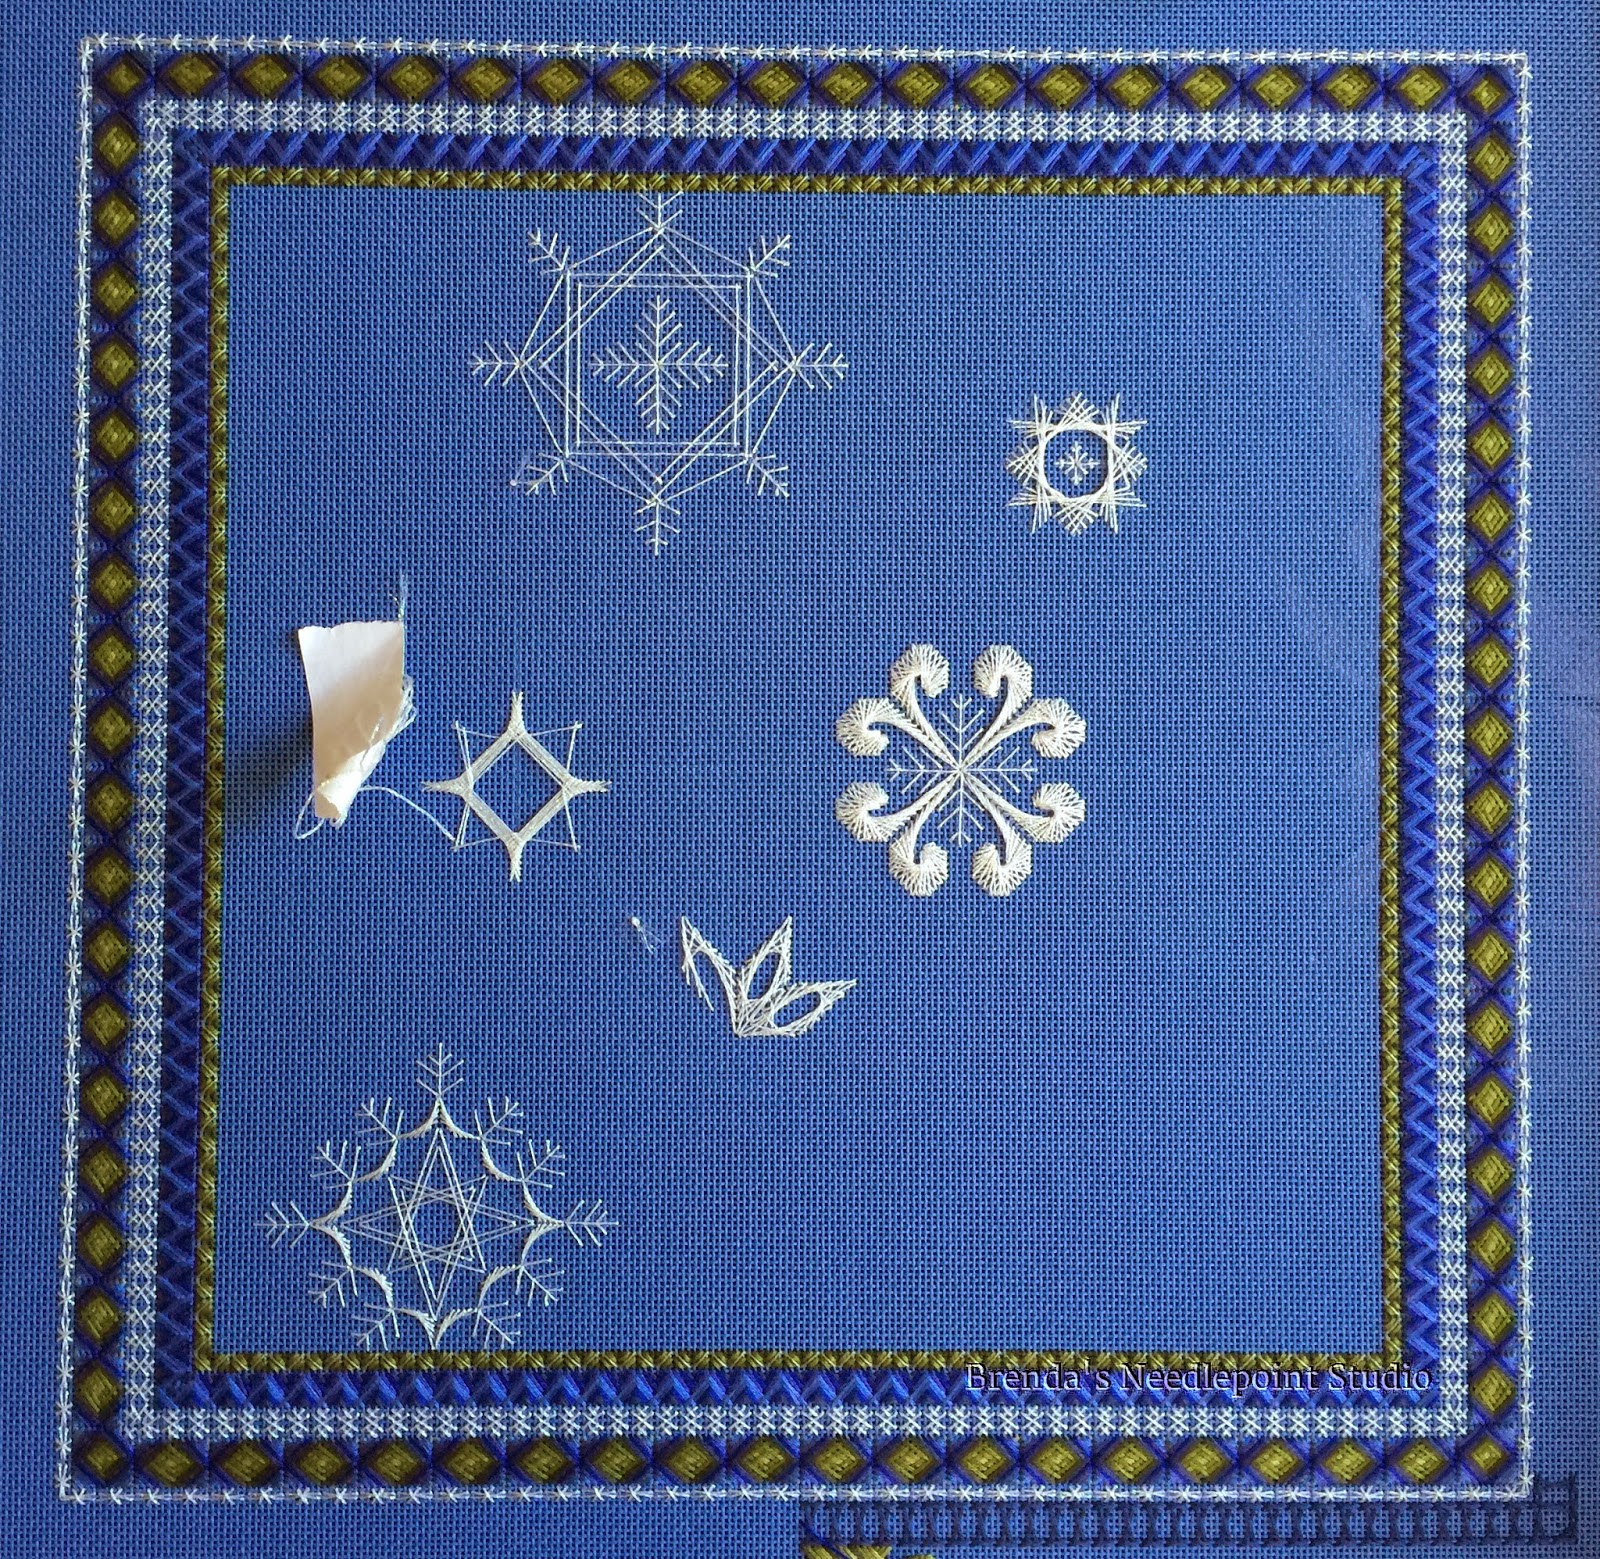
Let It Snow - Updated 3/21/16
March 21, 2016--Won 2nd Place Ribbon for Canvaswork at the Rehoboth Beach Museum 6th Annual Needlework Exhibit.
February 8, 2016--This project is now framed. Michael's Arts & Crafts did a wonderful job and I know it costs less than half of what I would have paid at a traditional framing shop. Very happy.
February 3, 2016--My first completion for 2016. This was an "in process" project that has taken four years to stitch and it's nice to have it done and at the framers.
January 24, 2016--Almost done!!!! Finished stitching all the little snowflakes (27 of them to be exact) and must now "bury" the back threads. The picture below shows the mess. Instead of burying the threads for each individual snowflake as it was completed, I just ran the threads all over the place with the intent of cutting them into manageable lengths to hide them all at the same time. This is going to be a TV project for sure.
December 31, 2015--Finished all the large snowflakes and have begun stitching the small ones. This is so pretty and wish I had more time to get this done, but it doesn't look like it's going to happen this year. Not complaining though. Have had a wonderful year and 2016 looks even brighter.
Wishing all of you a wonderful New Year with lots and lots of stitching.
September 19, 2015--The 7th and last border is done. This was a complex stitch requiring the use of four threads, one after the other. Lots of work, but the results are beautiful. Now to finish the silver snow flakes, then I'm done.
July 9, 2015--The 6th border is now stitched, only requiring 4 passes using 4 different threads. The last border is going to take some time involving 4 threads in a fern stitch variation.
May 6, 2015--Completed Border 5. This one was fast and easy--only one pass was required.
April 30, 2015--Border 4 is complete. This one took quite some time to stitch--9 different colors were used in the layering process. The next border will stitch up very fast.
April 7, 2015--Started stitching on this project and, after working on a few of the large snowflakes, decided to get some of the border done. Three of the seven borders are now stitched....whew! This is a large piece and at the rate I'm stitching, will take awhile to complete.
December 11, 2014--This project, called Let It Snow, was a class taught by Toni Gerdes at the 2012 ANG Seminar in San Antonio, TX. I've wanted to complete the stitching, but so many things kept nudging it to the bottom of the pile. My local ANG chapter, Delaware's Seashore Chapter, has recently challenged its members to complete 3 WIPs or UFOs by December, 2015. I chose this project as one of my three.
As what happens in all of these classes, there's the usual thread spaghetti to deal with. Because it's been two years since I've looked at this project, I now have to re-read all the instructions before picking up a needle. I will post again when all of the beautiful snowflakes have been stitched.
February 8, 2016--This project is now framed. Michael's Arts & Crafts did a wonderful job and I know it costs less than half of what I would have paid at a traditional framing shop. Very happy.
| Let It Snow Framed |
February 3, 2016--My first completion for 2016. This was an "in process" project that has taken four years to stitch and it's nice to have it done and at the framers.
| Let It Snow Completed |
| Threads in Back to Bury |
Wishing all of you a wonderful New Year with lots and lots of stitching.
| Large Snowflakes Done |
September 19, 2015--The 7th and last border is done. This was a complex stitch requiring the use of four threads, one after the other. Lots of work, but the results are beautiful. Now to finish the silver snow flakes, then I'm done.
July 9, 2015--The 6th border is now stitched, only requiring 4 passes using 4 different threads. The last border is going to take some time involving 4 threads in a fern stitch variation.
| Closeup of Border 6 |
| Through Border 6 |
May 6, 2015--Completed Border 5. This one was fast and easy--only one pass was required.
| Closeup of Border 5 |
| Through Border 5 |
| Border 4 Closeup |
| Through Border 4 |
| Let it Snow Border 3 Closeup |
| Let It Snow Borders 1, 2 and 3 Done |
December 11, 2014--This project, called Let It Snow, was a class taught by Toni Gerdes at the 2012 ANG Seminar in San Antonio, TX. I've wanted to complete the stitching, but so many things kept nudging it to the bottom of the pile. My local ANG chapter, Delaware's Seashore Chapter, has recently challenged its members to complete 3 WIPs or UFOs by December, 2015. I chose this project as one of my three.
As what happens in all of these classes, there's the usual thread spaghetti to deal with. Because it's been two years since I've looked at this project, I now have to re-read all the instructions before picking up a needle. I will post again when all of the beautiful snowflakes have been stitched.
| Let It Snow Thread Spaghetti |
Wednesday, January 27, 2016
Oriental Butterfly Class - 1/27/16
January 27, 2016--Signed up to take an ANG CyberPointers Chapter workshop called Oriental Butterfly taught and designed by Ann Strite-Kurz. The class begins April 1st and runs through June 1st of this year. I'm now ready--just purchased some beautiful teal/aqua threads to use in this project.
![]() |
| Oriental Butterfly by Ann Strite-Kurz Project Photo |
| Oriental Butterfly Threads |
Monday, January 11, 2016
Rehoboth Beach Museum 6th Annual Needlework Exhibition
January 11, 2016--The Rehoboth Beach, DE Museum, has just announced its 6th Annual Needlework Exhibition from March 19 through May 22, 2016. Below are the Exhibition Details and Entry Form.
Come early for your beach vacation and visit the museum at the same time.
Please note if you plan on exhibiting (and I hope you do), your pieces must be submitted between February 26th and March 13th. If you have any questions, please comment below. I have worked as a volunteer at the exhibit for the last 5 years as well as having entered pieces of needlepoint as an exhibitor.
Rehoboth Beach
Museum
511
Rehoboth Avenue , at the entrance to the City of Rehoboth Beach , near the
lighthouse traffic circle and the Chamber of Commerce Visitors Center.
First
Place , Second Place , Third Place – for each technique
Come early for your beach vacation and visit the museum at the same time.
Please note if you plan on exhibiting (and I hope you do), your pieces must be submitted between February 26th and March 13th. If you have any questions, please comment below. I have worked as a volunteer at the exhibit for the last 5 years as well as having entered pieces of needlepoint as an exhibitor.
6th Annual Needlework
Exhibition
March 19, 2016
through May 22, 2016
(The museum is CLOSED
TUESDAYS, WEDNESDAYS, and THURSDAYS)
On behalf the
Rehoboth Beach Historical Society
Entries accepted
February 26 through March 13, 2016
(The Museum is CLOSED TUESDAYS,
WEDNESDAYS and THURSDAYS)
Exhibition details
EXHIBIT DATES:
March 19 through May 22, 2016
LOCATION:
EXHIBITION HOURS:
Monday and Friday, 10-4, and Saturday and Sunday,
11-3.
DAILY ADMISSION FEES: Exhibitors only may visit the
museum for free. Admission is by donation for all others.
RECEPTION:
There will be a closing reception for exhibitors May 22
from Noon to 2 p.m. Refreshments will be served. You may pick up your work
then.
ELIGIBILITY:
Each entry must be the work of a living person and
appropriately finished. We reserve the right to display items in the manner we
deem most appropriate and to refuse items deemed inappropriate for display. Entries
requiring hanging must be wired. No saw tooth hanging devices will be accepted.
Entries must be labeled with the stitcher’s name and phone number.
DIVISIONS:
Adult: For stitchers 18 years old or older.
Junior: For stitchers 17 years of age or younger
at the time the work was completed.
CATEGORIES:
Original
A unique design and composition, which is entirely the
product of the stitcher’s own mind and hands. This includes interpretations of
nature and art through stitching.
Commercial
Works using any element of a designer’s pattern for
needlework. Includes: charted or painted canvas, printed graphs, kits, class
projects, and minor alterations thereto.
TECHNIQUES:
·
Beadwork
·
Canvaswork/Needlepoint: Traditional, multi-stitch (4+)
or painted canvas
·
Counted Thread: Including Blackwork, Cross Stitch (even weave), Drawn thread, Hardanger
·
Sampler: Traditional or Multi-stitch (4+)
·
Embroidery: Including but not limited to Crewel, Goldwork, Silk Ribbon, Stumpwork,
Surface, White Work.
·
Heirloom Sewing: Smocking, Fine hand sewing, Needle
Lace, Quilting (please note, only those quilts awarded prizes will be displayed
in full due to space constraints).
·
Lace: Bobbin Lace, Battenburg, Filet Guipure, etc.
·
Miniature: 32-count or higher, over one thread
JUDGING:
A nationally certified judge will award ribbons. Major
award winners will be announced just prior to the opening reception. Entrants should fill out forms carefully to
ensure that each piece is properly classified. The Historical Society reserves
the right to re-classify entries.
AWARDS:
Best in Show – across all techniques
Honorable Mention - the judge reserves the right to choose the
number of honorable mention winners
People’s Choice – by popular vote
All entries must remain at the Rehoboth Beach
Museum for the duration
of the exhibition.
MAXIMUM NUMBER OF ENTRIES: Five. Entries must not have been in previous RBHS
exhibits, but may have been in other
shows.
ENTRY FEES:
Members of RBHS: $5 per entry, $5 per additional entry
Non-members: $10
per adult entry, $5 per additional entry
Juniors: $5
junior entry, $1 each additional entry.
Sets containing several items will be charged $1 for
each additional item.
Make checks payable to Rehoboth Beach
Historical Society (RBHS), 511
Rehoboth Avenue , Rehoboth Beach , DE 19971
Society Memberships are available:
Individual: $25
Household: $35
Supporting: $50
Anna Hazzard: $100
Membership is tax-deductable. Please send a separate
check for membership.
ENTRIES BY MAIL:
PLEASE NOTE: Entries will be accepted by mail but
will not be returned by mail. All entries must be picked up at the museum.
Entries MUST BE RECEIVED BY March 13, 2016. Entries by mail must be shipped in
a sturdy container and must contain a completed entry form. Mailing address: Rehoboth Beach Museum ,
511 Rehoboth Avenue , Rehoboth Beach , DE 19971 . Please call (302) 227-7310 for
information.
HAND DELIVERED ENTRIES:
Exhibitors are urged to pre-register by sending
completed forms and fees in the mail to The Rehoboth Beach Museum by February 25,
2016. Please make checks payable to the Rehoboth Beach
Historical Society. Walk-in entries are accepted February 26 through March 13, 2016, between the hours of 10
a.m. and 3 p.m. NOTE: The Museum is closed Tuesdays through Thursdays. No
entries will be accepted after March 13, 2016. Entries must be picked up by May
26 , 2016.
TERMS AND CONDITIONS:
1. Insurance
coverage is the responsibility of the owner/depositor.
2. The
depositor warrants that he or she holds full and clear title to the object(s)
identified on the face of the entry form or is the agent of the owner
authorized to deposit the objects(s) with the Rehoboth Beach Historical Society.
3. All objects
may be examined, photographed, measured, or otherwise reproduced for
educational or promotional purposes.
4. The
object(s) will be returned only to the depositor unless RBHS is notified in
writing to the contrary.
5. If objects
are not picked up by the last pick-up date, a $5 per day storage fee will be
charged. After 30 days, the object will be deemed an unrestricted gift to the
museum.
ENTRY FORM – Maximum 5 entries
Please reproduce this
form or print from www.rehobothbeachmuseum.org
(please attach a
photo of your work if possible and an artist’s statement)
Stitcher Name_________________________________________
Exhibited by___________________________________________
Address______________________________________________
______________________________________________________
Phone (home) _______________Phone (cell)
_______________
Email (print CLEARLY) _______________________________
Division: _____Adult
_____Junior
Category: _____Original _____Commercial
Technique:
_____ Beadwork _____
Canvaswork/Needlepoint _____ Sampler _____
Counted Thread/Cross Stitch
_____ Embroidery _____
Heirloom Sewing/Quilt
_____ Miniature _____
Lace ___Mixed Media
Title __________________________________________
Measurement:
Length____ Width____
Description (framed piece, pillow, etc.)
___________________
Thread Count: ________ Pattern Source/Class
_____________
In submission of this
entry I hereby agree to abide by the stated rules of the exhibition, and terms
and conditions listed on the enclosures.
Signature _________________________
Entries accepted at the museum 511 Rehoboth Avenue
* (302) 227-7310
#
of entries __ times Entry Fee = $_________
(office use only) AMT
Cash $________ Check #________
Labels:
Print clearly and affix one label to each piece or use your own.
Name of Stitcher: __________________________________________
Title of Piece:
_____________________________________________
Technique:
________________________________________________
Name of Stitcher:
__________________________________________
Title of Piece: _____________________________________________
Technique:
________________________________________________
Name of Stitcher:
__________________________________________
Title of Piece:
_____________________________________________
Technique:
________________________________________________
Name of Stitcher:
__________________________________________
Title of Piece:
_____________________________________________
Technique:
________________________________________________
Name of Stitcher:
__________________________________________
Title of Piece:
_____________________________________________
Technique:
________________________________________________
Name of Stitcher:
__________________________________________
Title of Piece:
_____________________________________________
Technique: ________________________________________________
Name of Stitcher:
__________________________________________
Title of Piece:
_____________________________________________
Technique:
________________________________________________
Name of Stitcher: __________________________________________
Title of Piece:
_____________________________________________
Technique:
________________________________________________
Name of Stitcher:
__________________________________________
Title of Piece: _____________________________________________
Technique:
________________________________________________
Sunday, January 3, 2016
Shingles Ornament Updated 1/3/16
January 3, 2016--Just now added cording to this piece, making it into a really lovely ornament.
November 3, 2015--Earlier this year Gay Ann Rogers, a well known needlework designer, developed a serious case of shingles which kept her down for many months. She wrote about her experience, encouraging everyone to get the shingles shot and share stories about shingles which she later published on her web site (link below). For each story sent to Gay Ann, the sender received free instructions for the Shingles Ornament she designed (my story is number 52). I have completed the stitching of this beautiful ornament and will have it finished similar to the style shown on her web site.
Note: Gay Ann reports she has closed this offer and the Shingles Ornament is no longer available. But no fear, she has many, many other beautiful designs offered for sale in the Spring and Fall.
| Shingles Ornament Completed |
Note: Gay Ann reports she has closed this offer and the Shingles Ornament is no longer available. But no fear, she has many, many other beautiful designs offered for sale in the Spring and Fall.
| Shingles Ornament |
Friday, January 1, 2016
Ort Collection
January 1, 2016--My first post of the year and it's all about orts. I did a little needlepointing in the 70's and 80's, but didn't start up again until 2009. Since then, I've been saving all the leftover bits and pieces from completed projects--six years worth--transferring them from my blue and white ort box to a zip lock baggie. I plan on using these orts to stuff a medium size pillow, needlepointing the front to say ORTS in grand and colorful letters. The top will have a zipper so I may keep stuffing the pillow with orts from future projects.
Wishing everyone a happy and joyous 2016 with lots of orts in your future.
PS - I can see a lot of yellow and brown/red wool threads in the bag which came from stitching a Mt. Vernon seat cover. A true labor of love which I wrote about in my Mt. Vernon, VA Seat Cushion blog.
Wishing everyone a happy and joyous 2016 with lots of orts in your future.
| Ort Collection 2009 - 2015 |
Monday, December 7, 2015
Star Crossed Ornament Updated 12/7/15
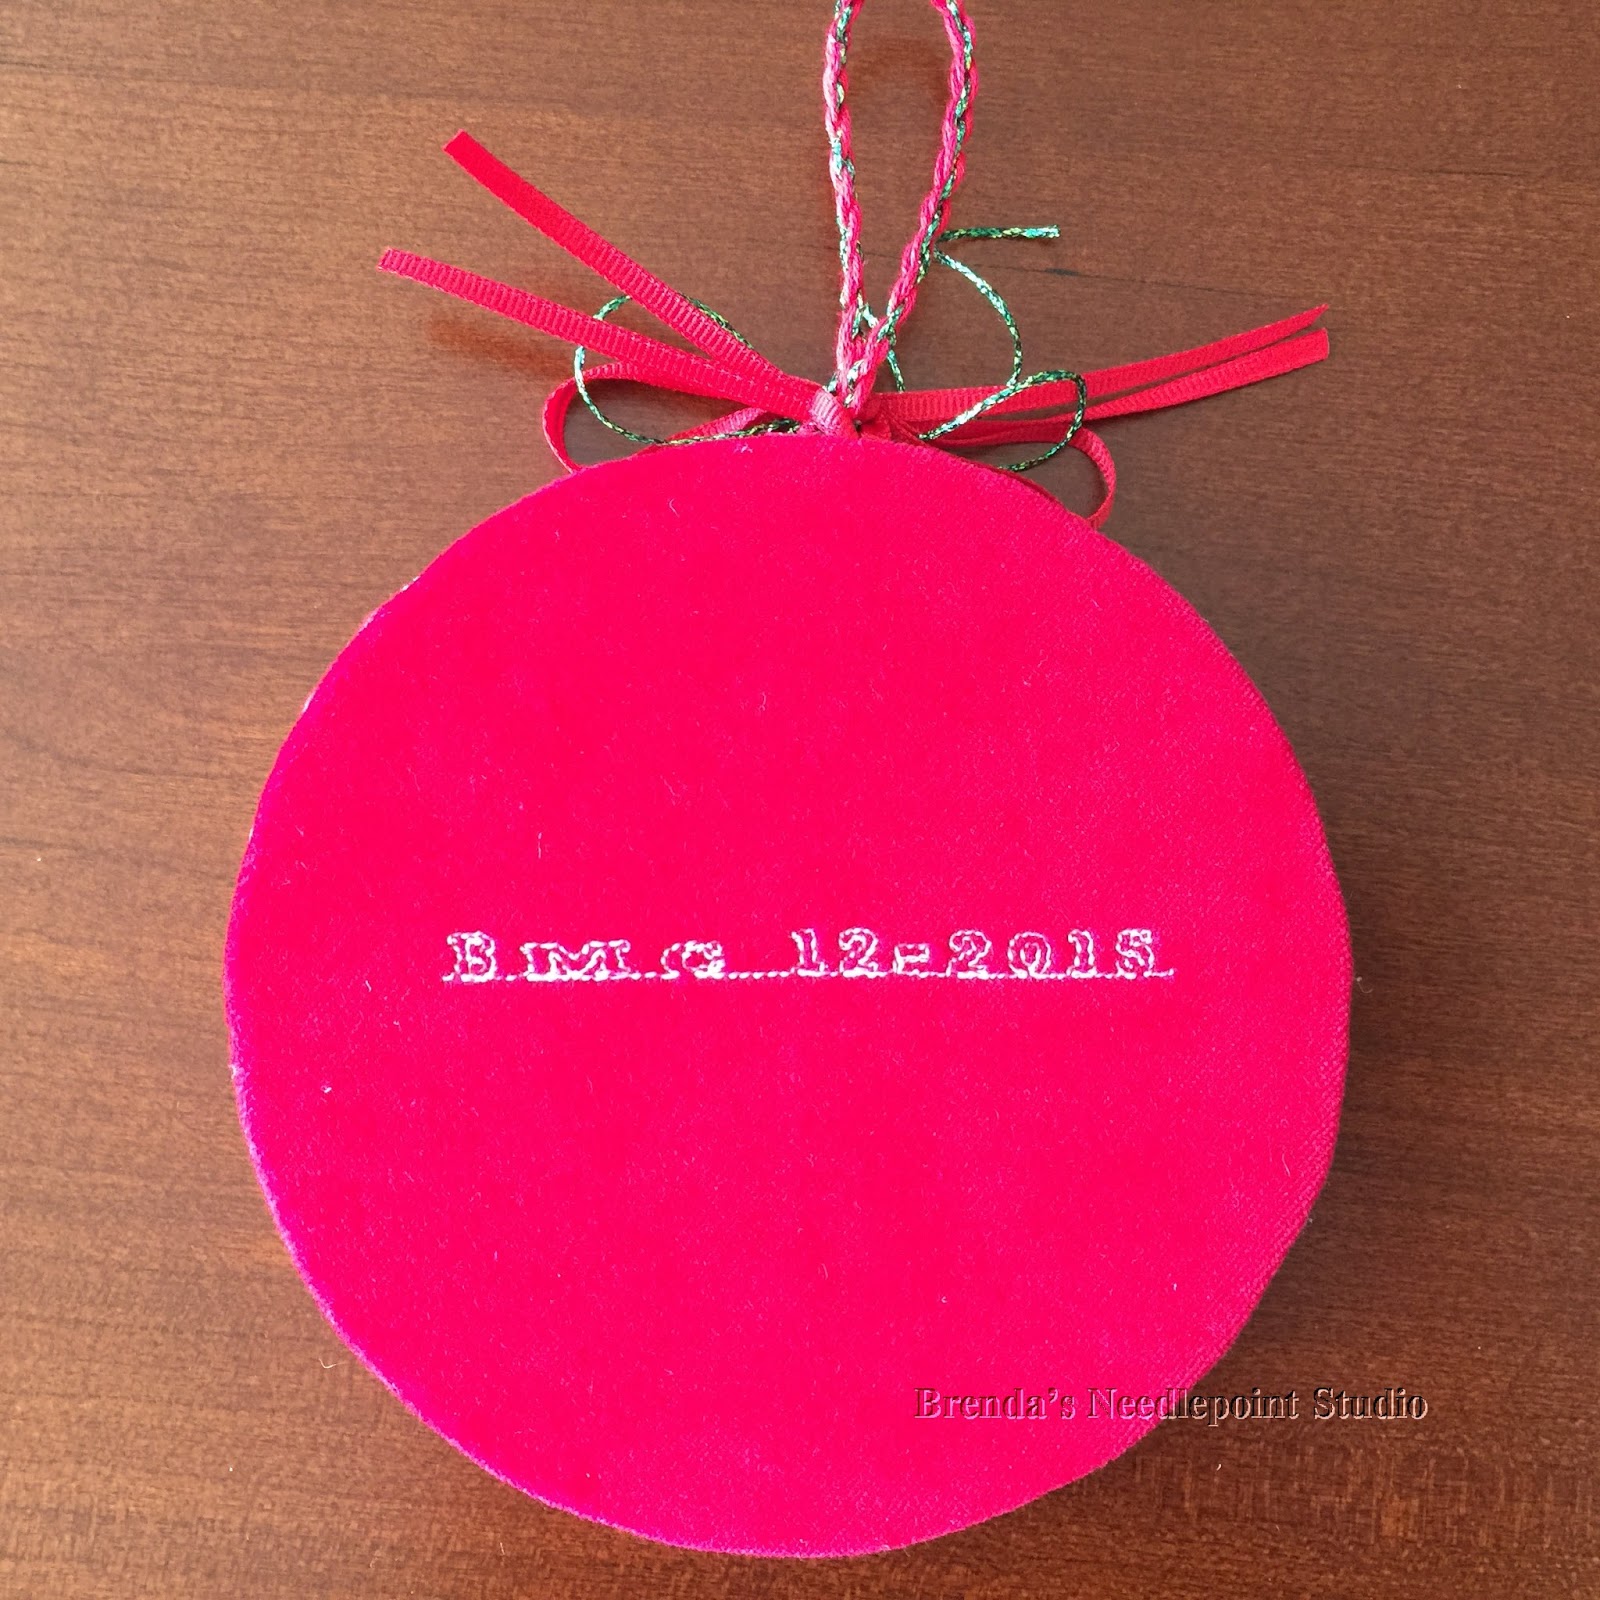
December 7, 2015--Finished these "stars" into two ornaments. Love how they came out and they are quiet large--5.5" in diameter. One of these ornaments will be part of my ANG Delaware's Seashore Chapter's Holiday Lunch and Ornament Exchange which is taking place today. Hope the recipient likes it. Tried something a little different for my signature on the back's red velvet fabric. Just initials with the date (done on my Bernina sewing machine). Like how it came out.
August 31, 2015--Completed all the stitching on the five arms and outlined the star with red Kreinik thread. I like how the Kreinik seems to hide irregularities in stitch compensation along the diagonal lines. The green basting thread will assist me in finishing the star as a round ornament. Instead of adding stitches to the star's background, I'll back the canvas with a shiny white fabric since the canvas itself has opalescent threads running through it (can't see it in the pictures). I'm very pleased at how well it came out.
August 26, 2015--Moving along nicely--fourth arm completed. Stitching two of these ornaments at the same time, so it's taking time to do each section. The compensation stitches aren't easy to do along the diagonal lines of the star and I'm constantly aware of the chance to "over stitch" a pattern.
The project photo (first picture below) shows this as a round ornament with no background stitching. I'm thinking of doing a light coverage darning pattern using a very shimmery thin thread in the background. Hmmm....will have to play with that idea.
August 18, 2015--Third arm of the star is completed. Compensating the stitches along the angle of each arm is a challenge and I may have to outline each arm to cover up discrepancies and other irregularities (LOL).
August 12, 2015--Second arm of this delightful ornament is stitched. Looking forward to seeing how the colors will look when the third arm is done.
August 7, 2015--The basting and first arm of the star is stitched. There was lots of basting, but it was necessary to properly line up the inside and outside points of the star. Also makes a nice guide for compensating. Susan Jones, however, has written very detailed instructions on where to place the basting stitches and how to compensate the complicated stitches in each star arm, so very little has to be decided upon. Easy, peasy :-).
August 4, 2015--Started stitching Susan Jones Star Crossed ornament. This project is from the July/August issue of Needlepoint Now magazine and the challenge of variations and compensation stitches is right up my ally. Below is a project photo. In process pictures will be posted as each arm of the star is stitched.
| Star Crossed Ornaments Finished |
| Star Crossed Ornament Back |
| Completed |
| Fifth Arm Complete |
August 26, 2015--Moving along nicely--fourth arm completed. Stitching two of these ornaments at the same time, so it's taking time to do each section. The compensation stitches aren't easy to do along the diagonal lines of the star and I'm constantly aware of the chance to "over stitch" a pattern.
The project photo (first picture below) shows this as a round ornament with no background stitching. I'm thinking of doing a light coverage darning pattern using a very shimmery thin thread in the background. Hmmm....will have to play with that idea.
| Fourth Arm Completed |
| Third Arm Completed |
| Second Arm Completed |
| Basting |
| First Arm of the Star Stitched |
August 4, 2015--Started stitching Susan Jones Star Crossed ornament. This project is from the July/August issue of Needlepoint Now magazine and the challenge of variations and compensation stitches is right up my ally. Below is a project photo. In process pictures will be posted as each arm of the star is stitched.
![]() |
| Star Crossed Ornament Project Photo |
Tuesday, November 17, 2015
Road Trip to the Needlearts 2015
November 15, 2015--I just returned from a wonderful weekend of stitching and camaraderie at the 20th Annual Road Trip to the Needlearts Retreat sponsored by SSP (Stitching Sisters Presents).
The three "sisters", pictured below from left to right, are
- Cindy Knowles of The Hang Up in Sterling, VA
- Ellen Meyer of In Stitches Needlework in Alexandria, VA
- Michelle D. Arsenault of Michelle Ink Designs in Laurel, MD
I had the good fortune of sitting with these terrific ladies as well as (from left to right), Patty Yergey, Needlework Designer of Samplers Revisited, Patricia Eaton with In Stitches and Wanda Kellum.
We wanted for nothing all weekend. The hotel was very comfortable and the stitching lounge was airy, spacious and well lit. We were fetted with a reception on Friday and a catered dinner on Saturday. The three "sisters" also had a boutique open with all types of needlework goodies to purchase. And the stitching--so many beautiful projects being worked on by all of the participants. The weekend also included a trip to see the Needlework Exhibit at Montpelier Mansion.
The coordinators are thinking about holding the next retreat in March, 2017 to coincide with the Woodlawn Needlework Exhibit in Alexandria, VA. Looking forward to that one!
Thursday, October 22, 2015
Silver Bell Santa Updated 10/22/15
October 22, 2015--Finally finished stitching this delightful santa. There's lots of dimension on this santa as can be seen in the second picture (but the beads aren't showing). Will eventually have this santa and others made into ornaments. How adorable they'll look on my tree.
July 29, 2015--Along with the hat, all of santa's hair is stitched--beard, mustache, sideburns and eyebrows. The last thing to do is the fur on the hat. The beard is very shiny and had to take a side view so the beads would be visible.
He's a cutie.
May 11, 2015--Signed up to take this class from the Shining Needle Society in December, 2014 and am just now able to work on it. Only the face has been stitched, but it's nice to see santa "come alive". Love these Janet Zickler Casey santas--they are fast to stitch and Janet's instructions are so easy to follow.
| Silver Bell Santa Completed |
| Silver Bell Santa Completed Side View |
July 29, 2015--Along with the hat, all of santa's hair is stitched--beard, mustache, sideburns and eyebrows. The last thing to do is the fur on the hat. The beard is very shiny and had to take a side view so the beads would be visible.
He's a cutie.
![]() |
| All Hair Stitched |
![]() |
| Side View of Beads in Beard |
| Face Completed |
Tuesday, October 20, 2015
Beachcomber's Booty - Updated 3/16/16
March 16, 2016--Won 3rd Place Ribbon for Canvaswork at the Rehoboth Beach Museum 6th Annual Needlework Exhibit.
March 7, 2016--Placed this project into a 6.5" box top with an antique finish white paint. Love it.
October 20, 2015--Finished this beautiful project and will now shop for a box with an insert top. Enjoyed seeing how easy the blackwork stitches were to execute.
October 7, 2015--My local ANG chapter, Delaware's Seashore Chapter, was fortunate to have Ann Strite-Kurz teach us a class called Beachcomber's Booty. It's a beautiful sand dollar design (it's our chapter's logo).
Below is a picture of my project so far. It's fun to work these beautiful stitches and I hope to have it done this month.
There's a story behind this. Linda, another chapter member, and I took a class from Ann at the 2012 Philadelphia ANG Seminar. While there, Ann told us about her beach house in Rehoboth Beach, DE. We asked Ann if she would be willing to teach a class when in Delaware and shared contact information. Well, earlier this year she wrote to say she would be here in October and asked if we were still interested in having her teach a class. We answered with a resounding yes, yes, yes!
Ann brought some examples of her pieces along with anything we wanted to purchase (saving us lots of shipping costs). We drooled over her techniques and marveled at the results.
Thank you Ann for a wonderful learning experience and we'll have a beautiful project when done.
March 7, 2016--Placed this project into a 6.5" box top with an antique finish white paint. Love it.
| Beachcomber's Booty Box Top |
October 20, 2015--Finished this beautiful project and will now shop for a box with an insert top. Enjoyed seeing how easy the blackwork stitches were to execute.
| Beachcomber's Booty Completed |
October 7, 2015--My local ANG chapter, Delaware's Seashore Chapter, was fortunate to have Ann Strite-Kurz teach us a class called Beachcomber's Booty. It's a beautiful sand dollar design (it's our chapter's logo).
Below is a picture of my project so far. It's fun to work these beautiful stitches and I hope to have it done this month.
There's a story behind this. Linda, another chapter member, and I took a class from Ann at the 2012 Philadelphia ANG Seminar. While there, Ann told us about her beach house in Rehoboth Beach, DE. We asked Ann if she would be willing to teach a class when in Delaware and shared contact information. Well, earlier this year she wrote to say she would be here in October and asked if we were still interested in having her teach a class. We answered with a resounding yes, yes, yes!
Ann brought some examples of her pieces along with anything we wanted to purchase (saving us lots of shipping costs). We drooled over her techniques and marveled at the results.
Thank you Ann for a wonderful learning experience and we'll have a beautiful project when done.
| Beachcomber's Booty in Process at 10/7/15 |
Subscribe to:
Posts (Atom)