 |
| North Star Santa Completed |
Statcounter
Monday, May 18, 2020
North Star Santa - 5/18/20
May 18, 2020--Here's another Janet Zickler Casey design called North Star Santa. This one was published in 2001 and was the easiest to stitch out of all the ones I've completed to date. Love all the sparkle in the hair and beard, which, of course, doesn't show up in the photo. Was lucky to find some plastic holly with berries. Makes for the perfect hat embellishment. Someday I'll finish this and all the other santas stitched to date into ornaments to hang on a tree, or something (LOL).

Tuesday, May 12, 2020
Santa in the Moon - 5/12/20
May 12, 2020--This santa cutie, designed by Janet Zickler Casey, was one of her earlier ones with a 2000 copyright date. I love the texture of the hat and moustache. All I need is a star charm to dangle from the hat and it'll be ready for finishing into an ornament.
 |
| Santa in the Moon Completed |
Thursday, April 30, 2020
Rehoboth Beach Needlework Exhibit for 2020 Cancelled - 4/30/2020
April 30, 2020--I have just received word from the Director of the Rehoboth Beach Historical Society and Museum that this year's needlework exhibit is cancelled. Here's her very sound explanation:
So many parts of our lives have changed during these past several weeks. Both our personal and professional activities have become limited or just about eliminated.
When this is all finally over, and we are back once again to a Usual Routine, there will be a tremendous rush, crush, and demand for our time.
One deadline that we can erase from your schedule is the 2020 Rehoboth Beach Museum Embroidery Show. We are cancelling it. This will give us all one less thing on the no doubt long To-do List by then, and more time to adjust back to regular life,
we hope.
This will also give us all more time to finish that wonderful piece now in production, to be ready for the show in 2021. If you haven’t had a chance to start on your planned work, now you can. We’ll look forward to seeing you and your spectacular piece (s)
in 2021.
Thursday, April 9, 2020
Frame Weight Stitcher's Parking Lot -- Updated 7/26/21
July 26, 2021--Entered this fun project into the Delaware's State Fair and was awarded a Third Place Ribbon along with a small (very small) cash prize. Nice.
Filling the frame weight with BBs wasn't difficult. The hard part came when I spilled half of them onto my kitchen counter, floor, rugs, etc. To the rescue came my very patient husband and my magnet on a wand device. We got those BBs under control in no time.
Now I have to find stitching tools large enough to fit snugly into the loops. Right now it's sitting on top of my Martha Washington Sewing Cabinet (which I'm using for all my stitching accouterments) looking very pretty.
 |
| Frame Weight Stitcher's Parking Lot Finished |
 |
|
Frame Weight Stitcher's Parking Lot Finished (Back Side) -
Shows serious warpage |
 |
|
Frame Weight Stitcher's Parking Lot Before Finishing Side View |
 |
| Frame Weight Stitcher's Parking Lot Before Finishing Front Closeup |
March 28, 2020--I purchased this frame weight project to stitch along with fellow chapter mates last year, but wasn't able to think about stitching it until the ANG CyberPointers Chapter had this as their July, 2020 project. I was motivated by the photos and additional class lessons given during the online meeting. So I finished stitching a few things and felt comfortable starting this project while quarantined at home to avoid the COVID-19 virus. Here's the under or bottom part of the frame weight:
 |
| Frame Weight Stitcher's Parking Lot Under or Back Side |
My colors are simple. The front colors are turquoise perle #3, light, silvery perle #3, silver Kreinik #16 braid, and variegated Watercolours called Twilight (you can see the variegated colors in the photo above).
Sunday, March 22, 2020
Autumn Crackers - Updated 5/5/2021
May 5, 2021--Won 2nd Place Ribbon in the Canvaswork-Multistitch category at Woodlawn's 58th Annual Needlework Exhibition in Alexandria, VA.
I'm keeping the photo of Marilyn's crackers at the end of this post for comparison purposes. If you haven't already stitched these crackers, you may want to give them a try. They'll be adorable on my side table during the Fall season.
 |
| Autumn Crackers Finished |
 |
| Decorative ribbon edges "stuffed" into seam allowance |
 |
| Decorative Ribbons used in the making of Autumn Crackers |
December 19, 2019--All the crackers are now stitched and ready for finishing. In order to start that process, I had to order some autumn themed 2.5" wired ribbons and found some nice ones on eBay. Once I determine if the ribbon colors will work with threads used, I plan to turn these canvases into "crackers" as soon as possible. Here's the last one--a leaf.
 |
| Autumn Crackers - Leaf Completed (five of five crackers) |
December 15, 2019--On a roll now--have just finished stitching the fourth cracker--a tree in Fall colors. There are even some leaves on the ground. Hope to finish the last one, a leaf, before the month is done.
 |
| Autumn Crackers - Tree Completed (four of five crackers) |
December 8, 2019--The third cracker, a quilt block pattern, is done. These are working up fast and are a lot of fun. I've stitched the centers of the Tree and Leaf crackers, so the whole set should be done by next month. Still have yet to purchase autumn themed ribbons. Stay tuned for that.
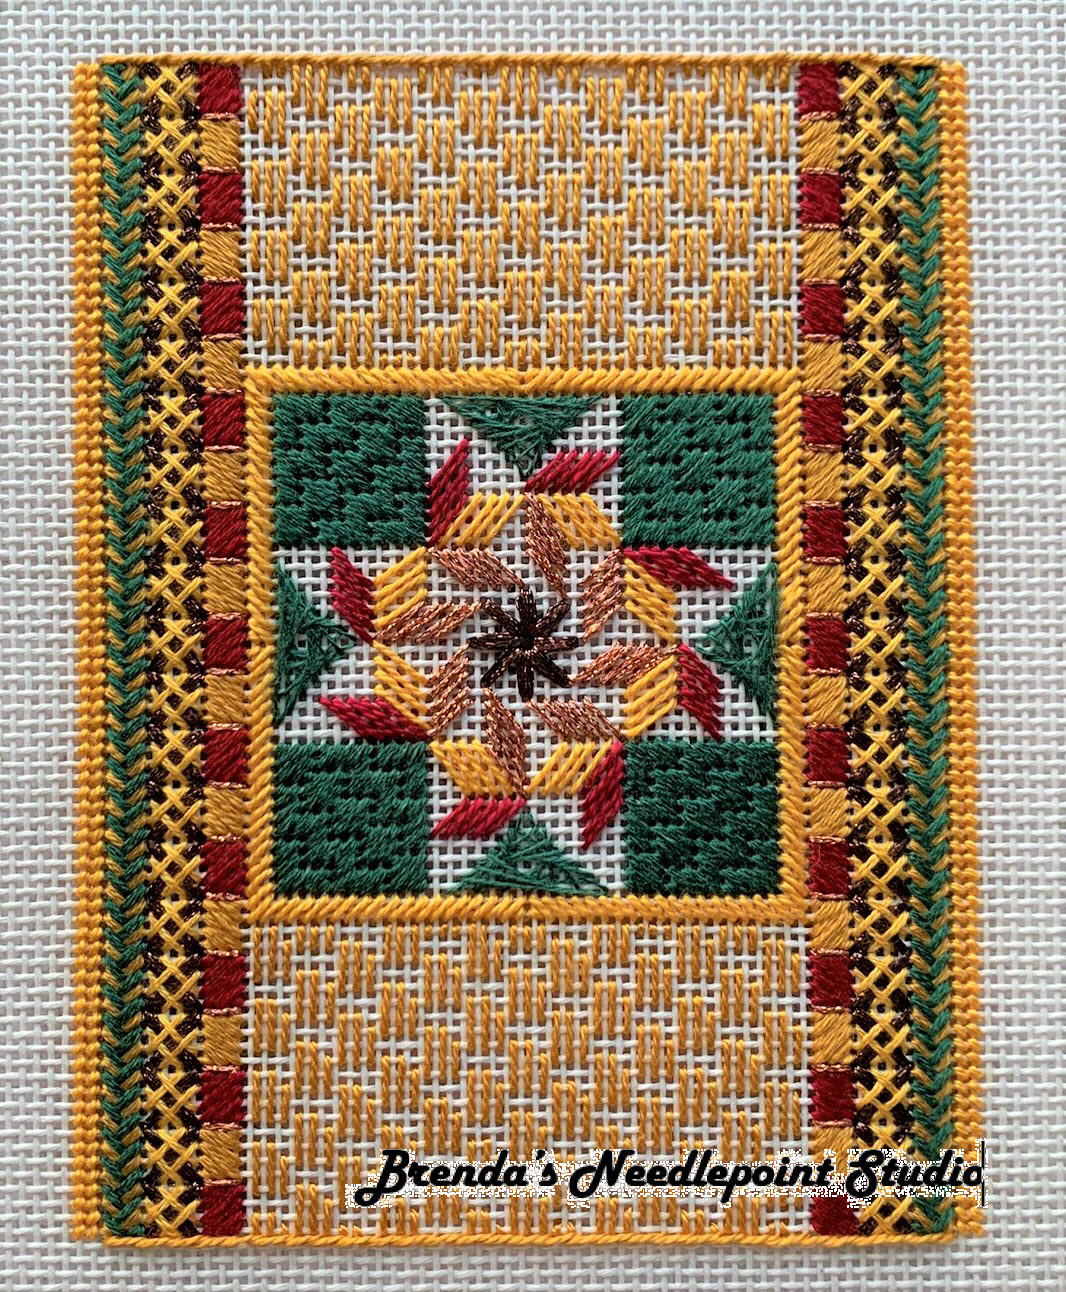 |
| Autumn Crackers - Quilt Block Completed (three of five crackers) |
November 22, 2019--The second of five crackers is now stitched. This is an adorable pumpkin with lots of stitch and thread variety.
I found extra stretcher bars in the size I needed, so have tacked three blank pieces of canvas unto the bars and will do them all at the same time--at least each section will be completed on all three before moving to the next. The three cracker patterns to be done are Tree, Leaf and Quilt.
Here's the pumpkin cracker:
 |
| Autumn Crackers - Pumpkin Completed (two of five crackers) |
November 17, 2019--When ANG's CyberPointers Chapter offered Autumn Crackers by Marilyn Owen (part of that year's Chapter Project Book) as a group project at their July, 2017 meeting, I had to sign up. They are the cutest things and will look great in the house as autumnal themed needlepoint. Even though it has taken 2 years for me to start working on these 5 crackers, I've got one completely stitched and am working on the second. Here's a photo of the owl cracker.
 |
| Autumn Crackers - Owl Completed (one of five crackers) |
Marilyn Owen gives lots of choices for the borders and roll areas, but also lets you know which stiches she chose. I appreciate that since I'm not very good at selecting my own. Also, her instructions on how to finish each design as a cracker are easy to follow. I just need to find some 2.5" Fall themed ribbons--easier said than done since I don't have large box craft stores near me (the small Michael's Arts & Craft store near me has moved out their Fall stuff and now has Christmas things). There are lots of ribbons on eBay, so may purchase a few rolls there and hope the colors match my threads.
Below is a project photo of all 5 crackers stitched and finished by the designer, Marilyn Owen. Love the colors.
 |
| Autumn Crackers by Marilyn Owen Project Photo |
Saturday, March 21, 2020
Hooray for the Red, White & Blue - Updated 3/21/2020
March 21, 2020--The 3rd and final lesson, the flag block, was supposed to have been given to my ANG chapter at the meeting on April 6th. However, with everything canceled because of COVID-19, I wrote out the lesson and emailed it to all participants. They have all done so well on the stitching through the second lesson and I know this last one will be a breeze for them. The only concern they may have is with the star brads used for embellishment. I wrote about my experience of placing them on the canvas, so they shouldn't have any trouble at all. Looking forward to seeing photos of their completed projects. All in all, this was a lot of fun to work on and to lead as a chapter class.
March 3, 2020--The instructions for the second installment to the project were given to my ANG chapter members yesterday. The three sections covered were Lettering, Red and White Squares, and Fireworks. All of us are thoroughly enjoying the variety of stitches in this piece.
The last section, The Flag, will be stitched next month, then I'll have the fun of finishing it into a box standup.
The only changes we would have made are in the spacing between the letters L and Y--they need to be closer together by one thread for balance, and lower the firecrackers by 5 threads to allow more room on top for the "spaeklers". Otherwise it's looking good.
February 4, 2020--This wonderful project, designed by Karen Barras of the Central Kentucky Chapter of ANG, was chosen by Delaware's Seashore Chapter as their project for the first 3 months of 2020.
I have the privilege of leading the members in stitching this design, and yesterday was Lesson 1 covering the first 4 sections (bunting, pinwheel, plaid and flowers). Of course, prior to the first lesson, all had the opportunity to do the pre-work which outlined each section with Diagonal Gobelin Stitch.
Karen's instructions and graphs are superb, but I did have to review my Chottie's Plaids book to figure out how the plaid section should be stitched. Using her technique, the back looks as good as the front. Here are the results:
 |
| Hooray for the Red, White & Blue - Lesson 3, Section 8 |
March 3, 2020--The instructions for the second installment to the project were given to my ANG chapter members yesterday. The three sections covered were Lettering, Red and White Squares, and Fireworks. All of us are thoroughly enjoying the variety of stitches in this piece.
The last section, The Flag, will be stitched next month, then I'll have the fun of finishing it into a box standup.
 |
Hooray for the Red, White & Blue - Lesson 2, Sections 5 - 7
|
February 4, 2020--This wonderful project, designed by Karen Barras of the Central Kentucky Chapter of ANG, was chosen by Delaware's Seashore Chapter as their project for the first 3 months of 2020.
I have the privilege of leading the members in stitching this design, and yesterday was Lesson 1 covering the first 4 sections (bunting, pinwheel, plaid and flowers). Of course, prior to the first lesson, all had the opportunity to do the pre-work which outlined each section with Diagonal Gobelin Stitch.
Karen's instructions and graphs are superb, but I did have to review my Chottie's Plaids book to figure out how the plaid section should be stitched. Using her technique, the back looks as good as the front. Here are the results:
 |
| Hooray for the Red, White & Blue - Lesson 1, Sections 1 - 4 |
Tuesday, February 18, 2020
Hardanger Stitch A Card Kit - Updated 2/18/2020
February 18, 2020--A few days ago, while looking for blank canvas bits and pieces, I came across this half completed hardanger project started 6-1/2 years ago and totally forgotten about. I remember I put this away because I felt my hardanger skills weren't up to par to complete the last 2 blocks. Since then, I've been to Hardanger University and could now finish this with ease. Which I did. So here are the final 2 blocks and a photo of them turned into greeting cards. I would stitch these again, or design my own little squares. Lots of possibilities.
August 13, 2013--Purchased this little kit to "practice" hardanger stitches learned last year at a chapter led class to make a hardanger doily.
There are four blocks to stitch, each progressively more difficult. Have completed the first two and know for certain that I really do need to practice before I take on a more ambitious project. It's very important to properly lay the satin stitches called "klosters" before cutting the threads, otherwise it's too easy to cut the stitching along with the linen threads (been there and done that). Also purchased a booklet by Janice Love called HARDANGER BASICS AND BEYOND, 2006. Great diagrams, pictures, detailed instructions and lots of small projects to work on.

 |
| Blocks 3 and 4 Completed |
 |
| All 4 Blocks Completed |
 |
| Blocks Attached to Greeting Card Stock |
August 13, 2013--Purchased this little kit to "practice" hardanger stitches learned last year at a chapter led class to make a hardanger doily.
There are four blocks to stitch, each progressively more difficult. Have completed the first two and know for certain that I really do need to practice before I take on a more ambitious project. It's very important to properly lay the satin stitches called "klosters" before cutting the threads, otherwise it's too easy to cut the stitching along with the linen threads (been there and done that). Also purchased a booklet by Janice Love called HARDANGER BASICS AND BEYOND, 2006. Great diagrams, pictures, detailed instructions and lots of small projects to work on.
 |
| Block 1 of 4 |
 |
| Block 2 of 4 |
Saturday, February 8, 2020
Pillows - Three Very Old Ones - 2/8/2020
February 8, 2020--A few days ago I was telling someone about some old needlepointed pillows I stitched in the 1980s and discovered I had no pictures to show. I'm taking care of that by writing about them here for "historical" purposes.
The first is a Jane Rainbow Design, Cheltenham, Gloucestershire called Rona stitched in cream colored paternayan yarn and cotton perle. I love this design and kept the instructions so it may be stitched again.
The second pillow is a Bucilla Needlepoint Pillow Kit called "Classique". I've stitched this twice--the first in a cream color (the pillow is no longer available--lost to wear and tear), and the second in a pale blue color using acrylic crewel yarn.
The last pillow I still have is a pattern from Maggie Lane's book called Needlepoint by Design: Variations on Chinese Themes. Unfortunately I no longer have this book. I will keep an eye out for someone giving this book away--I would like to stitch more of the pillows offered.
These were fun projects to work on while watching television and their classic designs still look wonderful in my home.
The first is a Jane Rainbow Design, Cheltenham, Gloucestershire called Rona stitched in cream colored paternayan yarn and cotton perle. I love this design and kept the instructions so it may be stitched again.
 |
| Pillow Rona by Jane Rainbow Design |
The second pillow is a Bucilla Needlepoint Pillow Kit called "Classique". I've stitched this twice--the first in a cream color (the pillow is no longer available--lost to wear and tear), and the second in a pale blue color using acrylic crewel yarn.
 |
| Pillow Classique Bucilla Needlepoint Kit |
The last pillow I still have is a pattern from Maggie Lane's book called Needlepoint by Design: Variations on Chinese Themes. Unfortunately I no longer have this book. I will keep an eye out for someone giving this book away--I would like to stitch more of the pillows offered.
 |
| Pillow Maggie Lane from Needlepoint by Design: Variations on Chinese Themes |
These were fun projects to work on while watching television and their classic designs still look wonderful in my home.
Thursday, January 30, 2020
Holiday Ornament Green Gift - 1/30/2020
January 30, 2020--Number 10 of the 16 Susan Portra Holiday Ornaments collection is now stitched (click here for more information about them). The star centers are filled with french knots and turned out to be easier than anticipated. They add some dimension to the front. The instructions for this ornament were published in Needlepoint Now Magazine 2014, Volume XVI, Issue 6. I plan on turning all of these Holiday canvases into ornaments when the set is completely stitched.
 |
| Ornament Holiday Gift Green Completed |
Wednesday, January 8, 2020
Hardanger Ornament Crystal Daisy - Updated 1/8/2020
January 8, 2020--The additional project to stitch given us by Terri Bay in the hardanger crystal daisy class (see 7/20/19 blog post below) is now finished into a little doily. It has some depth and shine due to the beads and Kreinik thread. Cutting away the fabric wasn't difficult at all--just had to keep a steady hand and carefully cut into the inside corners with the sharpest little scissors I have.
July 20, 2019--Finished the Hardanger Crystal Daisy piece into an ornament.
This is the first time I've made an ornament stitched on linen fabric--all others have a canvas (usually 18 count) base. The linen had a tendency to move off grain, so it needed serious pinning around the edge of the mounting board to stay even. It was also difficult to keep the measurements even all around from the edge of the stitching to the edge of the ornament--I had to repin the fabric onto the mounting board three times before I got it right.
For a needlepoint ornament stitched on canvas, I usually cut the ornament front a little smaller (about 5%) than the back so the cording "sits" a bit forward. This is because the canvas is so thick with stitching all the way to the edge (usually). With the linen ornament, the fabric is so much thinner than canvas and there's no stitching to the edge, so the front mounting board should only have been reduced in size by 3% or so. So this linen ornament has a front that is too small and the cording doesn't show at all from the back.
And speaking of cording, mine is too small for this size ornament. It would look much better if it were twice the thickness.
Every time I finish my own ornaments, I learn something new, but am learning the hard way. Would love to "intern" with a professional finisher so I could learn all the tricks of the trade at one time.
Anyone want an intern? I'm willing to travel in the mid-Atlantic area.
PS I have no desire to use what I would learn to finish ornaments for others as a business--this would be for my own purposes only. Thank you.
July 14, 2019--In February, I attended Hardanger University (click here for information about the classes) and have been wanting to finish stitching the pieces I started.
The first class was an ornament sized project called Crystal Daisy from Terri Bay Needlework Designs. Recently I decided to complete the stitching and learned a lot in the process. I really like stitching "in hand" and have no problems with my tension pulling and or warping the linen Below is a picture of the ornament which I just completed.
Below is a photo of where I left off at class end.
I had an issue with the very thin beading thread included with the kit. A small amount was coiled inside of a plastic bag and when I tried to take it out--it knotted up like crazy. So I used my 6 lb. Berkley Fireline Crystal Braid to stitch the bicone beads in place. This works great on canvas, but hated the results on the linen which can be seen in the photo below--was way too heavy. Fortunately I remembered having some "invisible" thread in my sewing stash. So I cut out the Berkley line and restitched the beads in place using my invisible thread. Worked perfectly as you can see from the first photo above.
Am now working on the larger, oval ornament which was included in the class materials. I plan on turning the project into a small doily instead of an ornament and placing it on the edge of my huge soaking tub for something a little decorative.
 |
Hardanger Crystal Daisy Doily Finished
|
 |
| My Tiny, Inexpensive, Sharpest Scissors |
July 20, 2019--Finished the Hardanger Crystal Daisy piece into an ornament.
This is the first time I've made an ornament stitched on linen fabric--all others have a canvas (usually 18 count) base. The linen had a tendency to move off grain, so it needed serious pinning around the edge of the mounting board to stay even. It was also difficult to keep the measurements even all around from the edge of the stitching to the edge of the ornament--I had to repin the fabric onto the mounting board three times before I got it right.
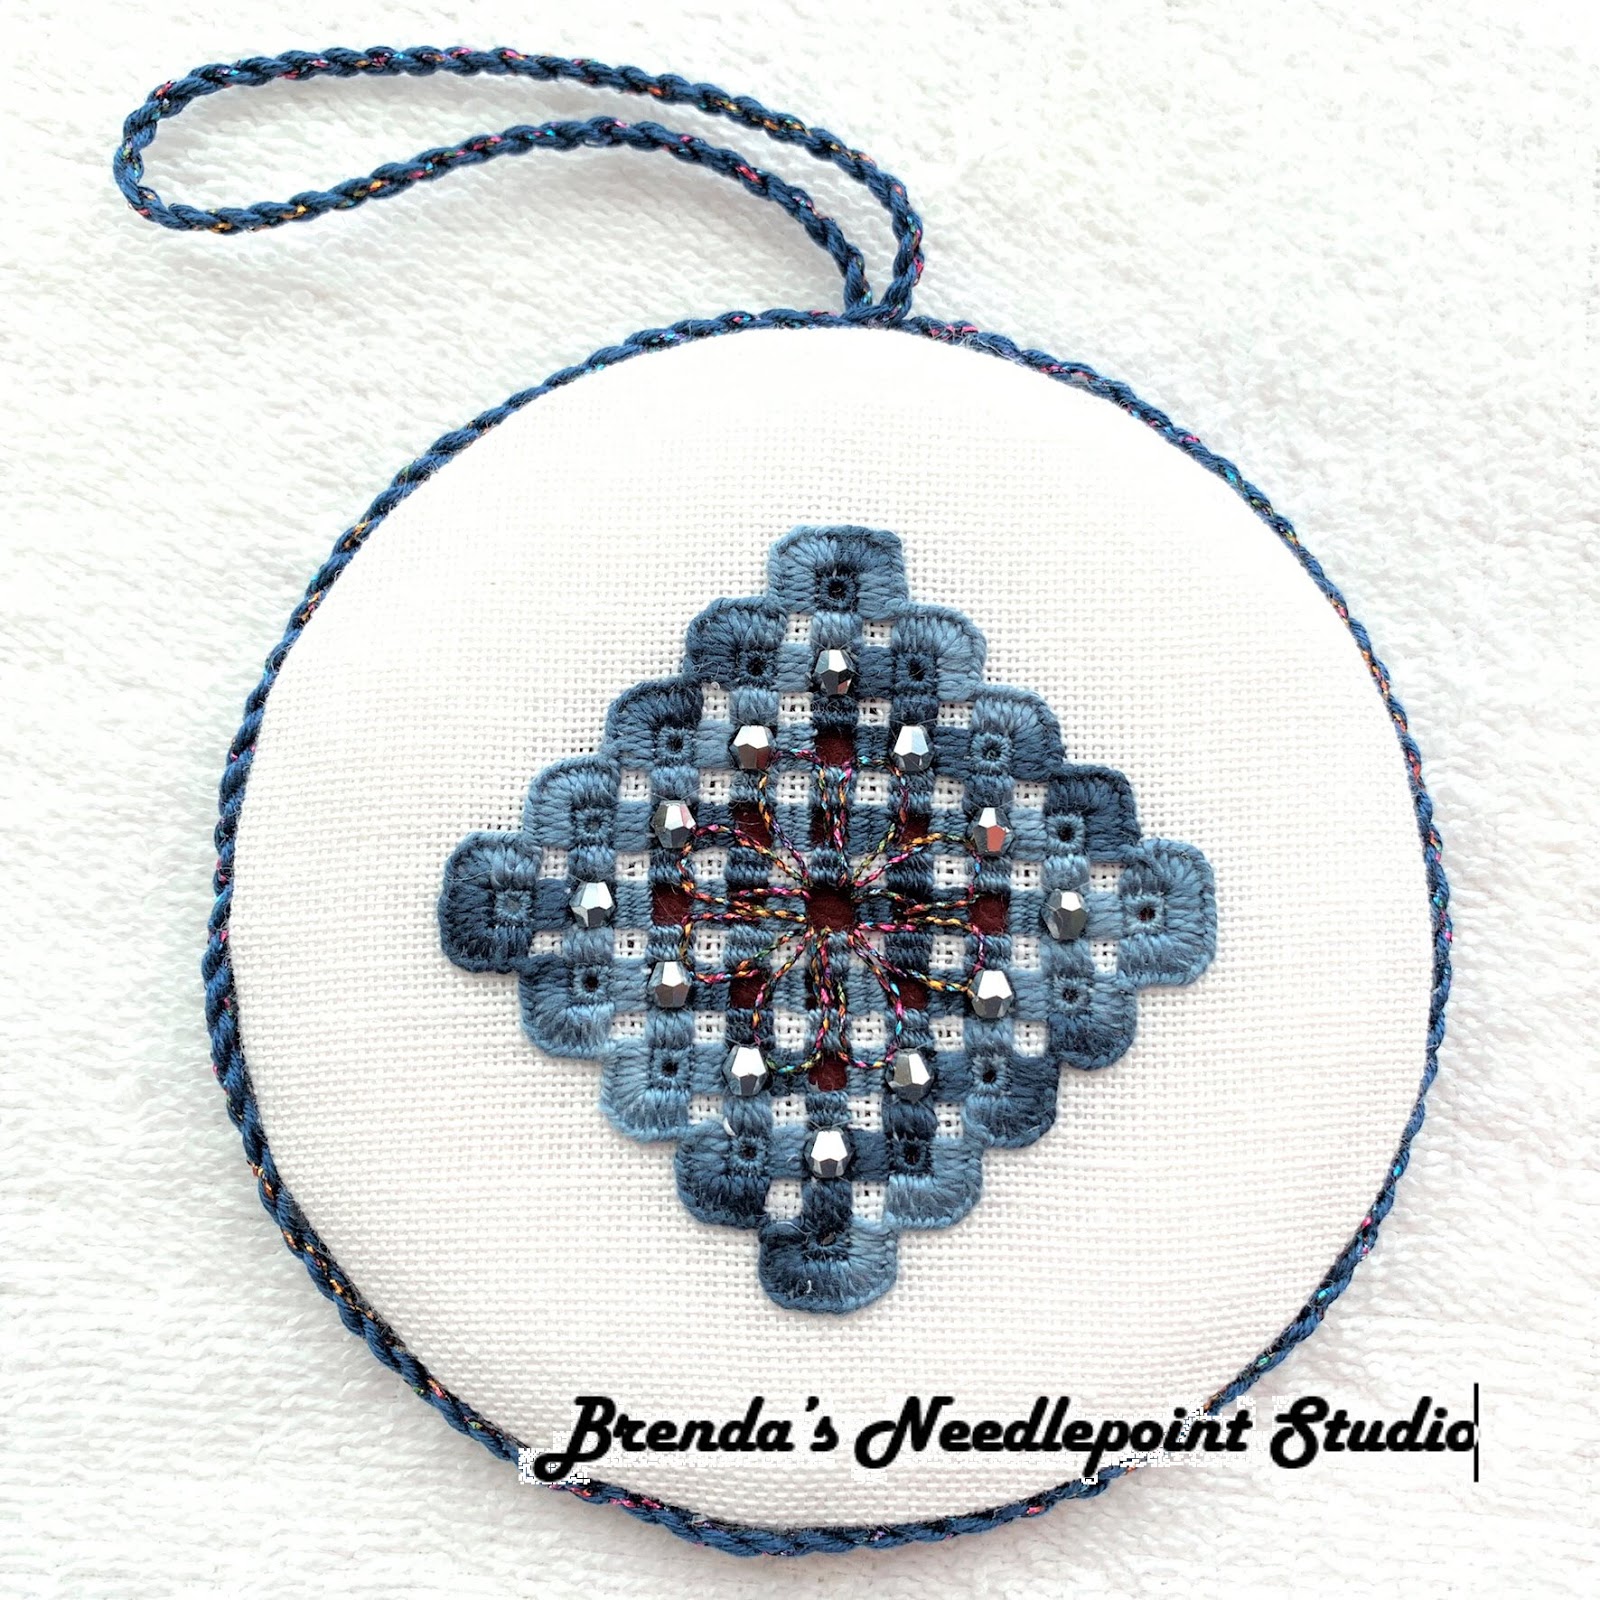 |
Hardanger Ornament Crystal Daisy Finished Front
|
And speaking of cording, mine is too small for this size ornament. It would look much better if it were twice the thickness.
Every time I finish my own ornaments, I learn something new, but am learning the hard way. Would love to "intern" with a professional finisher so I could learn all the tricks of the trade at one time.
Anyone want an intern? I'm willing to travel in the mid-Atlantic area.
PS I have no desire to use what I would learn to finish ornaments for others as a business--this would be for my own purposes only. Thank you.
 |
Hardanger Ornament Crystal Daisy Finished Back
|
July 14, 2019--In February, I attended Hardanger University (click here for information about the classes) and have been wanting to finish stitching the pieces I started.
The first class was an ornament sized project called Crystal Daisy from Terri Bay Needlework Designs. Recently I decided to complete the stitching and learned a lot in the process. I really like stitching "in hand" and have no problems with my tension pulling and or warping the linen Below is a picture of the ornament which I just completed.
 |
Hardanger Ornament Crystal Daisy Completed
|
 |
| Hardanger Ornament Crystal Daisy at Class End |
 |
| Hardanger Ornament Crystal Daisy with Berkley Fireline to Stitch Beads (too visible) |
Am now working on the larger, oval ornament which was included in the class materials. I plan on turning the project into a small doily instead of an ornament and placing it on the edge of my huge soaking tub for something a little decorative.
Sunday, January 5, 2020
Janet Zickler Casey Santas Stitched to Date - Updated 5/18/2020
Click on the photo caption to view more information about each santa.
May 18, 2020--Here's the 12th santa ornament stitched so far--North Wind Santa
May 12, 2020--the 11th Janet Zickler Casey santa stitched to date called Santa in the Moon.
January 5, 2020--The 10th JZC santa, Heart Santa, is stitched.
February 11, 2019--The 9th JZC santa is stitched.
January 9, 2019--Here's the eighth stitched so far to add to the list below.
November 16, 2018—Recently I counted up the number of santa ornaments designed by Janet Zickler Casey that I’ve stitched over the years. Below are 7 out of 23 total to date. As new ones are completed, I’ll add them to the list. My goal is to stitch two a year (one new, one old) until all are done. Click on the caption for more information about each santa pictured.
May 18, 2020--Here's the 12th santa ornament stitched so far--North Wind Santa
 |
| North Wind Santa Completed |
May 12, 2020--the 11th Janet Zickler Casey santa stitched to date called Santa in the Moon.
 |
| Santa in the Moon Completed |
January 5, 2020--The 10th JZC santa, Heart Santa, is stitched.
 |
| Santa Heart |
February 11, 2019--The 9th JZC santa is stitched.
 |
| Star Spangled Santa |
January 9, 2019--Here's the eighth stitched so far to add to the list below.
 |
| Twinkle, Twinkle Little Star Santa |
November 16, 2018—Recently I counted up the number of santa ornaments designed by Janet Zickler Casey that I’ve stitched over the years. Below are 7 out of 23 total to date. As new ones are completed, I’ll add them to the list. My goal is to stitch two a year (one new, one old) until all are done. Click on the caption for more information about each santa pictured.
 |
| Candy Swirl Santa |
 |
| Pine Cone Santa |
 |
| Nutcracker Santa |
 |
| Christmas Tree Santa |
 |
| Silver Bell Santa |
 |
| Christmas Light Santa |
 |
| Candy Cane Santa |
To see the santas yet to be stitched, please click
on the 2 Pages on the right side of this blog called Planned Projects and In
Process Projects.
Tuesday, December 31, 2019
2019 Year in Review
December 31, 2019--It's been a busy year, but I still managed to complete the stitching on 20 needlepoint projects. Here they are from most recent (December) to oldest (January).
Many have not yet been finished into ornaments, etc.--I'm waiting to stitch all the projects in the collections before working them up into ornaments (e.g., Janet Zickler Casey's santa collection, Susan Portra's holiday ornament collection).
Also included in this list are the projects stitched in prior years and finished into pillows, ornaments, etc. in 2019.
Hope you enjoy looking at these pictures and walking down memory lane with me. Click on the photo's caption to see more information about each project.
 |
| Santa Heart |
 |
| Autumn Crackers Leaf (5 of 5) |
 |
| Autumn Crackers Owl (4 of 5) |
 |
| Autumn Crackers Pumpkin (3 of 5) |
 |
| Autumn Crackers Quilt Block (2 of 5) |
 |
| Autumn Crackers Tree (1 of 5) |
 |
| Jeweled Heart |
 |
| Woven Ribbons Ornament |
 |
| Expressions in Rose Gold |
 |
| Mini Embellishment Ornament |
 |
| Valentine Heart |
 |
| Hardanger Crystal Daisy Ornament |
 |
| Holiday Ornament - Green Bell |
 |
| Ornament by DebBees Designs for 2018 |
 |
| RG Mystical Stairs Coaster |
 |
| Ort Box With a Twist |
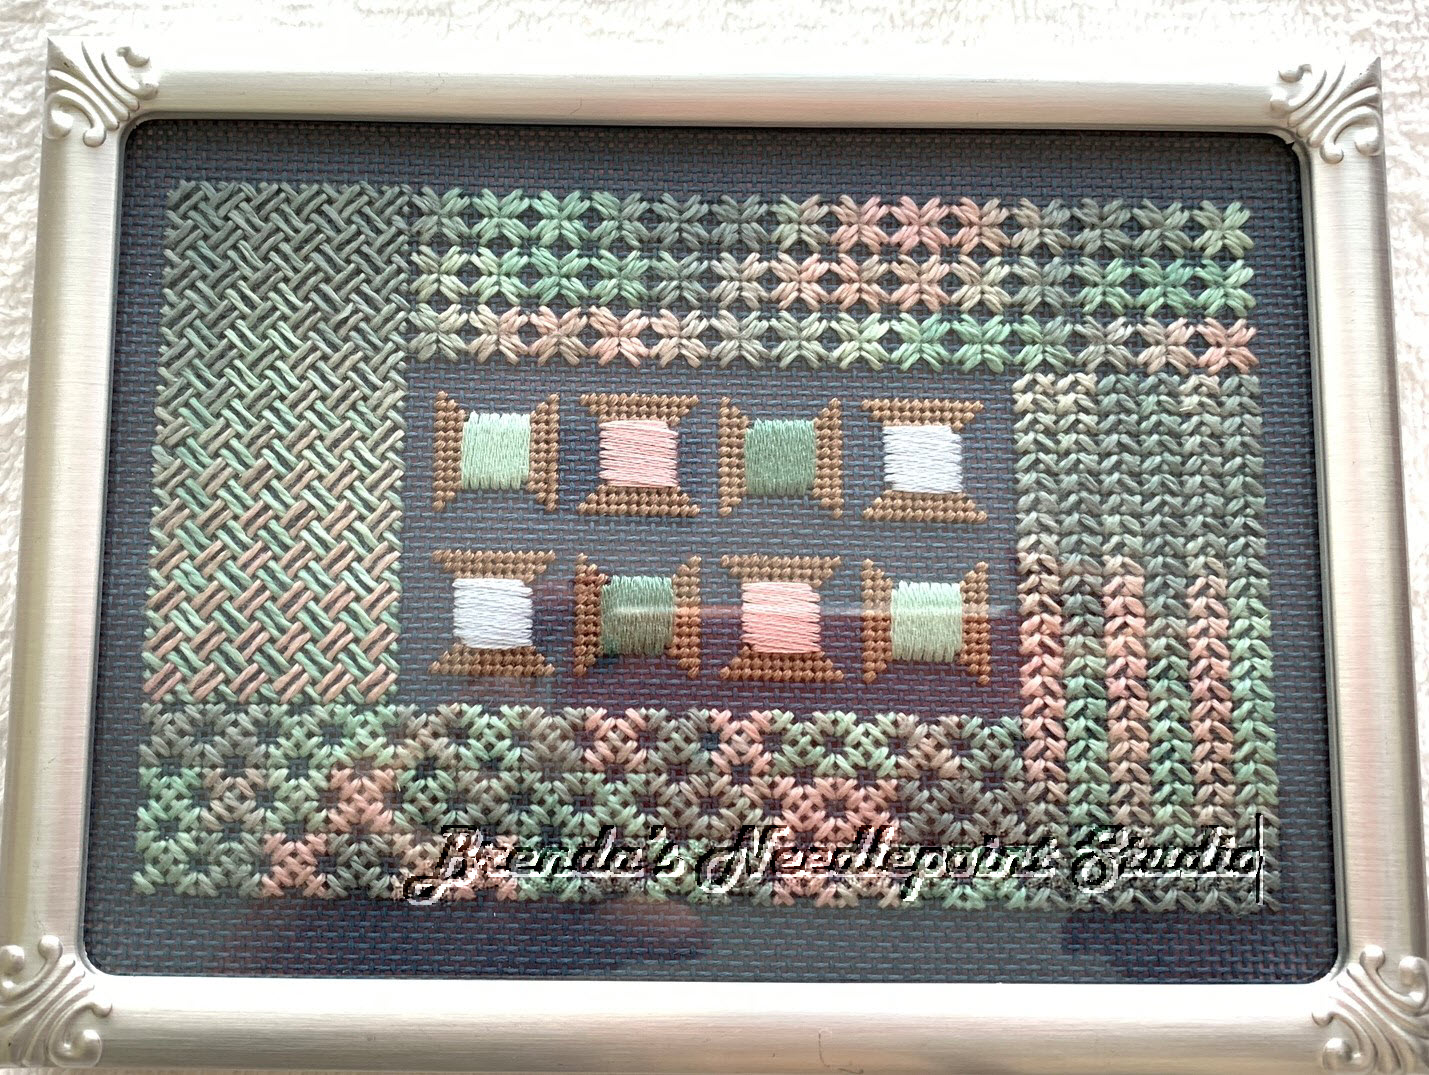 |
| Overdyed Spools |
 |
| Holiday Ornament - White Light |
 |
| Star Spangled Santa |
 |
| Twinkle Twinkle Little Star Santa |
Here are four stitched projects completed in years past and finally "finished" into something in 2019:
 |
| ANG Stitch of the Month for 2016 |
 |
| Woven Ribbons Pillow |


Subscribe to:
Posts (Atom)