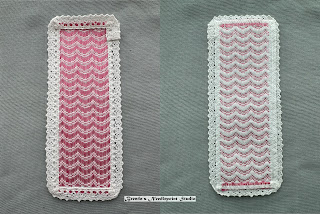
August 13, 2024--I've completed 15 more bookmarks (photos below). These are so much fun to stitch and work up easily.
The first two photos are an example of reversible "blackwork" done in purple thread, the first one is partially stitched, showing how the first "path" looks, then the design is completed with the second "path". However, I do need to work a bit more on my skill to end threads on the reverse side so they don't show.
 |
| Blackwork Pattern Partially Stitched |
 |
| Photo showing front (left) and back (right) sides of Blackwork |
I found an excellent resource for darning patterns:
Here are photos of the other fourteen bookmarks:
July 11, 2024--Last year I attended Needlefest New Jersey and had the pleasure at one point of sitting next to Dee L of the New Jersey Needle Artists Chapter of ANG who showed me the bookmarks she was working on. They were stitched on Aida cloth using various darning patterns, threads, etc., and they were so darned cute.
Soooo, I just had to stitch up some of these myself and learned that our local library in Georgetown, DE, where my needlepoint guild chapter meets, would be happy to have them as give aways to their new card holders, avid readers, etc. I found some lace edged Aida fabric bookmarks on Amazon which are perfect for this purpose except, in my opinion, they are a bit too wide. Nevertheless, I have them and am happily working away on them whenever I need a small, easy to carry project (in the car, at stitch-ins, etc.). Since they are supposed to be reversible, I "finish" off each bookmark by sewing across the top and bottom to catch the threads so they won't pull out.
I'm now tackling a bookmark with a reversible blackwork pattern. I went on YouTube to learn how to start and stop threads and was disappointed to see that most of the videos treat blackwork as black thread on white cloth embroidery, but NOT reversible. Fortunately, I have a decent library collection of blackwork books such as:
Reversible Blackwork Book 1 by Ilse Altherr, 1978
Blackwork & Holbein Embroidery Book 2 by Ilse Altherr, 1981
The Heart of Blackwork by Ann Strite-Kurz, 1992
Below is a collection of twelve bookmarks stitched so far. I especially like the one with hearts, spades, clubs and diamonds since I'm an avid casino goer. Each picture shows the bookmark's front (left side of photo) and back (right side of photo). Most of these have been worked up using a stash of discontinued RG metallic threads given to me by a friend. Each bookmark takes anywhere between 12 to 20 yards of thread, so I am happy to have this stash.


These are great. Especially since you can put one in your purse and work on wherever you want. Also, it's a good way to practice reverible blackwork.
ReplyDelete