Statcounter

Showing posts with label 2014 Completions. Show all posts

Sunday, August 25, 2019

Woven Ribbons and Lace Pillow - Updated 9/14/19

September 14, 2019--Just learned this piece garnered a 2nd place ribbon at the Rehoboth Beach Museum's 9th Annual Needlework Exhibit.   Thank you Jane Nichols for such a beautiful design.

August 25, 2019--After 5 years since the stitching of this project was completed, I finally had this made into a box pillow.  It really came out nice.
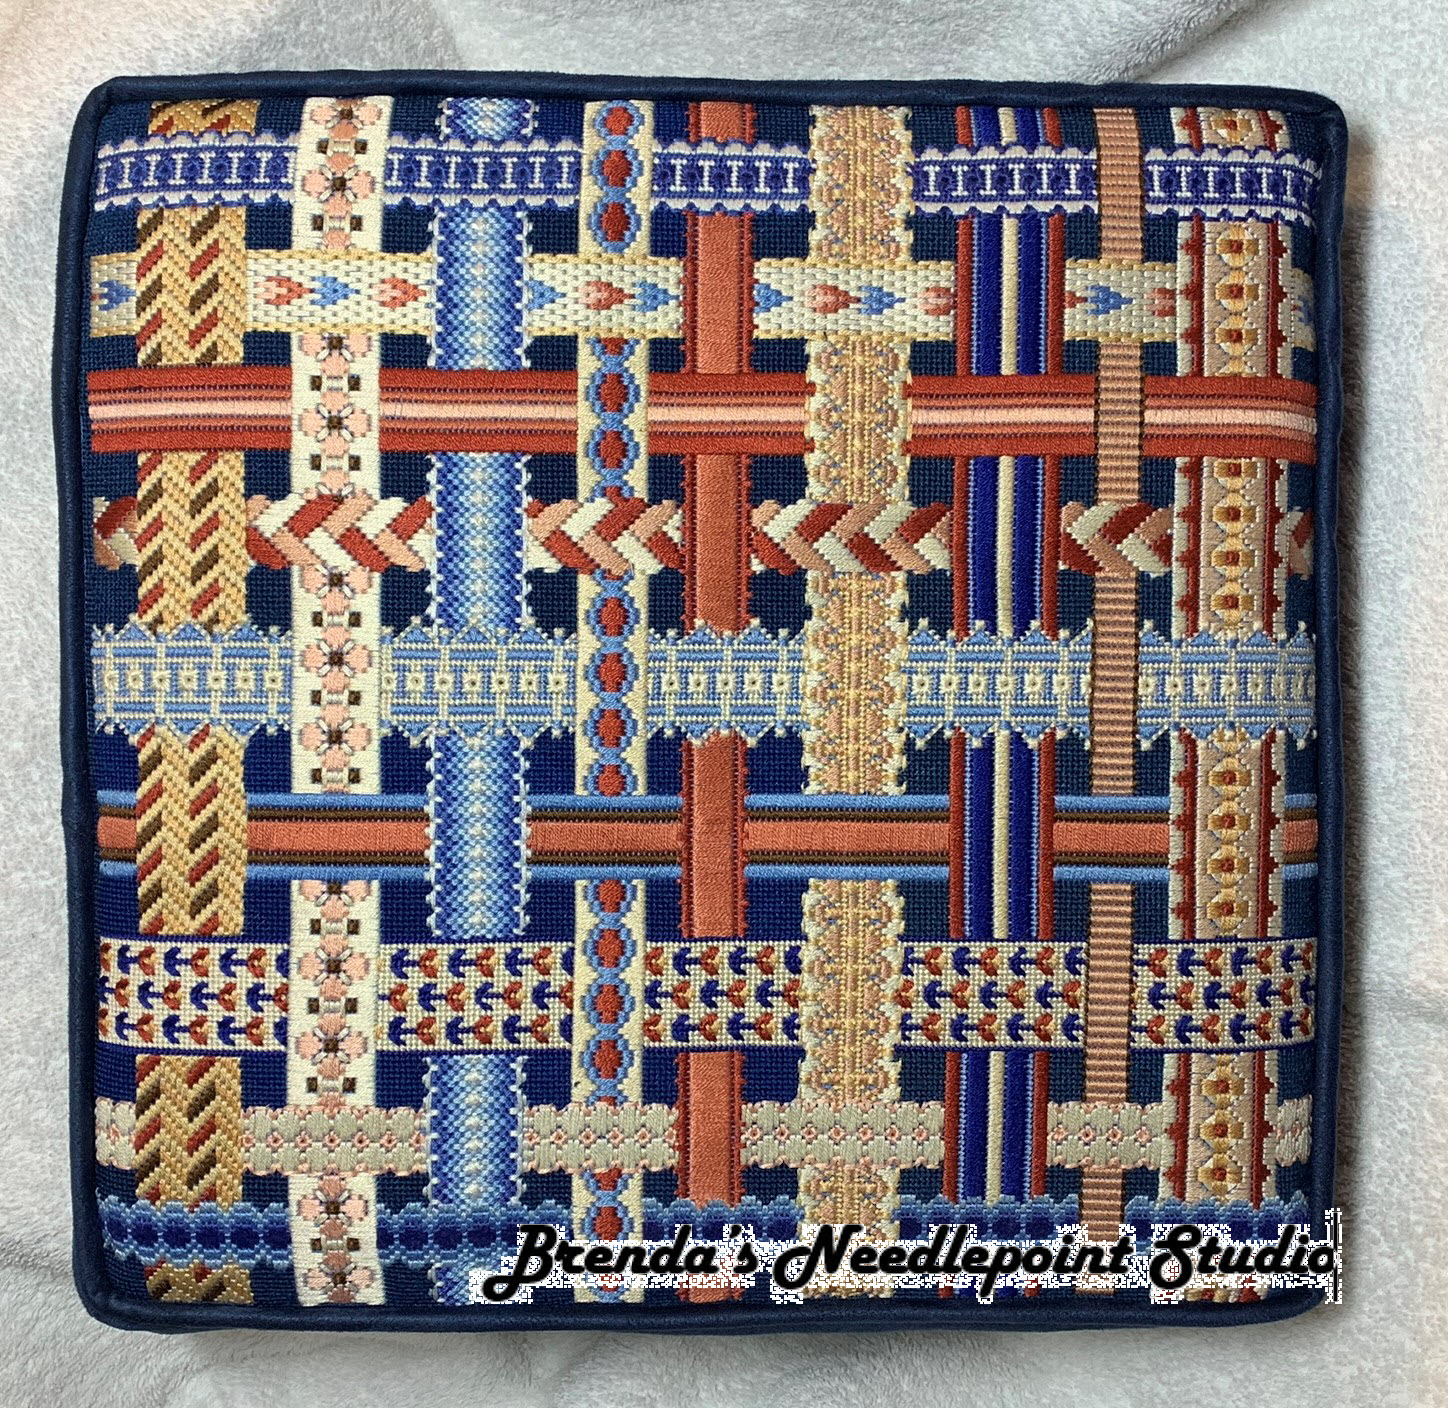
Ribbons Woven Finished into a Box Pillow


September 14, 2014--Done!   Just finished stitching the last ribbon, number 9 (vertical ribbon on the far right).  Next--will talk with my upholsterer to see which type of pillow should be made--knife edge or box?

Ribbons Woven, Ribbon 9

September 8, 2014--Finished stitching Ribbon 7 and have only one more to go.  The last ribbon, number 9, is a lacy type of pattern using multiple colors, so will probably take some time to complete.   This really is a fun project.

Ribbons Woven, Ribbon 7
September 3, 2014--Counting down--two more ribbons to stitch.  Below is a picture of my progress to date.  Ribbon G and all horizontal ribbons are done.

Ribbons Woven, Ribbon G


August 24, 2014--Ribbon F done.  Three more to go!

Ribbons Woven, Ribbon F


August 20, 2014--Only 4 more ribbons to stitch.  Below is a picture of the most recent completion--ribbon 4.  

Most of the background of this project is stitched with Paternayan yarn, color #500.  I ran out of this color and, after making a few calls, was unable to find more.  I began to panic (just a little) and then remembered I still have some Paternayan threads purchased over 30 years ago, lovingly stored for all these years.  After digging through this stash, I found a color very, very close to what I was using and, after stitching 3 small squares, am pleased that the color variance is hardly noticeable.  Can you find the color difference?

Ribbons Woven, Ribbon 4

August 7, 2014--Stitched two more ribbons--B and C.   That's going to be it for awhile--lots of life to live over the next few weeks.  Looking forward to completing this project--only 5 more ribbons to go.  

Ribbons Woven, Ribbon C


Ribbons Woven, Ribbon B

August 2, 2014--Ribbon 2 done.  Seems to be stitching up a lot faster now that the lacy ribbons are done.  I also like working on the background where possible--the basketweave stitching is relaxing.

Ribbons Woven, Ribbon 2

July 28, 2014--Ribbon 8 is complete.   Have stitched a total of 10 ribbons so far, over half done with 8 left to go.  

Ribbons Woven, Ribbon 8
July 21, 2014--Ribbon 1 finished.  This project is coming along nicely.

Woven Ribbons, Ribbon 1

July 15, 2014--Another ribbon done--Ribbon D.  Should have stitched this ribbon before completing Ribbon 6.  May have to fix this later.  Now that all the ribbons with extended sides are stitched, can work on any ribbon that strikes my fancy, or work them in rows, or columns, or.......

Woven Ribbons, Ribbon D

July 13, 2014--The photograph below shows Ribbon 6 is now done.  I also stitched in a few of the background blocks to see how I liked the color.  Looks good to me.  Next up--Ribbon D.  

Woven Ribbons, Ribbon 6
July 4, 2014--Happy Independence Day!!!  

Delaware's Seashore Chapter led this class in May, so I pulled it out of the WIP pile a few days ago and completed Ribbon H.  Next up--Ribbon 6.

Woven Ribbons, Ribbon H
December 8, 2013--I'm putting this project away until the Delaware's Seashore Chapter has its class in April, 2014.  I started it early so that my sister could see what it was all about while visiting her in Dallas, TX before Thanksgiving.   I've completed 5 ribbons and learned the hard way that I should have done the ribbons in the following order:  (vertical ribbons are numbered 1 through 9, horizontal ribbons are lettered A through I) A, E, I, 3 then 5. Instead, I stitched E, 3 and 5 before beginning A and I.  I had to rip out portions of ribbons 3 and 5 to make room for the extended edges of ribbons A and I.

The next ribbons will be D, H then 6.  I should be able to stitch the rest of the ribbons, 1, 2, 4, 7, 8, 9, B, C, F and G in any order I please since their edges don't overlap other ribbons (I think).   Below is a picture of my progress to date:


November 21, 2013--Have completed two more ribbons, 3 and 5.  Only 15 more to go.


Ribbon 3
Ribbon 3 Closeup


Ribbon 5


November 17, 2013--The first of 18 ribbons is done. This is Ribbon E. Because its edge extends into other ribbons, it and some others must be done first. 

Ribbon E Closeup


Ribbon E
November 10, 2013--Finished marking the ribbon positions by basting with thread instead of a #4 pencil.   It turned out to be much easier counting with a needle and thread instead of starting and stopping the pencil.  I basted the horizontal lines first, then the vertical.  Once I got the count correct on the first line, the rest was easy to copy.

Lines set up using basting thread
August 30, 2013--Have begun working on the Woven Ribbons and Lace pillow designed by Jane Nichols which the Delaware's Seashore Chapter will have as its April, 2014 class.  This wonderful project can be found in the May/June 1999 Needlepoint Now magazine.  I chose the blue and rust version and all threads have been purchased or pulled from stash and entered into my Threads Database.

Since this is a counted stitch project, the ribbon widths must first be drawn on the 18 count canvas with a #4 pencil.  Have begun laying out the groundwork below.  Will also print out the graphs for each ribbon in such a size that can be easily attached to the canvas with a magnet while stitching.  As you can see, there are 9 vertical ribbons and there will be 9 horizontal ribbons (only 3 are drawn in so far).


Friday, August 23, 2019

Bargello Techniques - Updated 8/23/19

August 23, 2019--Can't believe it's been 5 years since I completed the stitching on this project.  So rather than let more years fly by, I bought some fabric, foam, cording, etc. and then, instead of working this up into a box pillow myself, took it to my local fabricator.  Love the results.


Bargello Techniques Finished into a Box Pillow


May 2, 2014--Fini!  The last two sections, 7 and 8, are complete and this project is now ready to be made into a box pillow.  If I can find an upholsterer who will sell me the right sized piece of foam, I'll make the pillow myself.  I really enjoyed working on this and learned so much about bargello, especially when it comes to moving from one section to another--merging your patterns, so to speak.  The instruction manual is truly an excellend resource.  Thanks Liz for offering this course through ANG!

Bargello Techniques Through Section 8

Bargello Techniques Section 8 Closeup

Bargello Techniques Section 7 Closeup
March 30, 2014--Section 6 is complete and the missing stitches on Section 5 filled in.  Love how it reminds me of a kaleidoscope.

Discovered that I was 2 threads off at the bottom of Section 5 and used Liz's trick of doing the fill-in stitches over 6 threads (instead of the usual 4) to make Sections 5 and 6 meet.  Liz did this at the bottom of Section 6 to meet Section 3.  Worked beautifully.


Bargello Techniques Through Section 6

Bargello Techniques Section 6 Closeup

January 30, 2014--Section 5 is mostly done.  I'll complete the bottom after I begin Section 6--wanting to be sure of my count.  Must now put this project down for a few months due to other commitments, but look forward to working on it again.

Bargello Techniques Through Section 5

Bargello Techniques Section 5 Closeup
January 5, 2014--Section 4 is now done and I've reached the half-way point.  The instruction manual by Liz Morrow for this project is chock full of information and will make a wonderful reference for future bargello work.  I see all kinds of bargello designs by moi in the future.

Bargello Techniques Through Section 4

Bargello Techniques Section 4 Closeup

December 27, 2013--Just finished Section 3 and moved my horizontal and diagonal basting lines by 2 canvas threads to correct the error I made in Section1 (discussed below).

I'm not sure if I've miscounted, but had to make a small change in the instructions for Section 3 regarding what stitch to do first.  It isn't much of a change--all I did was move the basting indicator (small dot at top of Diagram 27) over 1 thread to the left (this change now agrees with the basting line for Section 2).  After doing so, I then began my stitching 1 thread over to the right.  Now everything fits where it's supposed to (see photo below showing these changes in the instructions).  Still enjoying this project immensely.  The next section is large and looks like fun to do.  Hope to start working on it soon.

Bargello Techniques Section 3 Closeup
Bargello Techniques Through Section 3
Change in Section 3 Instructions
December 18, 2013--Section 2 is done.  This was a large section to complete, but once the pattern was set up, it was a dream to stitch and didn't take long.  Love those over 4 stitches.  Liz suggested trying different color patterns, but I chose to stick with the plan since I'm not sure there would be enough thread to do something different.  Anyway, I love the color pattern as designed--it's a treat for the eyes.

PS--Since Section 1 was started "upside down", I inadvertently began two threads down from where I should have, so now I need to rebaste Sections 3 - 8.  Not a big problem and glad I realized what happened.  I'll just need to add two threads of stitching to the top of Sections 4 and 5 to equal Section 1.  You can see in my picture of Section 1 Closeup that there's an extra row of 2 threads stitched on the top.

Section 2 Closeup


Complete Through Sectiok 2


December 9, 2013--I'm loving this project!  So far all of the basting has been done to mark off the sections (hard to see in the picture--used very light pink thread) and Section 1 is complete.

The shop where I purchased my threads did not have Silk & Ivory as recommended by Liz, so they suggested Planet Earth and Vineyard Silks.  The lightest and darkest of my threads are Planet Earth and they cover beautifully.  Perfect for this project.  The Vineyard Silks...not so much.  Others have written on the class Yahoo Group List, confirming this is NOT a good substitution (thanks Melita for your photo).  However, in an email to the group, Liz suggested a "looser twist" or tension if using threads that cover less well, so I'm doing that with pretty good success.  The picture below was taken at a slight angle and, because my tension is loose, there's a loft in the threads, so the coverage looks good (for the most part).   Since I don't have an LNS, I'm sort of stuck with the thread purchases I made before I learned of this problem.

I really liked Liz's suggestion to begin the pattern in the middle, dividing the thread in half, working one side from the middle to the right, then the other side from the middle to the left.  My thread skeins were easily cut into 40" lengths, so this was perfect.  Had no waste knot to start and just enough tail on each end to bury into threads on the back.  Since I used only half of the length for each side, there was less drag and wear on the thread through the canvas.

Bargello Techniques Section 1 Closeup
This is a huge project--on 18 x 22 stretcher bars.  Will have to be extra careful not to knock over my glass of wine.

Bargello Techniques Section 1
November 20, 2013--Just purchased my threads for this project... was unable to find Silk & Ivory as recommended by Liz.  However, the wonderful personnel at Creative Stitches in Dallas, TX (where I'm currently visiting my sister) suggested Vineyard Silks and/or Planet Earth Silks.  Below is a picture of my color choices.   The instruction manual has already arrived in the mail and am looking forward to starting the class on December 1st.


Bargello Techniques Color Palette and Threads
September 9, 2013--Have just signed up to take Liz Morrow's Bargello Techniques Correspondence Course through ANG's CyberPointers Chapter.  I love bargello and have had few opportunities to really learn about these types of stitches.  Liz is a wonderful designer of needlepoint bargello and am keeping an eye on certain of her new projects hoping she'll offer them as classes in the near future.

See the tab above called In Process Projects for a project photo done by Liz for the class.


Sunday, August 19, 2018

Pinwheel Christmas Ornaments - Updated 8/19/18

August 19, 2018--The three projects completed in 2014 (see below) have now all been turned into ornaments.  The small stocking, the first stocking I've ever "finished",  was a bit of a problem because I tried to sew it using "dressmaker" techniques.  Big mistake--too many layers to turn and the top was a mess, to put it mildly.   The next stocking I plan to finish is larger and I'll try the technique recommended by Pat Mazu.

The round pinwheel ornament below was part of my ANG chapter's ornament exchange in 2014 and the small square pinwheel ornament hangs on my tree at Christmas.


Pinwheel Stocking Completed Front
Pinwheel Stocking Completed Back


Pinwheel Round Ornament Completed Front

Pinwheel Round Ornament Completed Back

Completed Square Ornament Completed Front

Completed Square Ornament Completed Bck


August 21, 2014--Finished stitching this CyberPointers July project designed by Pat Mazu.  Really fun and fast to stitch and loved using up some of my stash.  Can't wait to learn how to finish the two ornaments and stocking--lessons coming up at the September meeting.


Thread Choices for the Pinwheel Stocking and Ornaments
 Picture taken from my Threads Inventory blog post

August 5, 2014--ANG's online CyberPointers Chapter offered Pat Mazu's pinwheel ornaments as their July stitching project.  There are three to choose from--a mini stocking, a round ornament and a square ornament.  Pat will instruct us how to finish these ornaments during the September meeting.  I've decided to stitch all three, choosing threads from my stash.