Statcounter

Showing posts with label 2016 Completions. Show all posts

Sunday, November 26, 2017

Frankie - Updated 11/26/17

November 26, 2017--My sister sent me this picture of Frankie in its new frame.  Love the texture of the frame and filet.  She says it looks perfect in her living room.  Me---so happy she likes it.


Frankie Framed

Frankie Frame and Filet Closeup

September 11, 2016--Frankie is DONE!  And I love it.  And I wish I could keep it.

This is a gift for my sister which will be given to her when visiting next month in her new Florida home.  Can't wait to see how it will look on her walls.

Frankie Completed
August 20, 2016--Working on Lesson 7 consisting of the background stitches.  There are three parts to this lesson:  Bokhara Couching Pattern for the narrow horizontal and vertical bands, Burden Stitch for the wide vertical bands and lastly the outer border area.  The first of the three parts is done and here's a picture.

Frankie through Lesson 7.33
August 12, 2016--Lesson 6 is completed.  This lesson covered the Walnetos with Jessicas and Eight Point Stars.  Love those stars--they are quick to stitch and the results are beautiful.  The color difference in the stars is due to the fact that in one, the gold is stitched first, while in the other it is stitched last.

The last lesson covers the background or filling stitches, and the braided border.  There's a lot to do here, but now this is a good TV watching project.

Frankie through Lesson 6
August 9, 2016--Lesson 5 covering the Double Fans Doubled and Chilly Hollow stitches is done.  Only four more "diamonds" to fill in, then all that's left are the background stitches.  Rounding the bend to the finish.

Frankie Through Lesson 5
July 24, 2016--Back from traveling in New England and Canada and have finished Lesson 4.   This lesson covered stitches for the Diagonal Padded Waffle and Mini Double Fans (these remind me of pinwheels).  The colors are blending nicely.

Frankie Through Lesson 4
July 11, 2016--Lesson 3 is now complete.  This lesson included the filling for the Diamond Jessicas (which I had already stitched before wrapping up Lesson 2), the Amadeus Stitch on the upper and lower bands and the Wheat Sheafs along the outer edges.  Now on to the really fun stuff--those highly engineered Jean Hilton stitches.

Frankie Through Lesson 3
July 5, 2016--Happily stitching along and have finished Lessons 1 and 2, and half of Lesson 3 (out of a total of 7 lessons).

The instructions call for stitching each of the Diamond Jessicas (DJs) before doing the Waffle Stitches and Circular Jessicas that fit inside the DJs.  I changed this by stitching the Waffle Stitches and Circular Jessicas BEFORE stitching the Diamond Jessicas.  This made it a lot easier for me to properly execute the last stitches that go behind the first section.  So here's my progress todate:

Through Lesson 1 - Plaited Stitch Columns

Through Lessons 2 and Half of 3 - Diamond Jessicas
Filled with Waffle Stitches and Circular Jessicas
June 29, 2016--Three years ago I signed up to stitch Frankie, a project by Michael Boren and Carole Lake of StitchPlay Designs (project photo below).  It was being offered through Shining Needle Society and I was very excited to find it available as an online class.  I had planned to stitch this as a gift for my sister whose home has a bit of Art Nouveau, Art Deco and Frank Lloyd Wright styling. When I visited her that year in 2013, she even helped me to choose threads to go with her decor.

Move forward to 2016 and I've finally begun working on this piece.  The instruction manual along with all the online class materials have a 1.5" width and are quite heavy.  Just reading the pre-work portion of the instructions took some time to wade through.  Well all that's behind me now and below is a picture of the pre-work completed.  It looks a little wonky, so imagine vertical bars with stitching to cover all the traveling threads and bar tacks.

There's a reason for starting this project now--I'm visiting my sister in October to see her new home in Florida (she moved from Dallas, TX) and would like to have this project finished by the end of the visit so I can leave it with her for framing.  I plan on getting at least 75% of it done before I leave.  It's a 19 hour train ride from Delaware to Florida, so should be able to get more stitching done while traveling.

This is a beautiful project and am looking forward to putting color on the canvas.

Frankie Pre-Work Completed
Frankie by Michael Boren and Carole Lake of StitchPlay Designs Project Photo


Thursday, December 1, 2016

Christmas Diamond Ornaments - 12/4/16

December 4, 2016--The threesome of diamond ornaments is now finished and ready to hang.  I loved how easy it was to just glue (using my trusty tape gun) each layer onto another, measure, cut, then done.

Christmas Diamond Ornaments Threesome Finished

December 1, 2016--Here's the last of the trio designed by Kurdy Biggs.  I have so much enjoyed stitching up these beautiful ornaments on perforated paper, and they worked up quickly.  I just returned from Michael's Arts & Crafts with some very pretty paper to place on the back.  Pictures of the finished ornaments will be posted soon.


Ornament Christmas Diamonds No. 1, 2 and 3 Completed

Ornament Christmas Diamond No. 3 Completed

November 12, 2016--And now there are two.  These designs are so pretty, and they work up quickly (being small in size helps).  One more to go.

Christmas Diamond Ornaments One and Two
Christmas Diamonds Ornament Two Completed

October 25, 2016--Finished stitching the first of three ornaments.  Love how easy it is to stitch on perforated paper.  Here's a picture and now to stitch the next two designs.

Christmas Diamonds Ornament One Completed

September 20, 2016--I found the instructions for these Christmas Diamond ornaments by Kurdy Biggs of Threedles in the November/December 2015 issue of Needlepoint Now Magazine and knew I would have to stitch them.  There are five examples using three different patterns, two of which were stitched on perforated paper.  Never having worked with perforated paper, I thought this would be a perfect opportunity to give it a try.   I found some off-white 14 count paper and decided dark blue thread would look good, so below is my progress to date on ornament number one.  Still have additional beads to stitch (ran out and had to order more) but am very pleased with the look so far.

The instructions in the magazine lacks details about the threads used for all three of the different patterns and Kurdy Biggs was very helpful in getting me the information I needed.  The problem was one of space--there wasn't enough room for the instructions and the full thread list when the article was published.   If you decide to stitch these ornaments, Kurdy is very helpful in supplying any additional information you may need.


Christmas Diamonds Ornament One


Tuesday, November 8, 2016

Downton Abbey Framed - Updated 9/15/2018

September 15, 2018--Just learned this piece won a 3rd place ribbon in the 8th Annual Rehoboth Beach Museum Needlework Exhibit in the Canvas/Needlepoint category.  Cool.

November 8, 2016--At last, here's the Downton Abbey threesome framed along with the cards made specifically for each design.   You can read about each of the the three pieces by clicking on the names of Countess of Grantham,  Lady Edith and Lady Mary.  I think the frame is perfect.

Downton Abbey Framed

Monday, October 17, 2016

Downton Abbey Lady Mary Geometric - 10/17/2016

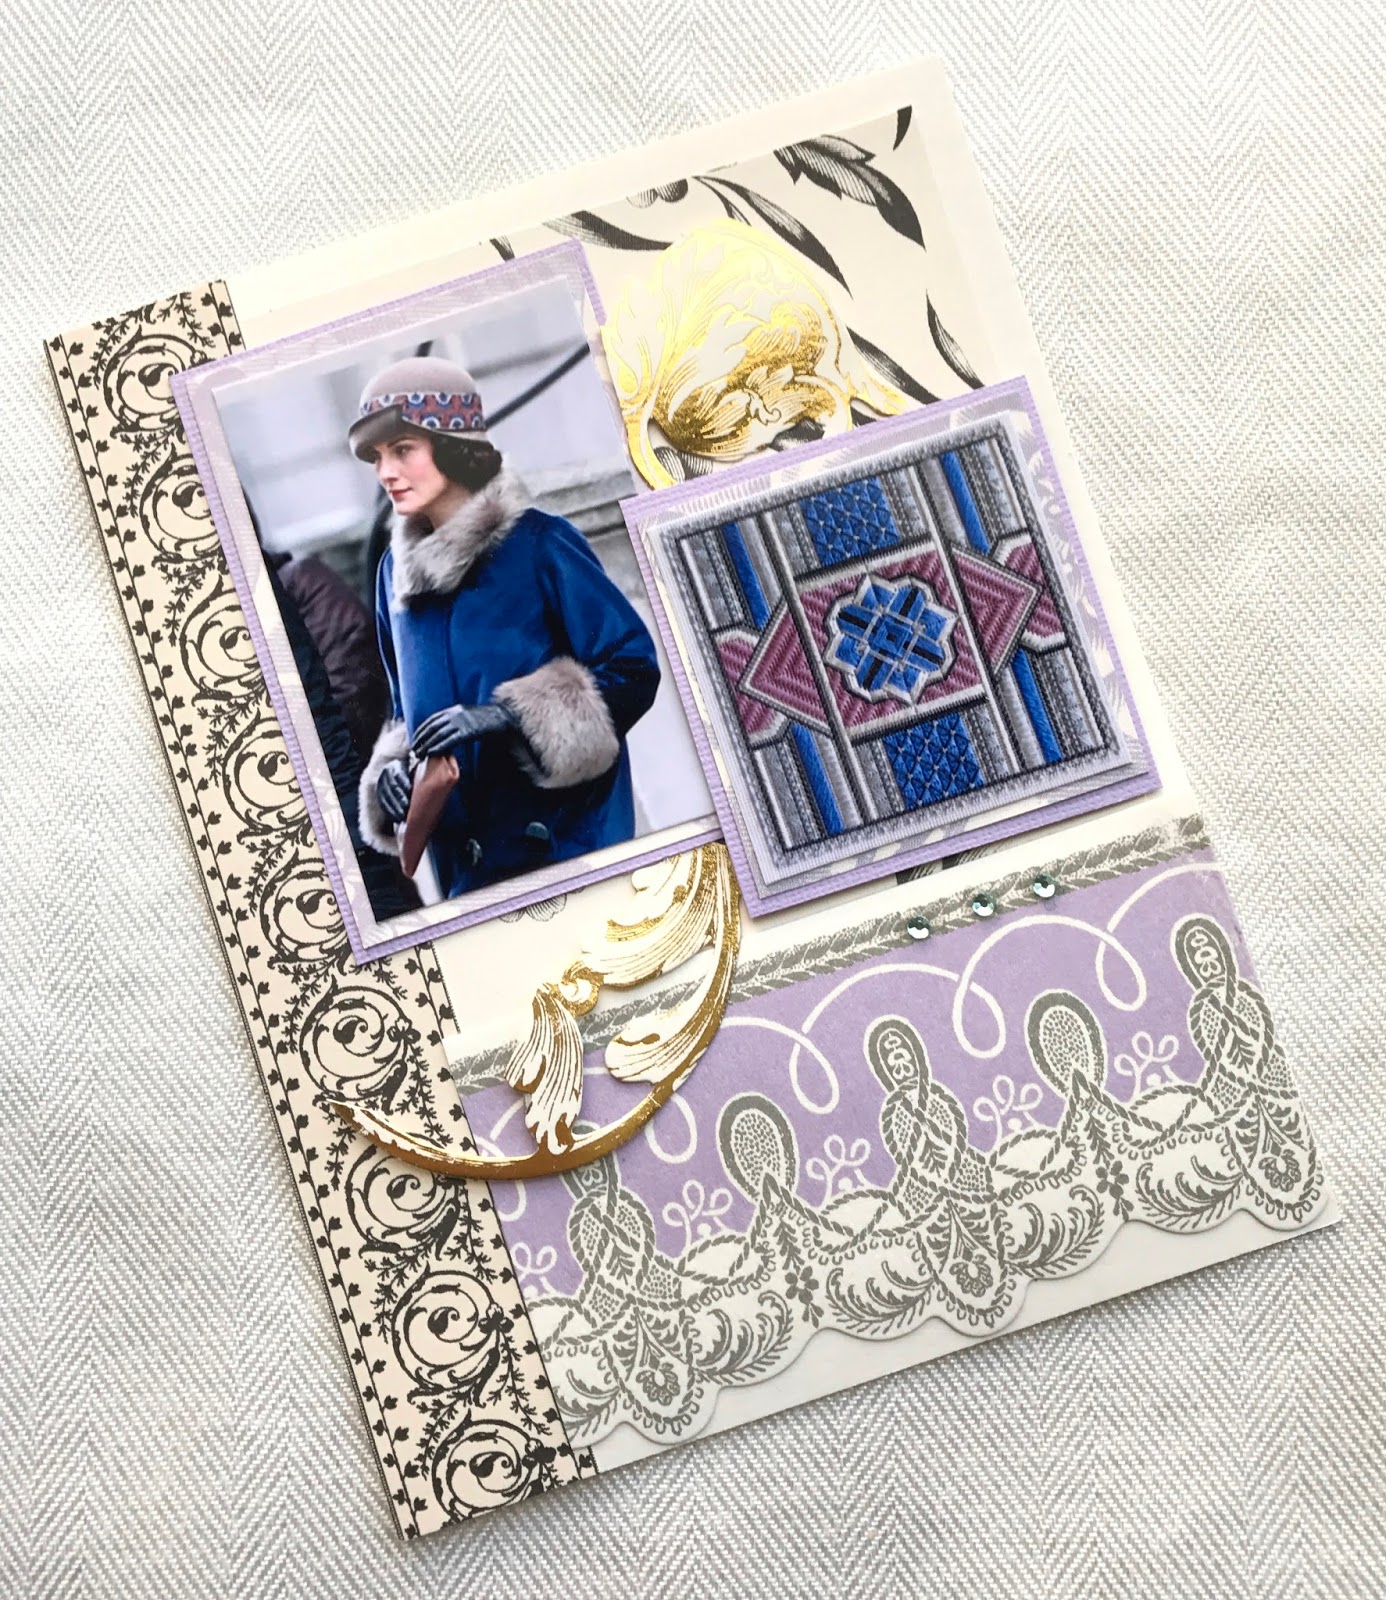
October 17, 2016--The Lady Mary geometric, third of the Downton Abbey designs by Gay Ann Rogers, is now complete.  I've also attached a photo of a card designed by Annette Navarro and sold through Gay Ann Rogers on her website.    Now off to the framer.

Downton Abbey Lady Mary Geometric Completed

Lady Mary Card
October 4, 2016--I am now stitching the last of the three Downton Abbey Geometric designs by Gay Ann Rogers.  More information can be found here.  This one is called Lady Mary and the colors are sumptuous.  The other two , Countess of Grantham and Lady Edith, are done and can be seen by clicking on their project names.  So far, most of the outlining is finished and the upcoming filling stitches will add depth and dimension.  Next posting will be of completed piece.  A view of the project photo can be found by clicking on the In Process Projects under the Page heading on the right.

Downton Abbey Lady Mary as of 10-05-2016


Sunday, August 21, 2016

Updated Name Tag - 08/21/16

August 21, 2016--Leaving on Monday for ANG's Seminar in New Orleans.  DH is coming with me and we're driving, taking three days for a little sight seeing along the way.

Anywho, I took a look at my pathetic chapter name tag that I sloppily put together 5 years ago and decided it needed an upgrade, a remake, a total makeover, so to speak.  So here it is, before and after.  Amazing what a little cording can do, and some ribbon, white lining, etc.

Name Tag Before

Name Tag After
Now I'm ready for seminar.  Hope to see you there.


Thursday, August 4, 2016

Sisters by Nancy Cucci Pilot Class - Updated 9/15/18

September 15, 2018--Just learned this piece won a 2nd place ribbon in the 8th Annual Rehoboth Beach Museum Needlework Exhibit in the Canvas/Needlepoint category.  Yay!

September 22, 2016--Sisters is now framed.

Framed
August 4, 2016--This project is now completely stitched, including the "sisters" box on the bottom.  My sister's initials are CW and are placed with mine (BC) inside the turquoise square.  I love the feeling of connectedness this piece conveys even though we are separated by many miles.  Now to have it framed.

Sisters Completed
June 26, 2016--Block 3 in turquoise is done.  This is the last block with beading.  The five smaller ones should go a lot faster.

Really like how the stitches in the three blocks look different from one another even though they are the same.  The difference is in the placement, angle and rotation.

Sisters Block 3 Completed
June 22, 2016--Block 2 (the gray one) is now stitched and am starting another.  This is really pretty.

Sisters Block 2 Completed
May 6, 2016--Happily stitching on this lovely project.  Here's my progress so far....block 1 is completely done.

Sisters through Block 1
April 27, 2016--Just completed a two day pilot class taught by Nancy Cucci for her "Sisters" project, held in Georgetown, DE.  One of ANG Delaware's Seashore Chapter members organized the whole thing.  Wow, another success for sure!  One of the pictures below shows how much, or how little, I accomplished over the last two days, but I really learned a lot.  Click on the In Process page on the right for a view of the project photo.

PS  I believe this is the fifth class Nancy has come to Delaware to teach and I've been lucky enough to participate in two other of her classes:  Stitches in Sterling and Irrisistible Iridescents.


Class Members

Our illustrious instructor Nancy Cucci

What I Stitched in Two Days

Tuesday, May 31, 2016

Orange Grove - Updated 6/8/16

June 8, 2016--Found the perfect frame, and this lovely piece now sits on the night stand in my guest bedroom.

Orange Grove Finished
May 31, 2016--Have just returned from two weeks out West (brief itinerary below), and while traveling around by car, was able to complete the stitching on this delightful little project.

However, please don't look at the stitching too closely.  Some of the roads were quite rough and bumpy. and trying to get an even tension while laying two threads proved to be a challenge.   Also was distracted by the beautiful scenery along the way.

The places we visited:

Badlands National Park, SD
Mt. Rushmore, SD
Devil's Tower, WY
Yellowstone National Park, WY
Grand Tetons, WY
Grand Canyon North Rim, AZ
Snow Canyon, UT
Zion National Park, UT
Death Valley, CA
Las Vegas, NV

Orange Grove Completed

May 14, 2016--Orange Grove, otherwise called Introduction to Paradise, is a pretty little project by Lois Caron and taught to our ANG chapter in March 2014 by one of our members, Pat vd A.

My husband and I are traveling for the next few weeks and I wanted to work on something I could easily hold while riding in a car.  This piece is perfect.  I started working on it to be sure it wasn't too complicated and believe I can complete it while on the road--it's that easy.  So here's a picture of what's been done to date and hopefully the next picture will be of a completed project.

Orange Grove as of 5/13/16

Orange Grove Project Photo

Saturday, April 30, 2016

Summer Solstice Sampler - Updated 10/10/16

October 10, 2016--Had this framed at my local Michael's Arts & Crafts and am very pleased with the results.  The frame looks "antique" and the two mats are perfect with the linen.  Looks very colonial.  However, my house is not colonial so the sampler will be relegated to dress up my craft room.


April 30, 2016--My first cross stitch sampler is completed and I thoroughly enjoyed this quick and easy piece.  Using my new MagEyes made the job so much easier on my eyes.

One change I made, however, was deciding not to continuing to stitch "in hand" and to mount the linen on stretcher bars.  What a difference!!!  I was able to stitch more quickly without worrying about warping the fabric or getting it wrinkled and dirty.  Here's the results.....


Summer Solstice Sampler Completed

Summer Solstice Sampler Mounted on Stretcher Bars
March 9, 2016--Our March, 2016 member led project at the ANG Delaware's Seashore Chapter meeting was Summer Solstice Sampler by Sally Ann Designs.  I understand this is second in a series of four seasonal samplers and a companion piece to "Winter's Whisper Sampler", another beautiful sampler done in pale threads.

I've never worked on a cross stitch sampler and this is a beautiful introduction which includes a variety of stitches.

I'm working "in hand" on 32 count linen using 1 strand of Caron Waterlillies over 2 threads in a darker, less variegated color than that used by the designer.  My magnifying glass is going to be an eye saver while working on this piece.  Below is my progress to date.

Progress at 3-9-16


Tuesday, April 19, 2016

Downton Abbey Lady Edith Geometric - Updated 4/19/16

April 19, 2016--The Lady Edith geometric, second of the Downton Abbey designs by Gay Ann Rogers, is now complete.  I've also attached a photo of a card designed by Annette Navarro and sold through Gay Ann Rogers on her website.   A photo below shows the rich dimension of the stitches.

Now on to the last of the series--the Lady Mary geometric.


Downton Abbey Lady Edith Geometric Completed

Lady Edith Card


Lady Edith Side View
April 12, 2016--Have begun stitching the second of three Downton Abbey geometric designs by Gay Ann Rogers (click here for more information).  This one is called Lady Edith and I love the colors.  So far the outlining is done and now to do the filling stitches--lots and lots of filling stitches.  The first design called Countess of Grantham is complete (see it here).

Lady Edith Geometric through 04/12/16

Saturday, April 2, 2016

Downton Abbey Countess of Grantham Geometric - 4/2/16

April 2, 2016--Completed stitching this pretty design.  I've also attached a photo of a card designed by Annette Navarro and sold through Gay Ann Rogers on her website.  Now on to the next two designs celebrating Downton Abbey's Lady Edith and Lady Mary as written about here.

Downton Abbey Countess of Grantham Completed
Card Designed by Annette Navarro
March 24, 2016--Thought that I was ready to begin the fill-in stitches--nope, had more cross stitch outlining to do in tan (looks like shadowing) and 8 little "florets" to place.  Now I think I'm ready.

Downton Abbey Countess of Grantham as of 3-24-2016
March 14, 2016--Have begun stitching this beautifully designed project by Gan Ann Rogers.  This is one of three geometrics she designed to celebrate the Downton Abbey series (click here for more information),  The most difficult portion is done (all that counting...whew).  Now all that's needed are the fill-in stitches.

Downton Abbey Countess of Grantham as of 3-14-2016

Monday, February 15, 2016

Kumihimo Braid Making - Updated 2/15/16

February 15, 2016--Have been experimenting with different types of thread and think I've come up with the right combination of thickness and decorative metallics.  I like this one so much that I'm going to use it as the cord around my Imperial Heart project.   It has a few uneven areas, but when wrapped around the heart, don't think they'll show that much, if at all.

Kumihimo Braid for use as Ornament Cording


February 11, 2016--My interest was piqued after reading about this braid making tool on D1D2's January 18th blog.

So taking advantage of some eBucks to spend on eBay, I found this Beginner's Small Kumihimo Kit.  It came with two colors of cord, a Kumiloom or braiding disk, how-to instructions, thread bobbins and bits to make a necklace.  Last night while watching TV I worked up the braid and now I'm hooked.  It was so fast and easy to do.  Next cord will be made with needlepoint stash threads for a similar look, but with a smaller diameter to use for the finishing of ornaments.   Too cool!

Kumihimo Braid Beginner's Kit