Statcounter

Monday, April 30, 2018

Imperial Rubies Heart - Updated 4/30/18

April 30, 2018--Finished!  Again, this is "do it yourself" finishing and continues to be a learning process.  Love the hearts designed by Gay Ann Rogers.   The cording around the heart was made using my kumihimo disk.


Imperial Rubies Heart Finished Front
Imperial Rubies Heart Finished Back


December 21, 2015-- Was so eager to complete this beautiful heart that I sat down and worked all the beading yesterday.   The side views show the dimensions and beauty of the beadwork.

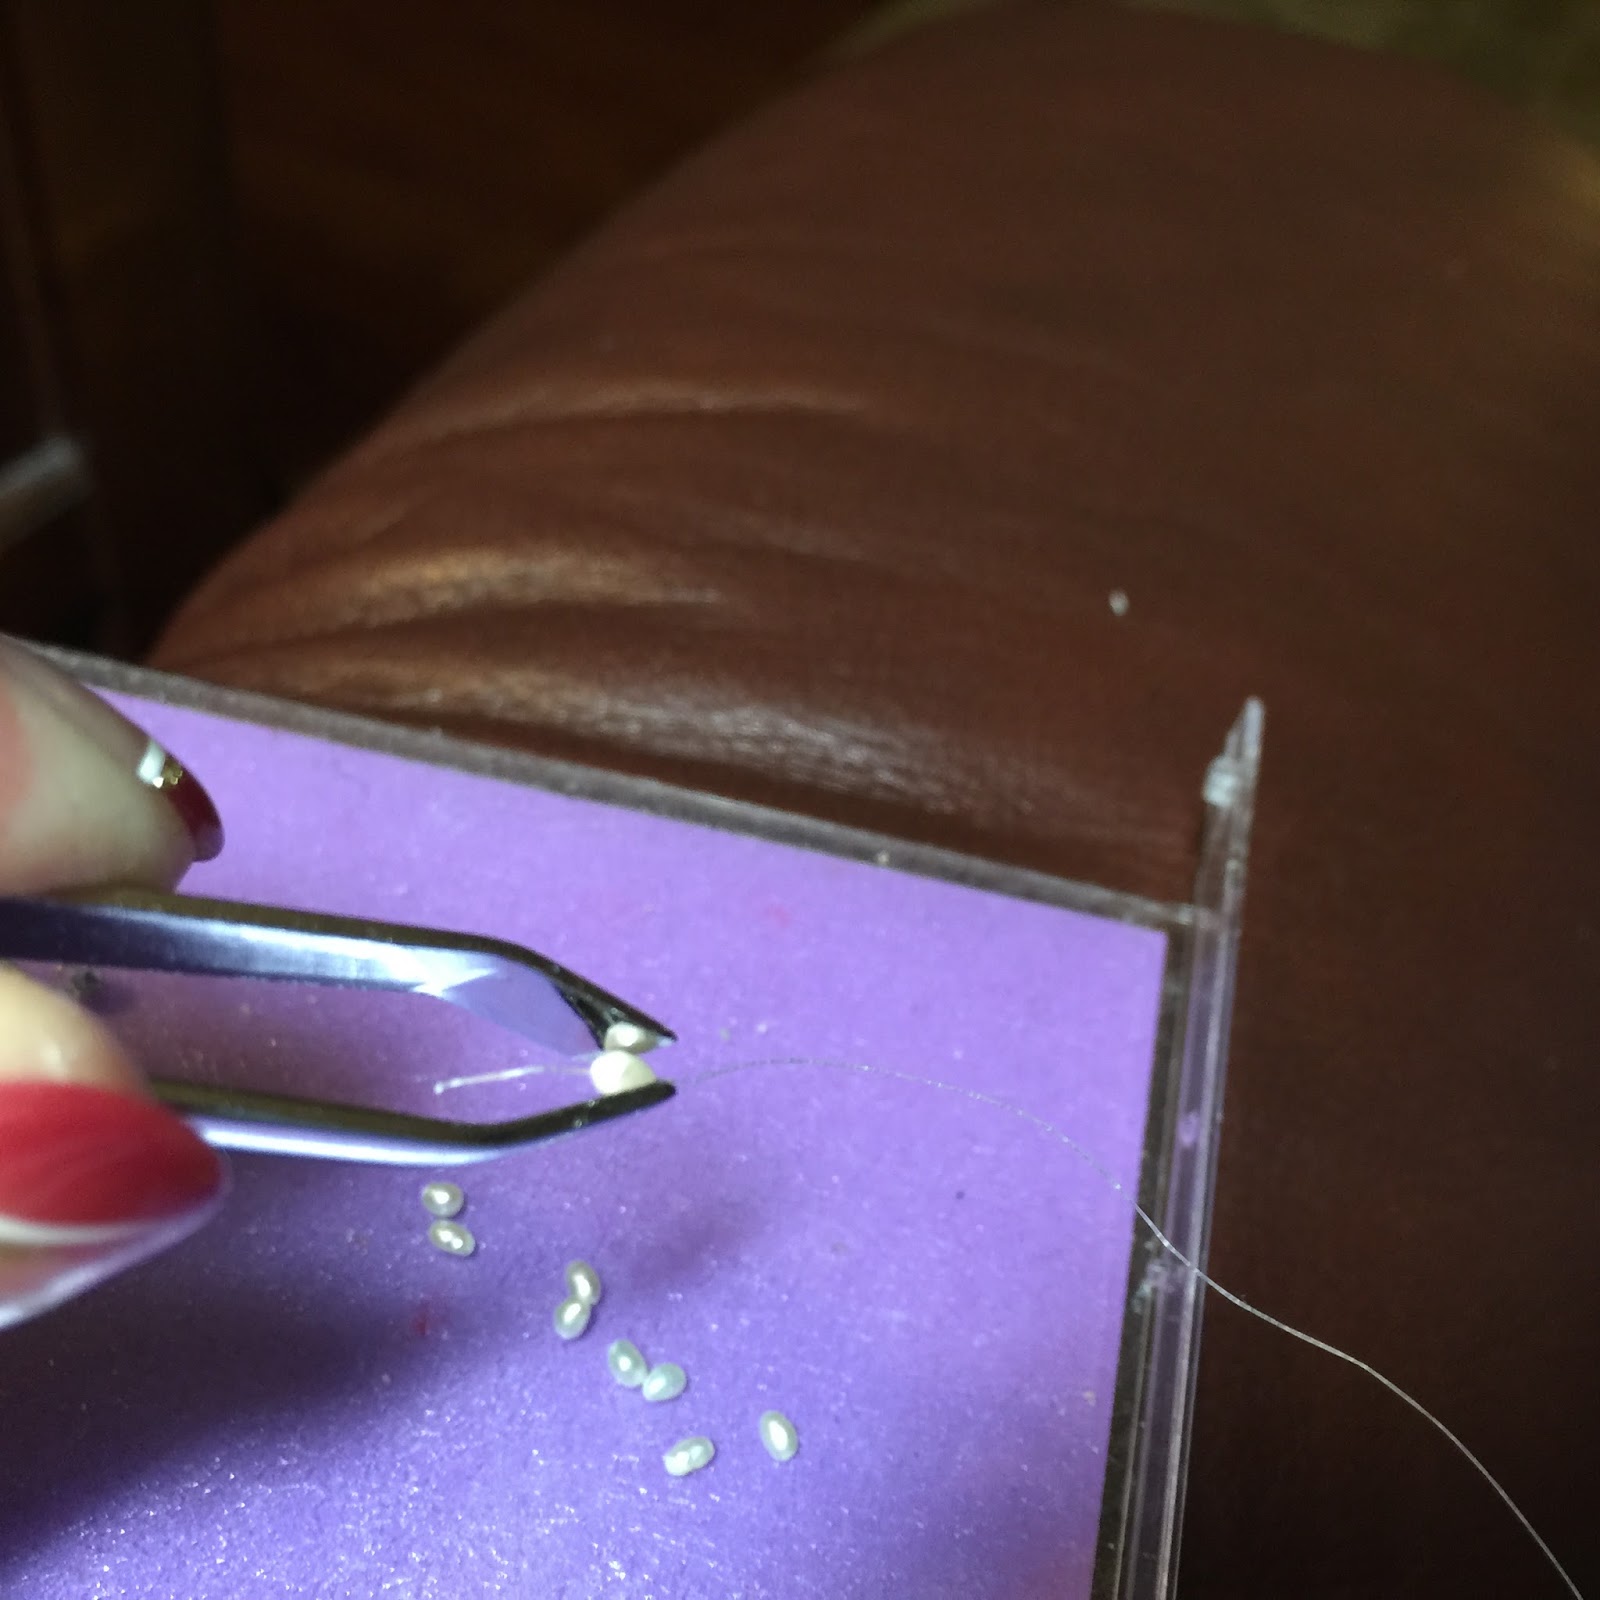
Almost couldn't finish--discovered I didn't have a needle small enough to fit through the tiny pearl beads, and there were 22 of them on the two necklaces.  Fortunately I remembered purchasing a new type of beading thread from Louise's Needlework shop in Ohio while there for a class last April.  It's a very fine, strong braid and stiff enough to manually thread through the itty, bitty, teeny, tiny pearls. They are so small that I couldn't hold them with my fingers--had to use a pair of tweezers.   Of course, I had to continuously thread up and unthread the needle to pick up the crystal beads.  Took a bit longer than anticipated, but now that it's done, I'm very pleased.

Imperial Rubies Heart Completed

Left Side View

Right Side View

Beading Thread - Braided and Strong
Manually inserting Thread into Pearl Bead (no needle)

December 20, 2015--All the stitching has been done and ready for beading.

Progress through 12-20-15

November 24, 2015--This is my work so far on this lovely heart.  Almost finished with the needlepointing.  The beading will add the beautiful dimensions.   See the In Process Tab above for a project photograph.

Stitching through 11/24/2015


October 17, 2015--For the very first time, I participated in Gay Ann Rogers' sale of her royal hearts and was able to purchase the Imperial Rubies Heart.   Looking forward to getting the kit in the mail--these hearts are so beautiful.


Wednesday, April 25, 2018

Theo Fabergé's Jeweled Spiral Coil Egg - Updated 4/25/18

April 25, 2018--The Theo Faberge's Jeweled Spiral Coil Egg is now "finished" into an ornament. This one was a real challenge to put together--had to remove some extra beads that were hanging over the edge, then had to deal with the white beading thread that was showing.  Took my cue from the couture houses--when you make an error, cover it up, cut it out, or incorporate it into the design.  In my case, I used the "cover it up" principle.  Won't say where (LOL).

I love the plaid fabric on the back.  In person, the color is a lot more intense and shiny.  BTW, the dark lines on both sides of the backing fabric are part of the design, not gaps between the edge and cording.

All in all, I think it looks nice.  


Ornament Theo Faberge's Jeweled Spiral Coil Egg Finished Front
Ornament Theo Faberge's Jeweled Spiral Coil Egg Finished Bsvk


February 17, 2017--Completed the stitching, beading and thread couching on this beautiful needlepoint version of Faberge's Jeweled Spiral Coil Egg.  The multi-colored beads really sparkle.


Ornament Theo Faberge's Jeweled Spiral Coil Egg
Ornament Theo Faberge's Jeweled Spiral Coil Egg Side View


January 27, 2017--Finished laying the gold ribbon and am beginning the beadwork.  The first picture below shows how the egg looks with the canvas threads running true vertival.  The second picture shows it slightly tilted to have more of an egg shape.  This is how it will hang when finished.  The purpose is to visually reduce the slant of the gold ribbon diagonal lines while making the beads look like they are coiling sideways around the egg.


Theo Fabergé's Jeweled Spiral Coil Egg at 1-27-17


Theo Fabergé's Jeweled Spiral Coil Egg at 1-27-17 Tilted


January 15, 2017--This is one of the classes I took while at ANG's 2016 National Seminar in New Orleans, LA.  It's called Theo Fabergé's Jeweled Spiral Coil Egg and is designed by Michele Roberts, known for beautiful goldwork projects.

I haven't had an opportunity until today to resume working on this piece.  Here's what I accomplished in class.

Theo Fabergé's Jeweled Spiral Coil Egg at 1-15-17


Tuesday, April 24, 2018

Rozashi Baby Iris - Updated April 24, 2018

April 24, 2018.  On a roll with finishing ornaments.  This is the third and last of the recent rozashi projects, but there will be more to come, that's for sure. 

Tried to make cording by twisting 1/8" ribbons--not a total success.  Should have made the twist tighter.  Also needed to make the mounting board a little smaller so that the stitches would wrap around to the back OR for future projects, will need to add a row or two of tent stitches so that the canvas won't show if I have a mounting board size issue.  Hmmm....


Rozashi Baby Iris Finished Closeup

Rozashi Baby Iris Finished Back
December 7, 2017--This little Rozashi Study called Baby Iris by Margaret Kinsey was a CyberPointers class in 2013.  I ordered the kit, then put it aside, not comfortable with the style and method.   Well, that problem ended after completing the recent Rozashi Imari Study class, a recent CyberPointers offering.  I was able to stitch this up in a few days and really like the technique using all vertical stitches on a Japanese canvas called "ro".

The next step is to block the piece by spreading a thin layer of Yamato nori stitcking paste (a type of glue) all over the stitches in the back, then while still damp after an hour, hold an iron above the canvas and steam the devil out of it until it is dried, then do it all over again.  At least that's how I interpret the instructions.  Once that's done, I'll make a little egg shaped ornament out of it and hang it on a drawer knob in my dressing closet.

I found some rozashi projects in the 2005, 2006 and 2009 NeedlePointers Magazine, so will have to find a source for "ro" canvas and work on those.

Rozashi Baby Iris Completed Closeup

Rozashi Baby Iris Completed


Monday, April 23, 2018

Rozashi Ornament East Meets West - Updated 4/23/18

April 23, 2018--Finished this lovely rozashi project into an ornament.   For the most part, I'm pleased with how it turned out.  I kept the shape of the ornament as it was drawn on the "ro" canvas by the designer, Margaret Kinsey, but if I had to do it all over again, I would have redrawn the shape as a proper circle.  As it is, it looks a little out of kilter, but not the end of the world.

Rozashi Ornament East Meets West Finished Front
Rozashi Ornament East Meets West Finished Back
The bow on the top of the ornament was made with a special ribbon I found online.  The ribbon is about 1/8" wide with a string running through it.  To make a bow, all you need do is pull the string to make as many loops in the ribbon you would like.  Cut, secure, and voila--done.  I now want to find this in all the colors I use a lot of.

Diagram to Make a Ribbon Bow 

This is what the ribbon looks like with string running through it.
February 11, 2018--After stitching Margaret Kinsey's Imari Sampler and Baby Iris Rozashi projects, I just had to stitch another.  Found this delightful ornament in the September/October 2005 Needlepoint Now Magazine and just had to stitch it--but first, to find the "ro" canvas.  I learned that Margaret Kinsey is the only US distributor of this canvas, so  I emailed her letting her know I wanted to purchase some ro for the ornament project she designed for the magazine.  Well, she wrote to let me know she had a pre-made up kit and would I like to purchase it.  Yes, yes--the kit not only included the line drawing on ro, but it was already mounted on the special frame and included the sumptuous silk threads used in rozashi.  Happy dance.

Once the kit arrived, I dropped everything and got working on it.  It was so easy to do, and now that it's stitched, need to get this, and the other two rozashi projects, made into hanging ornaments.

I did learn something while stitching this piece--Margaret's instructions on which direction to stitch initially confused me until I finally figured out she uses the economic method instead of the "wrap" method for the bargello like stitches--duh (hand hitting head--LOL).  This makes for half stitches on the back, but does save a lot of thread.  A good thing considering how expensive the silk threads are.

I recenty found a You Tube video of Margaret talking about rozashi and showcasing many of her beautiful projects.  Saw two or three I'd like to tackle.

Here's the completed Rozashi East Meets West Ornament.

Rozashi Ornament East Meets West Designed by Margaret Kinsey

Tuesday, April 17, 2018

Stitching Retreat in Ocean City, MD - 4/17/18

April 17, 2018--Just returned from a four day stitching retreat in Ocean City, MD put on by the ANG Checkerspot Chapter of Silver Spring, MD.  This is my second year in attendance and, as I did last year, had a wonderful time.  We stayed at the Dunes Manor Hotel, an old but well maintained and renovated charming spot in the heart of Ocean City.   The package included two breakfasts and one night's dinner in the dining room, and the food was delicious!  Our stitching room was bright, large and comfortable with a view of the sea.

Dunes Manor Hotel in Ocean City, MD
The weather, though cold, rainy and VERY windy, enhanced our delight at being able to stay in and stitch, stitch, stitch.  Barbara E. surprised us with three little projects.  The first consisted of two button forms sold by Toni Gerdes.  The buttons come with 64 pre-drilled holes you fill in with needlepoint.  Here's what I came up with though I may redo them later with fancier threads.

Button Forms by Toni Gerdes

The second project was a bookmark.  Barbara had the cutest designs and I chose the Scandinavian looking one.  Didn't have the right threads to stich it while at the retreat, so took a few hours this morning to whip it up.  Think I'll remove the canvas from the green felt and turn it into a luggage tag or a label.

Bookmark Closeup

Bookmark
The third project is my favorite and one that I will teach to my local ANG chapter if they'd like to learn how to do it.  It's a tassel that has 3 beads at the end of each loop taught to us by Debbie L.  Easy to do and the results are beautiful.  This is the first time I've every made a tassel, and now that I know how, I see lots of tassels in my future.   The thread and beads were also supplied by Barbara.  She thought of everything.

Tassel with Beaded Ends Side View

Tassel with Beaded Ends Top View

I did manage to work on a large project I took with me, but didn't finish it as I had hoped.   But the time spent on these fun surprises, stitching and talking with wonderful fellow chapter mates, and in a very nice environment means I'll be there again next year for sure.  Thank you Barbara E. and Checkerspot for hosting this event.

Thursday, April 12, 2018

A Study in Rozashi--A Petite Imari Sampler - Updated 4/12/18

April 12, 2018--Finished this rozashi project into a little ornament.  Like how it came out.  I'm hanging non-Christmas type ornaments like this in my new all wood dressing closet by Closet Works.  They look sweet hanging from the sides of the supports.

Rozashi Imari Sampler Finished as an Ornament


December 3, 2017--Finished lessons 3, 4 and 5, completing all the stitching.  These sections are called Kaku (upper left), Tortoise Variation (upper middle) and a pattern with no name (lower right).  Margaret advised us to be frugal with the use of the kitted threads since we could run out if mistakes were constantly made.  Well, I took that advise to heart and was careful to place the stitches correctly.  In the end there was plenty of thread left.  Of course, there were mistakes that had to be ripped out, but fortunately, they were small ones. 

Rozashi consists of vertical stitches over horizontal threads and I found this type of work to go very quickly.  Will now look for similar projects using this method.

This will make a lovely framed picture for my in-home office.

Rozashi Imari Sampler Completed Closeup

Rozashi Imari Sampler Completed
November 29, 2017--Lesson 2 for sections called Tortoise and Daiya is now done.  More challenges with all the compensation that's needed.  Still enjoying this project.  Working on such a small canvas, however, does require good magnification.  Glad for my mageyes.  It's also a good thing that this is worked "in the well" so to speak (canvas is attached in back of the wood holder).  I'm stitching right to the edge of the wood and it's easy to end threads on the back because there's nothing in my way.

Rozashi Imari Study Lesson 2 Tortoise and Daiya Closeup

Rozashi Imari Study Lesson 2 Tortoise and Daiya

November 27, 2017--Lesson 1, section called Diamond Flower, is done.  This was a bigger challenge than expected.  Margaret Kinsey instructed us to stitch in a diagonal direction when working the light peach area.  Because of all the compensation stitches, I found that hard to manage, so I stitched along the horizontal line.  I don't think it changed the appearance that much.

Love the shine of the silk threads.

Rozashi Imari Sampler through Lesson 1 Diamond Flower Closeup

Rozashi Imari Sampler through Lesson 1 Diamond Flower


November 12, 2017--Last June I signed up to take this class through ANG's online chapter called CyberPointers.  The lessons were held during the chapter's November meeting and I'm loving it.  I'm still working on Lesson 1, but can see how beautiful this little sampler is going to be.

The working surface is very different from the mono canvases to which we're accustomed.  Rozashi stitching is done on starched silk gauze material called a "ro".  There are 3 horizontal threads, called "dan" that are woven very close together and are considered as one thread for stitching.  This causes an elongated vertical stitch.  A very pretty effect.  The "ro" is glued to a thin wood frame and all stitching is done "in hand"--no floor or table stands needed, at least not for a project this small.  And the twisted silk threads are scrumptious.  They reflect so much light.

I'm even learning to count up to three in Japanese.  Ichi is one, ni is two and san is three.  This count is important as all stitches are done over ichi, ni or san dan.    Margaret Kinsey's instruction booklet is wonderful and the added lessons through CyberPointers are very helpful.

Here's what I've done so far.

Rozashi Imari Sampler through 11/12/17

Closeup of the "dan" row of a "ro" canvas


Wednesday, April 11, 2018

Name Tag for ANG Checkerspot Chapter - Updated 4/11/18

April 11, 2018--Finished the name tag for the ANG Checkerspot Chapter.  Lined the canvas with shiny red fabric which shimmers through to the front.  The trim is made out of 8 strands of 1/8" ribbon braided on a kumihomo loom.  I know it's not perfect, but the results are getting better and better with every ornament, name tag, etc. I finish.

Name Tag for Checkerspot Stitchers Chapter Finished


October 6, 2017--I recently joined the ANG Checkerspot Chapter located in Silver Spring, MD.  They are a delightful group of stitchers located within a day's ride round-trip of where I live in Delaware.  Not long ago they changed their name from Executive Branch to Checkerspot which is Maryland's state insect and attached is a picture of a glorious specimen.  Love the butterfly colors they incorporated into their name tag.

ANG Checkerspot Chapter Name Tag

Checkerspot Butterfly, Maryland's State Insect


Wednesday, March 28, 2018

Winterthur, Delaware Retreat by Art Needlepoint - Updated 3/28/18

March 28, 2018--Have returned from this wonderful stitching retreat at Winterthur in Delaware and couldn't wait to write about it.

Firstly, I must talk about the class--Tree of Life.  This was a two-day class taught by Elizabeth Bozievich, the Editor of Needlepoint Now Magazine, who stepped in to replace the woman who originally stitched this piece for us (from the Royal School of Needlework).  Even though Elizabeth did not write the stitch guide, she did a great job teaching us the stitches used, and there are soooo many of them.   I took lots of close up photos of the stitched piece to help me in the execution of all those wonderful stitches.    

There were many other classes offered at this event and I wish I could have taken them all.

Tree of Life as Originally Embroidered - on Exhibit at Winterthur


Tree of Life Stitched Needlepoint Interpretation Project Photo

Now to talk about the schedule.  Below is a copy of the itinerary and there aren't enough superlatives to describe how well we were taken care of--from the beautiful accommodations at Hotel Dupont, to the tours and lectures at Winterthur, to the dining experiences.


Itinerary Page 1


Itinerary Page 2
Lastly, the retreat participants....I met many wonderful stitchers who came from near and far.  There were a few of us from Delaware, but most came from elsewhere.   I've requested a Facebook page be set up for those of us stitching the Tree of Life so we can encourage each other as we work on this piece.

If Doreen Finkel of Art Needlepoint Company does this again, consider it a must do retreat.


May 18, 2018--I just learned that Art Needlepoint is hosting a fabulous retreat at Winterthur Museum in Delaware from March 23 to 25, 2018. 

The initial brochure for this event can be found by clicking here.  I'm told there's a 5% discount for ANG and/or Winterthur members.  Of course, you can save a whopping 10% by registering and paying in full by July 15, 2017. 

I'm personally excited about this event because of

1) the venue
2) the techniques to be taught
3) the beautiful canvases to be offered
4) the lectures and tours

More information regarding kits, teachers and accommodations will be available shortly.  Feel free to contact Doreen at Art Needlepoint (contact information on the last page of the brochure)

It promises to be a full weekend filled with fun and information, and let's face it--anytime you can stitch with like minded spirits is a very, very good thing.

Click here to access Art Needlepoint website.

Tree of Life from Art Needlepoint


Friday, March 23, 2018

Project List and Thread Inventory Management - 3/23/18

March 23, 2018--For many years (since 2013) I've used and loved DDH Software's HanDBase app to manage my Projects and Thread Inventory (see Favorite Apps and Tools page on the right).  Loved having the ability to sync the data from my PC to my iPad and iPhone and visa versa.  It was the only app I could find that handled thousands of records without crashing, and could be personalized.

However, I've had three issues--firstly, the sync had to be done manually from my PC to each device (no "cloud" here); secondly, DDH Software is a one-man shop (no support if something happens to this guy); and thirdly, when I purchased new equipment (PC, laptop, iPad, iPhone, etc.), it was a bear to re-sync my data to my new equipment.  

In comes Microsoft's OneDrive, a cloud storage system that I'm subscribed to along with Microsoft Office 365.  For a nominal amount each year, both my husband and I each get 1 TB of cloud storage and the latest and greatest Mircosoft Office tools (Word, Excel, Access, etc.).

What does this mean?  I can now use Excel to manage my needlework projects and threads inventory, etc. which is immediately and automatically synced to my OneDrive account.  I can access these Excel files from all my devices and if there is no internet connection, can download them to view offline.

It was very easy to transition my data from HanDBase to Excel by exporting everything to a Microsoft XLS file.  The ability to access the different files (e.g., to access the projects spreadsheet while in the threads inventory spreadsheet) was seamlessly exported to my new Excel files from HanDBase.  That was a nice surprise.

Any downside?  Yes, I miss the "form" used in HanDBase to input a new record.  It's easier to see all the fields in a record when using an input form.  In Excel, I need to scroll across a large spreadsheet and fill in each column.  Not the end of the world--I just need to adapt.

Now I want to learn more about Excel's advanced features.  Maybe an online class--but that is a mañana thing.  Of course, I could really "grow up" and learn how to use Access, including it's form layout tool.


Tuesday, March 13, 2018

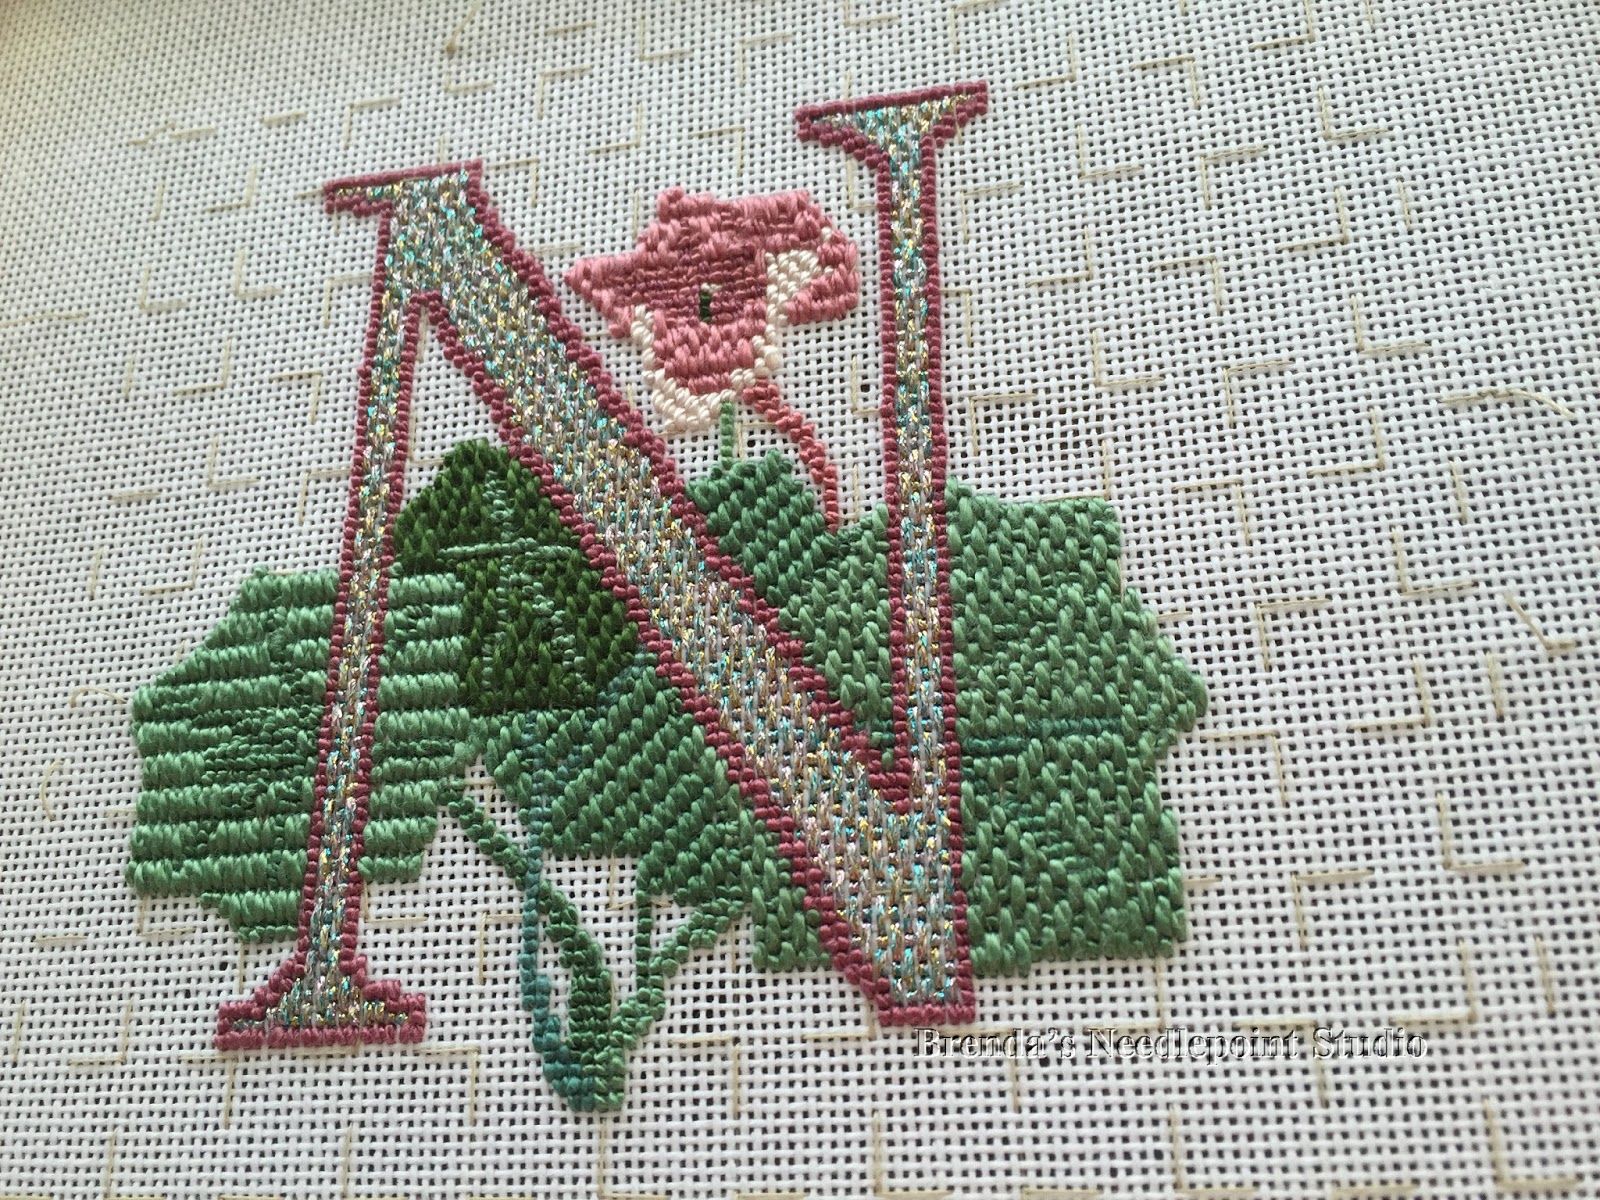
Gardener's Alphabet - The Letter N - Nasturtium - 03/13/18


March 13, 2018--Found a ready made frame for this letter.   Not sure what I'm going to do with it, so maybe a friend with a name beginning with N will want it.  It's very pretty in person.

Gardener's Alphabet Letter N

October 10, 2015--Sometime in mid-August, Liz Morrow sent out an email searching for pilot stitchers for her Gardener's Alphabet project (counted stitch, not painted) described below.  I've admired Liz's work with bargello and jumped at the opportunity to do this.  Here's the end result* and more information follows.


Gardener's Alphabet Letter N


Gardener's Alphabet Letter N Side View
Liz wrote:
  • The Garden Alphabet was designed by Jim Williams as a rug. The designs were first published in Needlepoint News, Jan/Feb 1982 issue. At that time, it was worked on 10-count canvas with Paternayan wool in Tent stitches.  Mr. Williams has graciously allowed the designs to be reworked for 18-count canvas, color coded to DMC floss.  The designs may be worked entirely in Basketweave or Continental. If desired, decorative stitches may be used, particularly for the background and letters. The background could also be left unstitched, especially if a colored canvas is used. A light coverage stitch on a colored canvas is also an attractive option. 
Liz sent me the letter N to stitch, using the canvas, colors, threads and stitches of my choice.  I have to admit that I have very little experience in choosing my own stitches, but tried to keep the different areas uniform in size while giving contrast.  I did something very unusual though (at least for me it’s unusual)—all the stitches are vertical on 24 count congress cloth—there aren’t any diagonal or horizontal stitches on the piece.  The color choices were based on the Kreinik thread used for the letter.  I love this color called Confetti Pink and it works with the flower and leaves.   Also, for the background, the basting stitches, worked over 5 threads in blocks of ten, were left in place.  I thought it gave a nice trellis-like look to it.

If I had more time (this needed to be done by the end of September), I would have redone this project, using threads with more contrast for the flower and a darker thread for the veins of the two center leaves.  Also, because the spaces within the flower were so small, would have chosen different stitches.   Oh well, for the most part it worked and Liz is going to use it.

* Liz has approved this early blog about the project and hopes to have the full alphabet up on her web site by the end of October.  Can't wait to see what the other stitchers have done.


Friday, March 9, 2018

Shades of Christmas Poinsettia Ornament - Updated 3/9/18

March 9, 2018--Took a moment to finish this into a Christmas ornament.  The instructions couldn't have been easier--stitch 2 pieces of linen together on 3 sides using a running stitch, make the cord for hanging, stuff a piece of batting between the two pieces of fabric, then finish stitching (catching the cord).  All that's left is to remove some threads around the ornament--finished.

Ornament Poinsettia Shades of Christmas Front


Ornament Poinsettia Shades of Christmas Back

May 10, 2017--This pretty little poinsettia is complete and all that needs to be done is turn it into an ornament.  I really like the variations in the thread colors, but think the size used--Caron Wildflowers (perle 8 to 12 equivalent), is too thin and doesn't cover the linen as well as I would have liked.  Maybe once it is pressed the thread will "flatten" out and cover more.

Ornament Shades of Christmas Poinsettia Completed
May 4, 2017--I am nearly finished "cross stitching" a beautiful Christmas poinsettia called Shades of Christmas led by Bobbie R. of Delaware's Seashore Chapter, ANG.  I am learning a little about cross stitching (this being my second chapter project) and like how pretty the projects are along with the challenge of counting stitches and thread color changes (I think the crosses are all going in the same direction).  Once the green leaves are stitched, I plan on making this into a very simple ornament with fringed edges.

This is a free chart designed by Crossing Montana for Eterna Silk.  However, I'm using Caron Wildflowers for the threads.  Love the variegations.

Ornament Shades of Christmas Poinsettia