Statcounter

Friday, August 23, 2019

Bargello Techniques - Updated 8/23/19

August 23, 2019--Can't believe it's been 5 years since I completed the stitching on this project.  So rather than let more years fly by, I bought some fabric, foam, cording, etc. and then, instead of working this up into a box pillow myself, took it to my local fabricator.  Love the results.


Bargello Techniques Finished into a Box Pillow


May 2, 2014--Fini!  The last two sections, 7 and 8, are complete and this project is now ready to be made into a box pillow.  If I can find an upholsterer who will sell me the right sized piece of foam, I'll make the pillow myself.  I really enjoyed working on this and learned so much about bargello, especially when it comes to moving from one section to another--merging your patterns, so to speak.  The instruction manual is truly an excellend resource.  Thanks Liz for offering this course through ANG!

Bargello Techniques Through Section 8

Bargello Techniques Section 8 Closeup

Bargello Techniques Section 7 Closeup
March 30, 2014--Section 6 is complete and the missing stitches on Section 5 filled in.  Love how it reminds me of a kaleidoscope.

Discovered that I was 2 threads off at the bottom of Section 5 and used Liz's trick of doing the fill-in stitches over 6 threads (instead of the usual 4) to make Sections 5 and 6 meet.  Liz did this at the bottom of Section 6 to meet Section 3.  Worked beautifully.


Bargello Techniques Through Section 6

Bargello Techniques Section 6 Closeup

January 30, 2014--Section 5 is mostly done.  I'll complete the bottom after I begin Section 6--wanting to be sure of my count.  Must now put this project down for a few months due to other commitments, but look forward to working on it again.

Bargello Techniques Through Section 5

Bargello Techniques Section 5 Closeup
January 5, 2014--Section 4 is now done and I've reached the half-way point.  The instruction manual by Liz Morrow for this project is chock full of information and will make a wonderful reference for future bargello work.  I see all kinds of bargello designs by moi in the future.

Bargello Techniques Through Section 4

Bargello Techniques Section 4 Closeup

December 27, 2013--Just finished Section 3 and moved my horizontal and diagonal basting lines by 2 canvas threads to correct the error I made in Section1 (discussed below).

I'm not sure if I've miscounted, but had to make a small change in the instructions for Section 3 regarding what stitch to do first.  It isn't much of a change--all I did was move the basting indicator (small dot at top of Diagram 27) over 1 thread to the left (this change now agrees with the basting line for Section 2).  After doing so, I then began my stitching 1 thread over to the right.  Now everything fits where it's supposed to (see photo below showing these changes in the instructions).  Still enjoying this project immensely.  The next section is large and looks like fun to do.  Hope to start working on it soon.

Bargello Techniques Section 3 Closeup
Bargello Techniques Through Section 3
Change in Section 3 Instructions
December 18, 2013--Section 2 is done.  This was a large section to complete, but once the pattern was set up, it was a dream to stitch and didn't take long.  Love those over 4 stitches.  Liz suggested trying different color patterns, but I chose to stick with the plan since I'm not sure there would be enough thread to do something different.  Anyway, I love the color pattern as designed--it's a treat for the eyes.

PS--Since Section 1 was started "upside down", I inadvertently began two threads down from where I should have, so now I need to rebaste Sections 3 - 8.  Not a big problem and glad I realized what happened.  I'll just need to add two threads of stitching to the top of Sections 4 and 5 to equal Section 1.  You can see in my picture of Section 1 Closeup that there's an extra row of 2 threads stitched on the top.

Section 2 Closeup


Complete Through Sectiok 2


December 9, 2013--I'm loving this project!  So far all of the basting has been done to mark off the sections (hard to see in the picture--used very light pink thread) and Section 1 is complete.

The shop where I purchased my threads did not have Silk & Ivory as recommended by Liz, so they suggested Planet Earth and Vineyard Silks.  The lightest and darkest of my threads are Planet Earth and they cover beautifully.  Perfect for this project.  The Vineyard Silks...not so much.  Others have written on the class Yahoo Group List, confirming this is NOT a good substitution (thanks Melita for your photo).  However, in an email to the group, Liz suggested a "looser twist" or tension if using threads that cover less well, so I'm doing that with pretty good success.  The picture below was taken at a slight angle and, because my tension is loose, there's a loft in the threads, so the coverage looks good (for the most part).   Since I don't have an LNS, I'm sort of stuck with the thread purchases I made before I learned of this problem.

I really liked Liz's suggestion to begin the pattern in the middle, dividing the thread in half, working one side from the middle to the right, then the other side from the middle to the left.  My thread skeins were easily cut into 40" lengths, so this was perfect.  Had no waste knot to start and just enough tail on each end to bury into threads on the back.  Since I used only half of the length for each side, there was less drag and wear on the thread through the canvas.

Bargello Techniques Section 1 Closeup
This is a huge project--on 18 x 22 stretcher bars.  Will have to be extra careful not to knock over my glass of wine.

Bargello Techniques Section 1
November 20, 2013--Just purchased my threads for this project... was unable to find Silk & Ivory as recommended by Liz.  However, the wonderful personnel at Creative Stitches in Dallas, TX (where I'm currently visiting my sister) suggested Vineyard Silks and/or Planet Earth Silks.  Below is a picture of my color choices.   The instruction manual has already arrived in the mail and am looking forward to starting the class on December 1st.


Bargello Techniques Color Palette and Threads
September 9, 2013--Have just signed up to take Liz Morrow's Bargello Techniques Correspondence Course through ANG's CyberPointers Chapter.  I love bargello and have had few opportunities to really learn about these types of stitches.  Liz is a wonderful designer of needlepoint bargello and am keeping an eye on certain of her new projects hoping she'll offer them as classes in the near future.

See the tab above called In Process Projects for a project photo done by Liz for the class.


Tuesday, August 13, 2019

Expressions in Rose Gold - Updated 9/14/19

September 14, 2019--Just learned this piece garnered a 1st place ribbon at the Rehoboth Beach Museum's 9th Annual Needlework Exhibit.  Thank you Nancy Cucci for such a beautiful design.


August 13, 2019--Just picked this up from the framer at Aaron Brothers out of Michaels Arts and Crafts.  Love the rose gold metal frame.


Expressions in Rose Gold Finished

The woman who did the framing had a devil of a time with this one--mainly because the canvas was a bit crooked.  Even though I placed the canvas tight on the stretcher bars, the weave itself was not even, something I didn't notice.  When she tried to cut the mats evenly on both sides using the computerized cutting tool--wham, all out of kilter.  She then tried cutting the mat by hand using a roller type blade, but that left deep cuts in the corners--not a good solution.  Lastly she cut the mats by hand using a knife--perfect.

I give the framer at Aaron Brothers/Michaels lots of credit for making this just what I wanted.  I also love the price for the 16" x 13" metal frame, special mounting of the canvas and 3 mats:  $147.52.  Of course, I used those 70% off coupons, but I get those by email almost every day.


June 4, 2019--Completed the stitching on the 7th Nancy Cucci project to date.  This one is called Expressions in Rose Gold.  The others I've stitched are:  Mini Embellishment Ornament, Sisters, Lone Star Heart, Irresistible Iridescents, Stitches in Sterling, and Close to My Heart.

Now off to the framer.

Expressions in Rose Gold by Nancy Cucci Completed

May 15, 2019--Serious progress has been made on this beautiful project.  The central section was the hardest and most time consuming portion to stitch with all the various beads.  Now onto the outside sections stitched in Anchor 1 White and Kreinik 021 Copper.  These boxes will take no time at all.

Expressions in Rose Gold Central Portion Completed


March 26, 2019 - A while ago, I signed up to take a class offered by the Northern Virginia (NOVA) Chapter of ANG (of which I am a member) taught by Nancy Cucci herself called Expressions in Rose Gold.  I've seen this piece completed by others and have always wanted to stitch it.

Even though I couldn't be in Virginia for the class (a medical issue) that was held last weekend, I was able to ghost it.  And to feel part of the program, I completed the prework that was mailed to everyone a few weeks ago.  So now I'm waiting for the complete instructions, threads, and all the beads associated with this project.   And there will be lots of beads, I'm sure.  Once this is framed, I know exactly where I'm going to hang it.

Expressions in Rose Gold Prework


Wednesday, August 7, 2019

Woodlawn, VA - 57th Annual Needlework Exhibit - 8/7/19

August 7, 2019--Woodlawn has posted information on their website about the March, 2020  57th Annual Needlework Exhibit (click here).


Start Stitching Now for our 2020 Needlework Show & Sale, which has a  theme we know you will support.   


You have until JANUARY, 2020, to submit your pieces, but we know how long it takes so we wanted to give you a "theme sneak peak" right now. 

Women. Choosing to Craft. 

2020 marks the 100th anniversary of the 1920 ratification of the 19th Amendment to the United States Constitution, which granted all women the right to vote and to be a participant in our democracy.

At this year’s show, we hope that numerous and diverse pieces of extraordinary needlework will be submitted!

We want to fully engage us all in the broadest story possible of what “making needlework” might mean for anyone, everywhere, but particularly for women, who still are not always free to choose what to make and how. 


Needlework, like most craft, can be just a beautiful art piece, or it can be a pathway that its maker uses to express opinion. Often, it is both. Activism within the craft community has become more commonplace in our modern era, but traditional, historical pieces serve also to offer us a glimpse into the basic right of women to choose their path.

What will you choose to  make for us to showcase in 2020? 

Thank you Linda Mosch for forwarding the email about this.

Sunday, August 4, 2019

Mini Embellishment Ornament - Updated 8/4/19

August 4, 2019--This little 2" x 2" project designed by Nancy Cucci is now finished as an ornament by yours truly.

Am not happy with the finishing results, and know why.  It was suggested we stitch 2 rows of tent stitches so that the gold edge would not be folded around the mounting board, only the 2 rows of extra tent stitches would be wrapped around.  That's fine if using a thick mounting board, but I use a thinner board that's easier to cut to shape (click here for more information).   Because it is thinner, only one row of tent stitches would have sufficed.   I tried to get this extra row of stitching to fold under at the corner edges, but had a major fail.  It was too late to take out the rows of tent stitching since I used the basketweave method.   The only thing left to do was to plow ahead and "finish" the ornament as best as I could.  Here is the result...


Ornament Mini Embellishment Finished Front
Ornament Mini Embellishment Finished Back
As with other ornaments I've "finished" myself, I learn something new with each one.   Someday I'll be an expert....maybe when I'm 85.  One can only hope.  LOL.


February 8, 2019--Just finished stitching this sweet Mini Embellishment ornament designed by Nancy Cucci.  My ANG chapter, Delaware's Seashore Chapter, offered this as the February meeting project led by Roseanne J.  The written instructions were easy to understand and Roseanne gave some great tips on how to complete the piece.  Now I need to decide how to "finish" it--as a hanging ornament, box top, etc.

Mini Embellishment Ornament Completed


Wednesday, July 31, 2019

Florentine Heart - Updated 7/31/19

July 31, 2019--Finished this interesting heart into an ornament using a 6 ribbon Kumihimo cord.  It came out real cute.


Heart Florentine Canyon Front

Heart Florentine Canyon Back


September 11, 2018--Just finished the stitching on this delightful CyberPointers project.  The colors used came from an overdyed RG Mandarin Floss thread and would not normally have been my first choice--way out of the box for me.  I'm going to call this "Canyon" Heart since the colors make me think of the way canyons look at different times of the day.  It's interesting how the center color played out on the overdye, clumping the yellow in one place.   Do you think of a sunrise or late afternoon sun?  What do you see?

Heart Florentine aka Canyon Completed


September 9, 2018--As a member of ANG's CyberPointers online chapter, I love stitching their meeting offerings whenever possible, and because I love bargello stitches, this month's project is a must do for me.  The project called Florentine Heart is designed by Patricia Tector, and uses an overdyed thread from which 5 different thread colors are drawn, all taken from your own stash.

Years ago I received an RG Mandarin Floss M924 overdyed thread at an ANG NOVA chapter event as a table favor and have always wanted to use it somehow.  This strandable bamboo floss, along with four matching DMC threads and an RG Splendor thread are perfect for the Florentine Heart--at least I think so as of this point in the project.

I have thus far completed the instructions for Day 1 and below is a photo of the heart outline along with my thread choices.

Now onto the instructions for Day 2.

Florentine Heart Outline - Day 1
Florentine Heart Threads

PS  The heart outline was copied from another project that had the stitches already graphed--all I had to do was count out each section.  I found this preferable over tracing a heart design on the canvas and figuring out where to place the tent stitches.   I'm either very lazy or an extreme genius--or both.  LOL.

Sunday, July 28, 2019

Valentine Heart - Updated 7/28/19

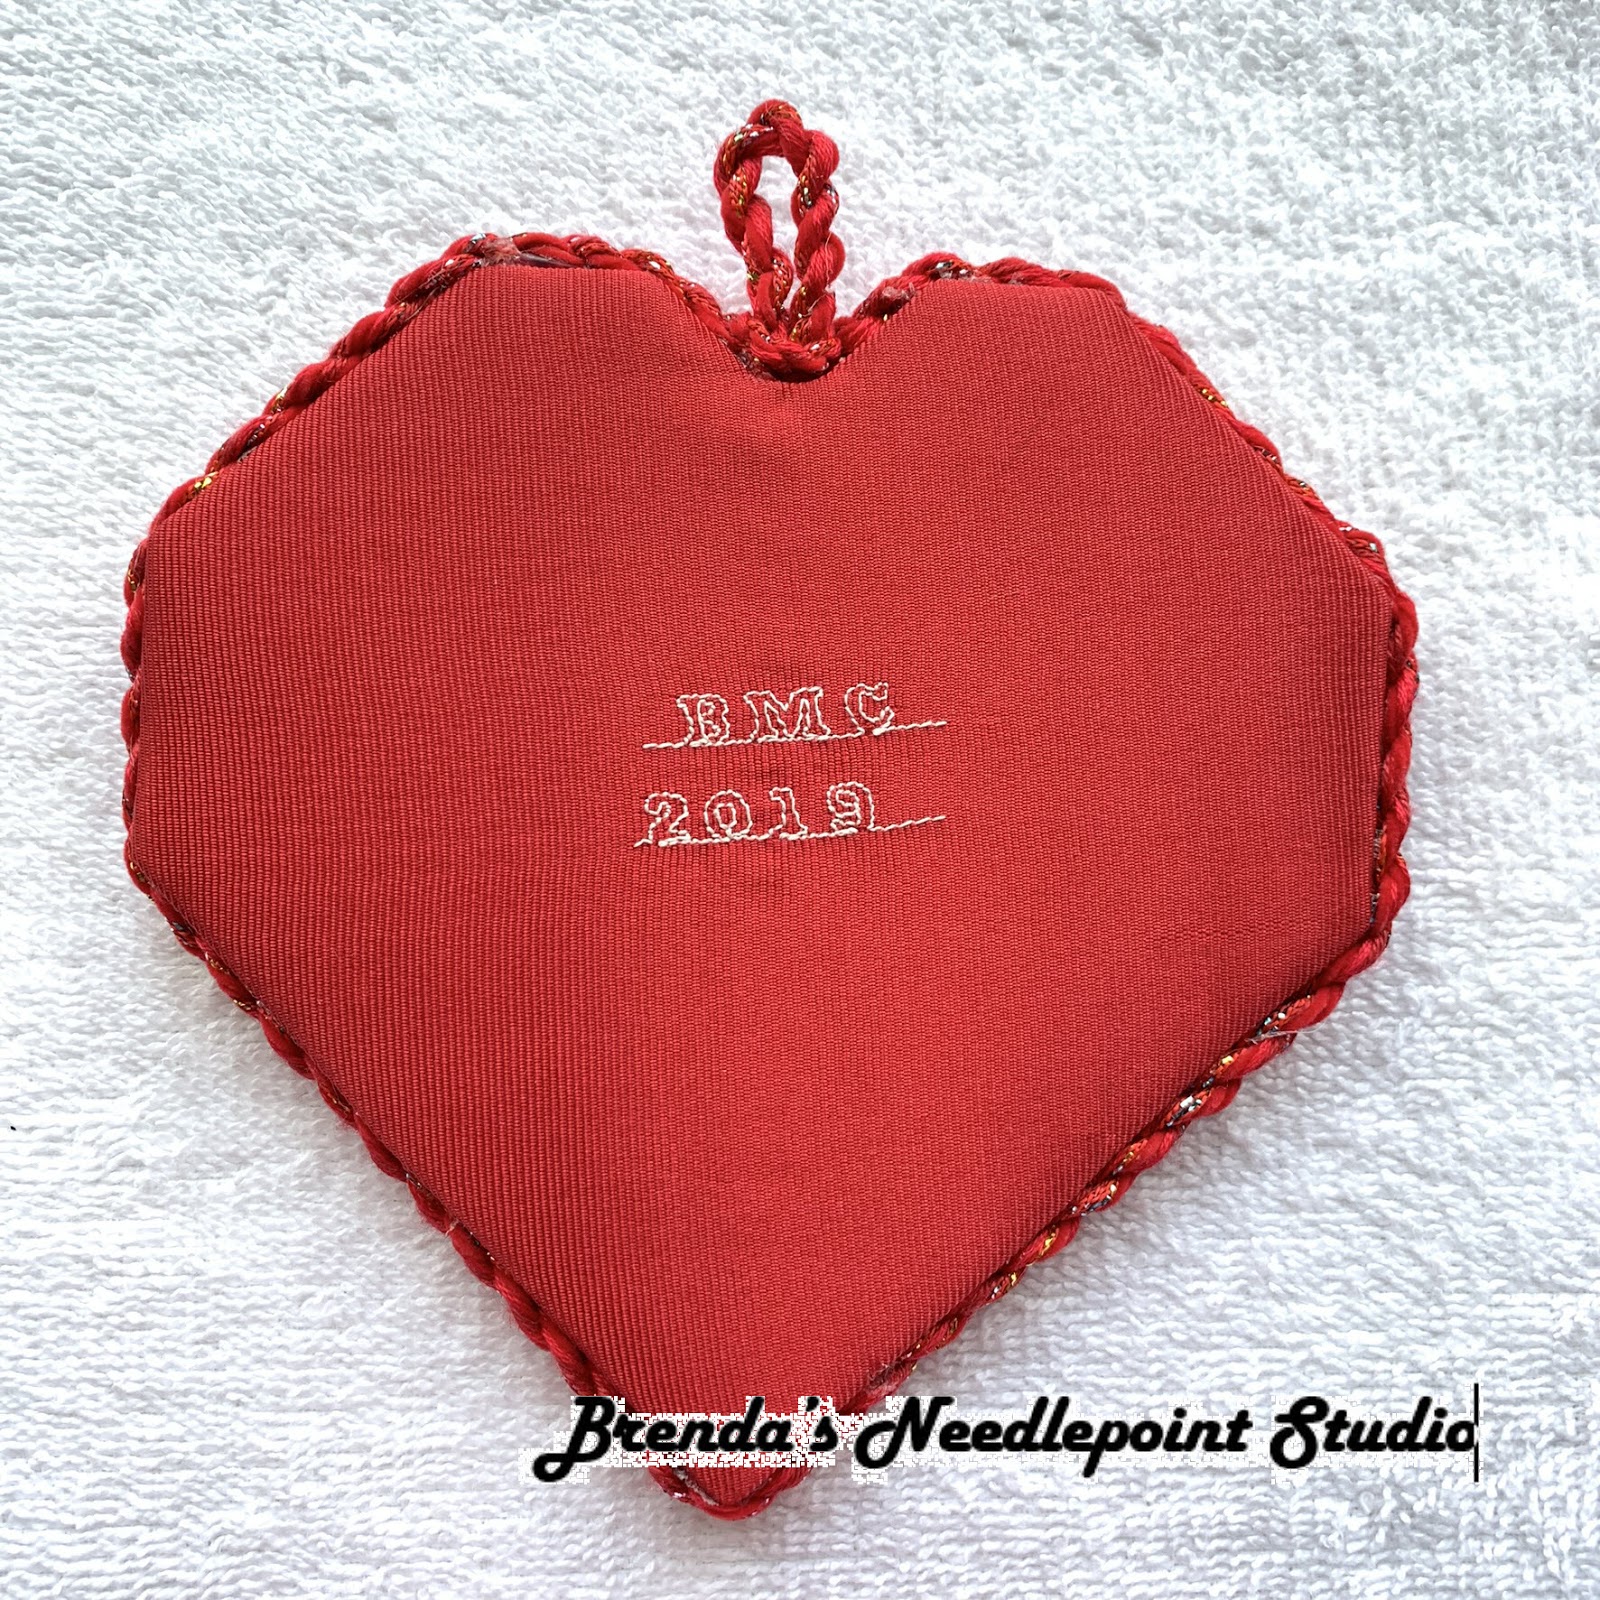
July 28, 2019--Finished this heart into an ornament today.  Like the results, but ask you overlook the crooked initials and year on the back.   Someday I'll remember to draw an erasable line on the fabric before doing the sewing.

The cord used for the bow is thinner than the one going around the heart.  When I first made it, I realized the heart needed a more substantial cord going around it, so saved the thinner one for a different use--like the bow,

Without further fanfare, here it is:
Heart Valentine Finished

Heart Valentine Finished Back


July 9, 2019--Completed the stitching on this cute heart.  It was a lot of fun and the 50 blocks worked up fast.  Will make the cording and find backing fabric from my stash today.  Looking forward to hanging this in my dressing closet where I have most of my other non-holiday ornaments.

Valentine Heart Completed


July 4, 2019--Happy Independence Day.  My stitching, not having anything to do with the holiday, does at least have the color red in it.

My ANG chapter, Delaware's Seashore Chapter, had a class called Valentine Heart led by one of our members, Roseanne J.  The project, published in the January, 2017 issue of ANG NeedlePointers Magazine, is from Wiehenberg Designs and has 50 blocks of different stitch combinations.  A challenge for even the most experienced needlepointer especially since the diagrams are not numbered as to how to execute the stitch.

So far I've completed 19 blocks using 5 different threads.   Not only did I chose different, but similar colors, I chose different textures as well.  It's interesting, to say the least (IMHO).  Here's a photo of my progress to date.

Valentine Heart through Block 19


Tuesday, July 23, 2019

Rehoboth Beach, DE 9th Annual Needlework Exhibit - New Closing Date - Updated 7/23/19

July 23, 2019--I have just been informed that the Rehoboth Beach 9th Annual Needlework Exhibit will run from September 14, 2019 through November 3, 2019 (not October 27, 2019 as originally posted).   Except for this change, everything else in the below entry form remains the same.

The change is made so as not to conflict with Rehoboth Beach's Sea Witch Festival which brings in lots of traffic and festivities.  Hope this date works best for you as well.


June 24, 2019--Below is information and entry form for the 9th Annual Rehoboth Beach Museum Needlework Exhibition.   Come to the beach in the early Fall and see the exhibit.  Better yet, come around Labor Day to add your entry, then again later to view all the pieces.  

PS:  It's recommended you call before coming by to be sure the museum is open:  302-227-7310.


Rehoboth Beach Museum

9th Annual Needlework Exhibition

September 14, 2019 through October 27, 2019


On behalf the Rehoboth Beach Historical Society


Entries accepted August 23 through September 8

Judging September 9 & 10 & 11

Show opens September 14, 2019

Annual Lecture October 27 at 1p.m.

No pick-ups before 2 p.m.


Exhibition details


EXHIBIT DATES:


September 14 through October 27, 2019


LOCATION:


511 Rehoboth Avenue, at the entrance to the City of Rehoboth Beach, near the lighthouse traffic circle and the Chamber of Commerce Visitors Center.


EXHIBITION HOURS:


Monday through Friday, 10-4, and Saturday and Sunday, 11-3


DAILY ADMISSION FEES: Admission is by donation.


RECEPTION:


There will be a closing lecture at 1 p.m. Refreshments will be served. You may pick up your work no earlier than 2 p.m.


ELIGIBILITY:


Each entry must be the work of a living person and appropriately finished. We reserve the right to display items in the manner we deem most appropriate and to refuse items deemed inappropriate for display. Entries requiring hanging must be wired. No saw tooth hanging devices will be accepted. Entries must be labeled with the stitcher’s name and phone number.


DIVISIONS:

Adult: For stitchers 18 years old or older.

Junior: For stitchers 17 years of age or younger at the time the work was completed.


CATEGORIES:

Original

A unique design and composition, which is entirely the product of the stitcher’s own mind and hands. This includes interpretations of nature and art through stitching.


Commercial

Works using any element of a designer’s pattern for needlework. Includes: charted or painted canvas, printed graphs, kits, class projects, and minor alterations thereto.


TECHNIQUES:

·      Beadwork

·      Canvaswork/Needlepoint: Traditional, multi-stitch (4+)          or painted canvas

·      Counted Thread: Including Blackwork, Cross Stitch      (even weave), Drawn thread, Hardanger

·      Sampler: Traditional or Multi-stitch (4+)

·      Embroidery: Including but not limited to Crewel,          Goldwork, Silk Ribbon, Stumpwork, Surface, White          Work.

·      Heirloom Sewing: Smocking, Fine hand sewing, Needle Lace, Quilting (NO QUILTS LARGER THAN 36 x 36 and must come with hanging supplies. (Please note, only those quilts awarded prizes will be displayed in full due to space constraints).

·      Lace: Bobbin Lace, Battenburg, Filet Guipure, etc.

·      Miniature: 32-count or higher, over one thread

·      Mixed Media

JUDGING:


A nationally certified judge will award ribbons. Major award winners will be announced just prior to the opening reception.  Entrants should fill out forms carefully to ensure that each piece is properly classified. The Historical Society reserves the right to re-classify entries.


AWARDS:


Best in Show – across all techniques

First Place, Second Place, Third Place – for each technique

Honorable Mention  - the judge reserves the right to choose the number of honorable mention winners

People’s Choice – by popular vote


All entries must remain at the Rehoboth Beach Museum for the duration of the exhibition.


MAXIMUM NUMBER OF ENTRIES: Five.  Entries must not have been in previous RBHS exhibits, but may have been in  other shows.


ENTRY FEES:

Members of RBHS: $5 per entry, $5 per additional entry

Non-members:  $10 per adult entry, $5 per additional entry

Juniors:  $5 junior entry, $1 each additional entry. 


Sets containing several items will be charged $1 for each additional item.


Make checks payable to Rehoboth Beach Historical Society (RBHS), 511 Rehoboth Avenue, Rehoboth Beach, DE 19971


Society Memberships are available:

Individual: $25

Household: $35

Supporting: $50

Anna Hazzard: $100


Membership is tax-deductable. Please send a separate check for membership.


ENTRIES BY MAIL:


PLEASE NOTE: Entries will be accepted by mail but will not be returned by mail. All entries must be picked up at the museum. Entries MUST BE RECEIVED BY September 7, 2019. Entries by mail must be shipped in a sturdy container and must contain a completed entry form. Mailing address: Rehoboth Beach Museum, 511 Rehoboth Avenue, Rehoboth Beach, DE 19971. Please call (302) 227-7310 for information.


HAND DELIVERED ENTRIES:


Exhibitors are urged to pre-register by sending completed forms and fees in the mail to The Rehoboth Beach Museum by August 22, 2018. Please make checks payable to the Rehoboth Beach Historical Society. Walk-in entries are accepted August 23 through September 8 between the hours of 10 a.m. and 3 p.m. on weekdays, and 11 a.m. to 3 p.m. on Saturdays and Sundays. No entries will be accepted after September 8, 2019. Entries must be picked up one full weekend after the show closes.


TERMS AND CONDITIONS:

1.    Insurance coverage is the responsibility of the owner/depositor.

2.    The depositor warrants that he or she holds full and clear title to the object(s) identified on the face of the entry form or is the agent of the owner authorized to deposit the objects(s) with the Rehoboth Beach Historical Society.

3.    All objects may be examined, photographed, measured, or otherwise reproduced for educational or promotional purposes.

4.    The object(s) will be returned only to the depositor unless RBHS is notified in writing to the contrary.

5.    If objects are not picked up by the last pick-up date, a $5 per day storage fee will be charged. After 30 days, the object will be deemed an unrestricted gift to the museum.


ENTRY FORM – Maximum 5 entries

Please reproduce this form or print from www.rehobothbeachmuseum.org

(please attach a photo of your work if possible and an artist’s statement)


Stitcher Name_________________________________________

Exhibited by___________________________________________

Address______________________________________________

______________________________________________________


Phone (home) _______________Phone (cell) _______________

Email (print CLEARLY) _______________________________


Division:     _____Adult        _____Junior      

Category:   _____Original   _____Commercial


Technique (circle one):  

Beadwork             Canvaswork/Needlepoint

Sampler                      Counted Thread/Cross Stitch

Embroidery               Heirloom Sewing/Quilt

Miniature                   Lace  ___

Mixed Media


Title __________________________________________


Measurement:  Length____      Width____


Description (framed piece, pillow, etc.) ___________________

Thread Count: ________ Pattern Source/Class _____________


In submission of this entry I hereby agree to abide by the stated rules of the exhibition, and terms and conditions listed on the enclosures. 


Signature   _________________________       

Entries accepted at the museum 511 Rehoboth Avenue * (302) 227-7310


# of entries __ times Entry Fee = $_________       

                           (office use only) AMT Cash $________    Check #________  


Labels: Print clearly and affix one label to each piece. You may use your own label but it must have this information.


Name of Stitcher: __________________________________________

Title of Piece: _____________________________________________

Technique: ________________________________________________


Name of Stitcher: __________________________________________

Title of Piece: _____________________________________________

Technique: ________________________________________________


Name of Stitcher: __________________________________________

Title of Piece: _____________________________________________

Technique: ________________________________________________


Name of Stitcher: __________________________________________

Title of Piece: _____________________________________________

Technique: ________________________________________________


Name of Stitcher: __________________________________________

Title of Piece: _____________________________________________

Technique: ________________________________________________


Name of Stitcher: __________________________________________

Title of Piece: _____________________________________________

Technique: ________________________________________________


Name of Stitcher: __________________________________________

Title of Piece: _____________________________________________

Technique: ________________________________________________


Name of Stitcher: __________________________________________

Title of Piece: _____________________________________________

Technique: ________________________________________________


Name of Stitcher: __________________________________________

Title of Piece: _____________________________________________

Technique: ________________________________________________


April 9, 2019--Heads Up!!!  I just learned that the 9th Annual Rehoboth Beach, DE Needlework Exhibit will open on Saturday, September 14, 2019.  Pieces for the exhibit are to be dropped off the week after Labor Day.

Please plan on not only attending this delightful venue at the beach, but to also participate by entering your needlework into the exhibit.  September is a beautiful time of year to visit the beaches here in Delaware and viewing the exhibits on display at the museum would be a fun addition to your holiday.

More details and entry form to be announced soon.  Hope you take home one of these ribbons.


Sunday, June 30, 2019

Holiday Ornament Green Bell - 6/30/19

June 30. 2019--Number 9 of the 16 Susan Portra Holiday Ornaments collection is now stitched (click here for more information about them).  The RG Neon Rays was difficult to lay absolutely flat, but the beautiful shine compensates for the bit of unevenness.  The side view shows the dimension added by the size 14 beads.  The instructions for this ornament were published in Needlepoint Now Magazine 2014 Issue 6, Vol XVI.  


Ornament Holiday Bell Green Completed


Ornament Holiday Bell Green Side View

Saturday, June 22, 2019

Ornament by DebBees Designs for 2018 - Updated 6/21/19

June 21, 2019--This turned out to be a really cute ornament.  Love all the shine and dimension.  Debbie used French knots on her example, but suggested beads would work as well.  So beads it was for me (find them easier to stitch than French knots).  Now to make some cording and a tassel.  Will post the finished results soon.


Ornament by DebBees Designs for 2018 Completed

May 11, 2019--Sometime in January of this year, Debbie Rowley of DebBees Designs offered a free ornament for 2018 through FiberTalk, the Podcast by Gary Parr.  I ordered this unusual design and just recently began stitching it.  Debbie uses a new 6 strand thread by DMC called Etoile (click here for a nice review).  I find this thread easy to work with and it gives a soft look of sparkle.  Below is my progress to date.

Ornament by DebBees Designs for 2018 Stitched to Date
Since this one is dated 2018, I wonder if she'll produce a new ornament each year going forward (cannot find ornaments for prior years).