Statcounter

Saturday, August 12, 2023

Scissors Case Lacy - Updated 8/12/23

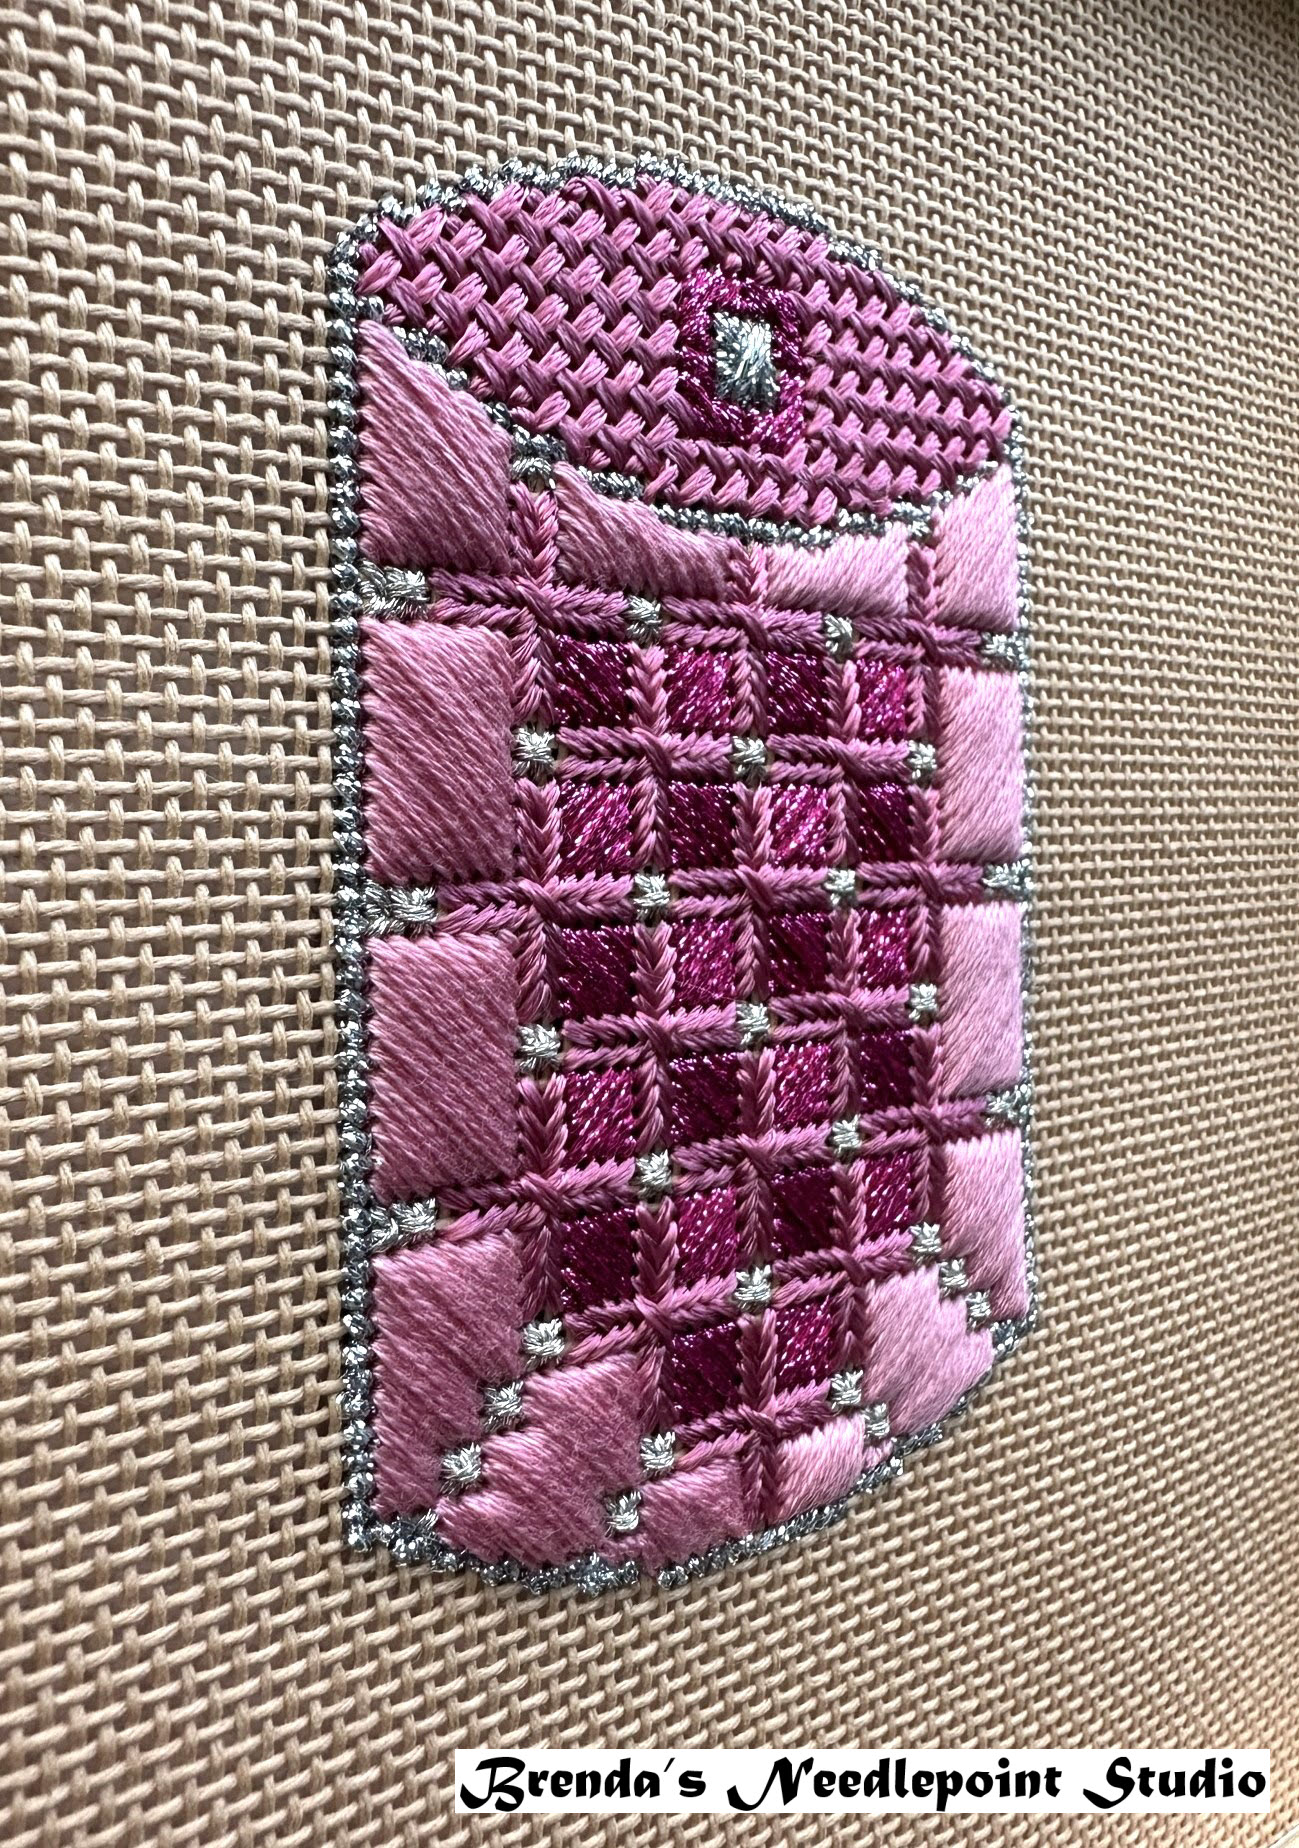
August 12, 2023--The stitching is done and this little scissors case has been sewn together with a binding stitch and lined.  It's rather cute, if I say so myself.   Now I need a beautiful pair of scissors to place in it.

Scissors Case Lacy Back Finished

Scissors Case Lacy Front Finished

July 23, 2023--The upper half is stitched except for the middle area where a ribbon will be couched.  That will get done after the bottom half is finished.  I like how the overdyed colors are playing out on the canvas.   I'm putting this away for a while to use as my "take along" project for social stitching days.

Scissors Case Lacy Upper Half Completed

July 21, 2023--At my local EGA meeting with the Brandywine Chapter on Wednesday, we received full kits to stitch Margaret Bendig's 2000 Petite Project offered through EGA to its members.  What a delightful project.  It's worked up using Valdani Pearl 8 which I love--no need to "lay" the thread and the variegated color is beautiful.  I've completed the outline done in Smyrna stitches and look forward to working up the body of the case.  Our instructions also guide us through the "finishing" process.


Here's my progress to date.

Scissors Case Lacy Border


Below is a photo of the project as stitched by the designer.

Scissors Case Lacy Project Photo

Saturday, July 29, 2023

Coin Case Stitch and Zip - 7/29/23

July 29, 2023--This little "stitch and zip" coin case by Alice Peterson Co. was donated to Delaware's Seashore Chapter of ANG and I picked it up to stitch as a "travel" project.  The front has a 14 count interlock canvas with the letter "A" painted on it in yellow.  I understand this type of case is considered a beginner's project, but after spending the last week working on it, I don't think so.  It was extremely difficult stitching over the folded edges and corners of the canvas so they wouldn't show from the inside.  It was also difficult to stitch to the very edge of the canvas where it is attached to the zipper.  Then there is the fact that I'm not used to stitching "in hand" and had some issues with maintaining tension while doing something as simple as basketweave.  

Coin Case Stitch and Zip

I'm satisfied with the end results for the most part.  To stitch the initials "BC", I used an unusual gold DMC Pearl 5 thread #5282.  I used only 1 strand but realized 2-3 strands would have looked much better.  I found the perfect color green--Caron's Impressions, a 50% wool and 50% silk thread in my stash, using 2 strands.  The coverage worked well, hiding the yellow "A" which was prepainted on the canvas.    The lettering I used is from Tink Boord-Dill's negative space alphabet which was published in ANG's NeedlePointers Magazine, 2005, Issue 4.  

Alphabet from Tink Boord-Dill PressedOut 18 Negative Space ANG NPs 2005, 4


Wednesday, July 5, 2023

Rehoboth Beach Museum's 11th Annual Needlework Exhibit - 7/5/23

 July 5, 2023--Save the dates--Rehoboth Beach, Delaware Museum's 11th Annual Needlework Exhibition will take place September 16 through November 12, 2023.  Flyer is in the link below.  

Plan on making three trips to the beach:

  1. Drop off your needlework piece(s) (August 26 through September 9, 2023)
  2. View the exhibition (September 16 through November 12, 2023)
  3. Pick up your needlework (November 12, 2023, AFTER 1:00 pm).  
Not only will the exhibition be judged, but each piece gets a critique--an excellent opportunity to learn about your stitching.

The link to find the application form on the museum's website can be found at:

Rehoboth Beach Museum

Looking forward to seeing everyone's work.


Monday, June 26, 2023

Master Needlepointer Program of ANG - Stage 2 - 6/26/23

June 26, 2023--I just received the results of my Stage 2 project for ANG's Master Needlepointer Program.  This one was a doozy and required lots of planning on my part.   I am pleased to have received 118 points out of the 120 available.   Here is the end result.....


Some of the requirements for this stage were:

  • Shapes other than square or rectangular are required.
  • Design must have at least 12 stitch areas, half of which are bounded by at least one curved edge.
  • eight of the 12 supplied stitches must be used and must include at least one diaper pattern.
  • Color scheme must be either complementary or split complementary.
For the shape, I chose to use Friendship Circles designed by Carol Algie Higginbotham which had to be enlarged to fit the required dimensions on Congress Cloth (commercial designs are allowed).   This appealed to me because of its symmetry.

Then I chose the split-complementary aqua blue colors from Joen Wolfrom's Color Tool.  This was after using my iPad to place various color schemes on the chosen design as drafted (again on my iPad).


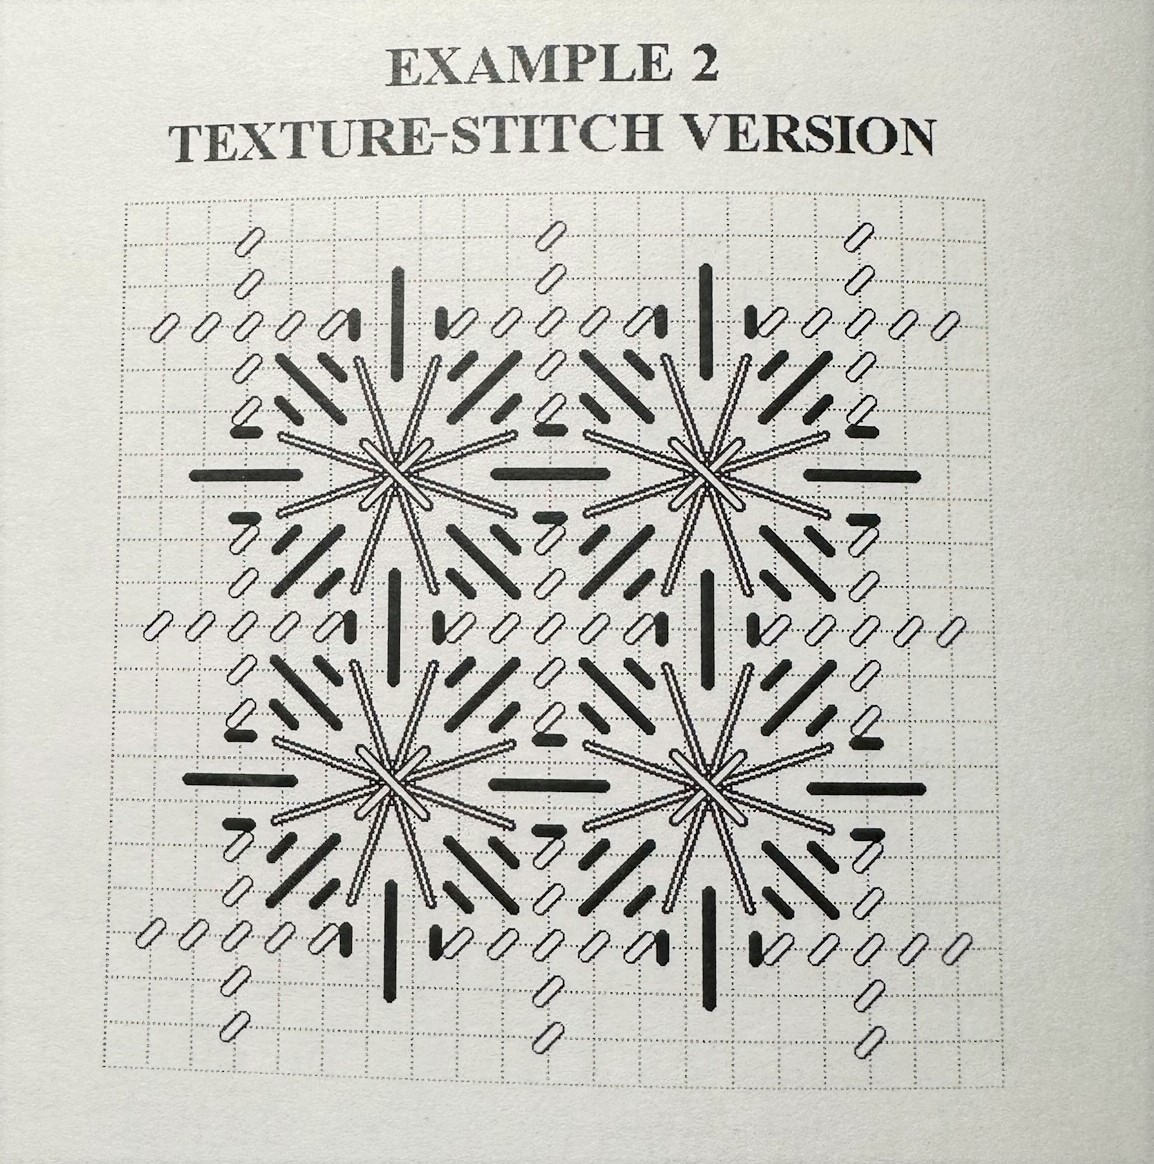
The stitches used had to be compensated on all edges since there isn't a straight line anywhere on the project.   Again, I used my iPad to draft out some of the more complex stitches, especially for the Jessica and Waffle stitches used in the center.   In the example below, I was able to draw in the full design, then "erase" the areas not to be stitched.


The diaper pattern used in the center of the outer four circles was from Ann Strite-Kurz's Diaper Patterns book.   It may not be obvious, but the centers of the four outer circles all have the same pattern, but the four colors are used differently.  Again, I used my iPad to draw the various colors on my graph to see if I liked the outcome.  


A darning stitch was one of the requirements and I chose to place it along the outside edge.  Again, I graphed the "donut" darning pattern on my iPad to make sure I liked the scale and pattern.  Can you tell that the threads are all stitched in the same horizontal direction?

That's pretty much it.  A serious challenge for me and I may have been a bit over ambitious in my choice of stitches, but it all worked in the end.


Saturday, June 24, 2023

English Wildflower Basket - 6/24/23

June 24, 2023--This English Wildflower Basket is a lovely painted canvas project designed by Kirk & Bradley.  The stitch guide by Jinny Barney was published in the Needlepoint Now Magazine, 2019 September/October issue.   When I ordered the canvas from Needlepoint.com, I ordered the full kit which included the same stitch guide but set up just a bit differently.  For example, I just completed the background stitch and noticed the magazine stitch guide graphed it as a "wrap" stitch worked on the diagonal.  The stitch guide that came with the kit called for the background stitch to be done using the darning method.  Both have their benefits--the wrap method saves thread (this is what I chose to use) while the darning method allows for the shine of the thread to show through from the back (the thread used was RG Silk Lame Braid which is very shiny but doesn't show in the photo).   

The painted canvas doesn't have a table upon which the vase would sit, so I didn't bother adding one.  

English Wildflower Basket Background Completed

I hardly ever work on painted canvases, preferring counted projects instead.  However, for a class I was to teach to my ANG chapter on working up silk ribbon flowers on canvas, this design was perfect to use as an example.  It was easy to find YouTube videos of the flowers used and they will fill up the canvas beautifully (see the project photo under the tab "Pages" on the right side in the In Process Projects file). 

Next up--the wicker basket to be worked up using Straw Silk threads. 

Friday, June 9, 2023

Beaded Starfish Pendants - 6/9/23

June 9, 2023--Currently I'm President of my local American Needlepoint Guild chapter, Delaware's Seashore Chapter, and I like to give the members little table favors when attending the chapter's Anniversary Lunch in June and the Holiday Lunch in December.  This month's table favors were little beaded starfish pendants which I learned how to do from a free YouTube video designed by Kelly Dale from a shop called Off the Beaded Path (the printed pattern is available at a small cost from the shop).  They are fun and quick to work up and are great stash busters using size 11 and 8 seed beads measuring about 1.75" across.   They can be used as necklace pendants, key fobs, purse charms, etc.  Here's a photo of what I put together for my chapter mates....


Saturday, May 27, 2023

Rozashi Daiya Variations Kit - Updated 5/27/23

May 27, 2023--I really enjoy Rozashi (which, in Japanese, means Ro - Canvas and Zashi - To Stitch).  You use mostly a vertical stitch on a type of canvas where the horizontal threads are much wider than the vertical ones.  In the United States, this type of canvas is only available through a few instructors from whom I've been fortunate enough to take classes (all online at this point).  

Here's a photo of the finished Daiya Variations using the Lee Ornament holder.  It's a good thing we are taught to seriously "paste" the back of the stitching because I had to cut about 1/4" off the circle as drawn for us on the canvas.  This meant cutting into the stitching--something I hated to do, fearing the threads and canvas would unravel.  Phew, because of the heavy Nori paste/starch, everything remained intact.  Next, the stitched circle had to be pushed, using a butter knife, into the Lee Ornament Holder.  This too caused me some anxiety fearing all that manipulation would hurt the piece.  Nope--everything held up fine and I now have a pretty ornament to hang in my dressing closet, along with all my other "smalls".

Rozashi Daiya Variations Ornament Finished

May 12, 2023--CyberPointers Chapter of ANG recently had a Rozashi class offering taught by Kate Festo called Daiya Variations.  I'm just now beginning to work on this beautiful piece and enjoyed going through everything in the kit which includes a rozashi canvas glued onto a wood frame, written instructions, 2 sumptuous silk thread colors and 1 packet of gold threads, needles, nori paste, AND a gold Lee round ornament to "finish" this project.  

I've read the instructions and watched the Zoom video by Kate, so I'm now ready to stitch.


Rozashi Daiya Variations Kit

BTW, Kate Festo is the daughter of Margaret Kinsey, famed Rozashi instructor and designer.

Monday, May 15, 2023

Russian Spiral Bracelet - 05/15/23

May 15, 2023--I now have a bracelet to match the Russian Spiral necklace (see below).  Matchie, matchie, I say.  And I love how it sparkles and can be dressed up or down.  I now see myself wearing these two pieces with blue jeans quite often.

Russian Spiral Bracelet 2023-05

May 11, 2023--As I fall deeper into the rabbit hole of beaded jewelry making, I have another item to show off, so to speak.  This time its's a Russian Spiral necklace using the pattern given me at a bracelet class taken from Karen Baratta but elongated into necklace length from which I can hang various pendants.  The beads used are silver-lined straw gold, size 11, and silver-lined cobalt blue, size 8.  This is so pretty that I want to now make a matching bracelet and a pendant (stay tuned for this one).

Russian Spiral Beaded Necklace 2023-05-11


Thursday, May 11, 2023

Russian Spiral Necklace - 5/11/23

May 11, 2023--As I fall deeper into the rabbit hole of beaded jewelry making, I have another item to show off, so to speak.  This time its's a Russian Spiral necklace using the pattern given me at a bracelet class taken from Karen Baratta but elongated into necklace length from which I can hang various pendants.  The beads used are silver-lined straw gold, size 11, and silver-lined cobalt blue, size 8.  This is so pretty that I want to now make a matching bracelet and a pendant (stay tuned for this one).

Russian Spiral Beaded Necklace 2023-05-11


Saturday, April 15, 2023

Beaded Bracelet Pearl Bliss - 4/15/23

April 23, 2023--Loved working up this beaded bracelet designed by Beads Gone Wild called Pearl Bliss.  It has lots of texture and I learned more techniques like ladder and herringbone stitches.  These little bracelets are fast and quick to work up while keeping me challenged.  I am falling deep into the rabbit hole and loving every minute.  

The wrinkles you see in the photo of the bracelet laid flat disappear when curved around the wrist.  Nice.


Bracelet Pearl Bliss on Wrist
Bracelet Pearl Bliss Flat

More news about the Stage 2 portion of ANG's Master Needlepointer Certification Program--it's done and mailed to the program chair for review.  Yay!!  Hope to have something to blog about by early Summer.

Saturday, April 1, 2023

Beaded Bracelet Peyote Dogwood - 4/1/23

April 1, 2023--I'm hooked on working up beaded bracelets, and this time it's a peyote beaded one with a dogwood button clasp.  I love the YouTube videos produced by Beads Gone Wild, the shop where I purchased the kit for this bracelet.  They give you lots of detailed instructions, much of which can be used in other projects.   

And I'm continuing to work on my ANG Master Needlepointer Certificate Program, Stage 2.  All of the designing, drafting and testing on the last section of this project have been done and I'm happily stitching away.  I actually believe the stitching and report will be completed in plenty of time (deadline for mailing is about April 17th).   I should be able to blog about it once the piece has been "graded", sometime in early Summer.  Stay tuned.

Bracelet Dogwood Peyote Laid Out

Bracelet Dogwood Peyote


Sunday, March 26, 2023

Beaded Bracelet Holiday Russian Spiral - 3/26/23

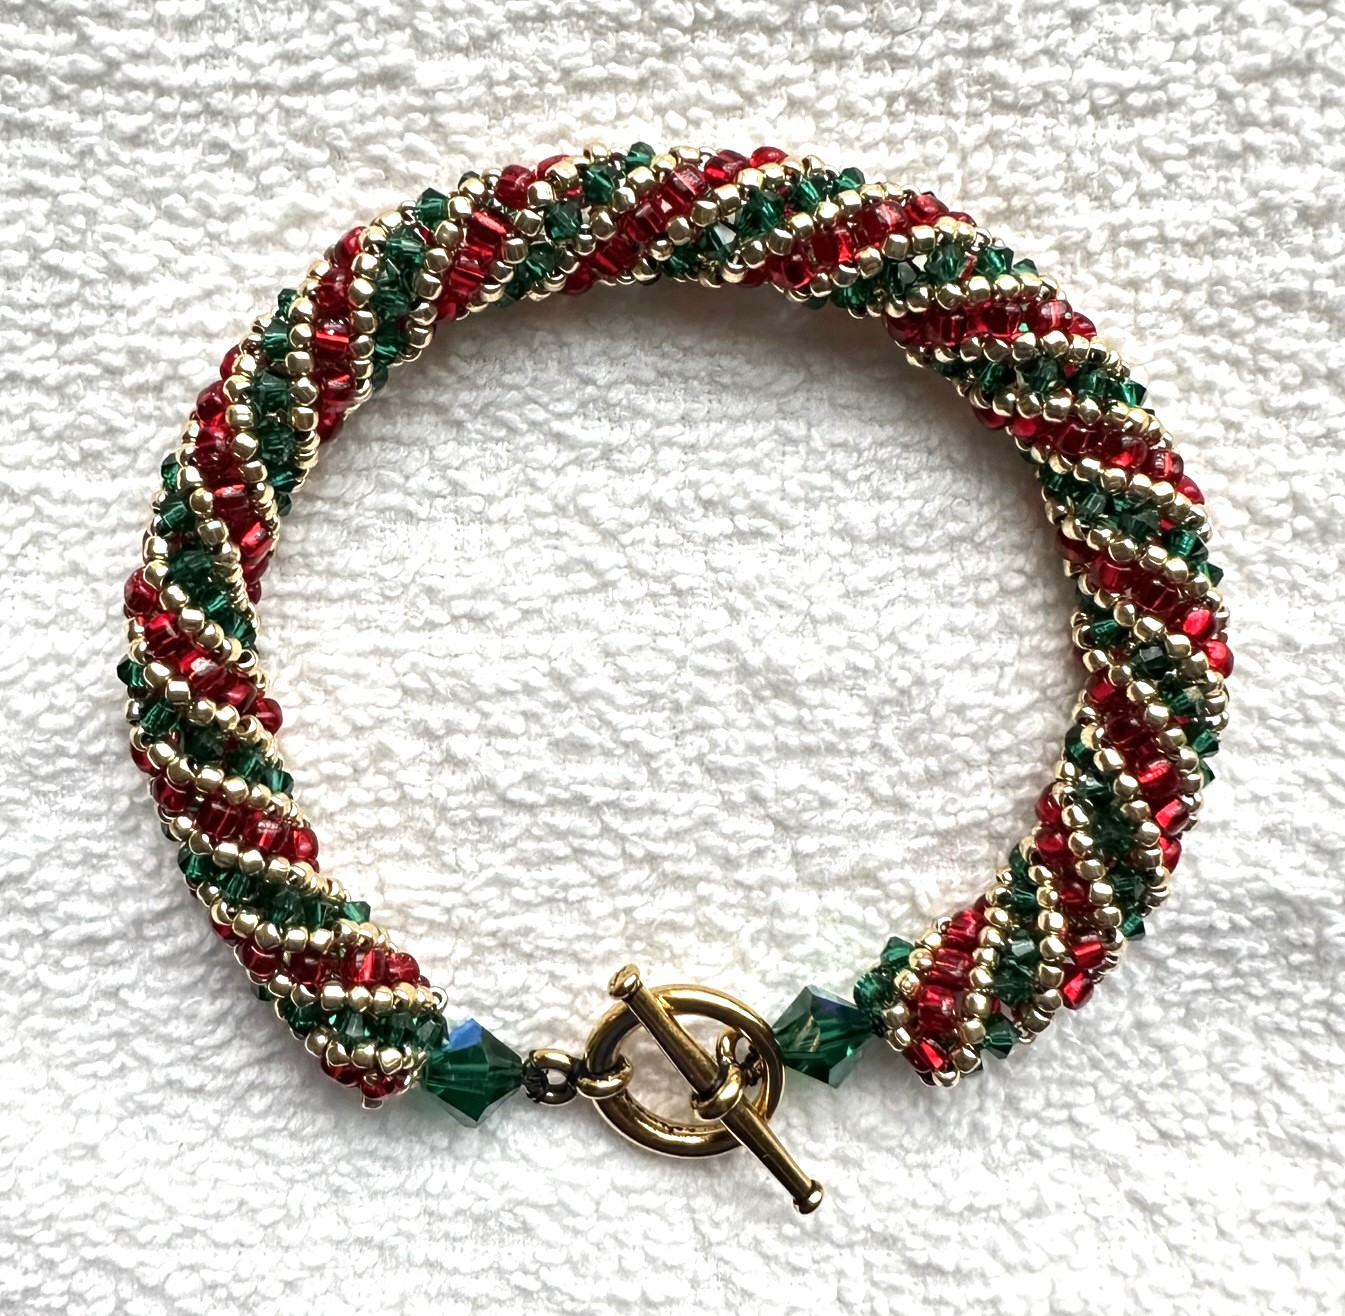
March 26, 2023--Here I go--deeper into the rabbit hole of beading delight.  I ordered some kits on sale from Beads Gone Wild and easily completed this beautiful Holiday Russian Spiral bracelet.   The kit had everything--beads, thread, toggle hardware, instructions, needles, etc.  I was also able to find additional video instructions on YouTube.  

Now I have to discipline myself to finish Stage 2 of ANG's Master Needlepointer Certification program.  The last portion required some serious planning, drafting, graphing, etc.  That's behind me now and all I need do is stitch it up.  It all still requires a lot of counting.  Whine, whine....wine, wine.

Holiday Russian Spiral Bracelet--kit by Beads Gone Wild


Thursday, February 23, 2023

Bracelet Beaded Taught by Dinna V - 2/23/23

February 23, 2023--Yesterday I met with a group of serious beaded jewelry makers and am about to fall into a delightful rabbit hole.    Our host showed us her gorgeous necklaces and bracelets and found a simple bracelet design for me to copy.   She even gave me the supplies to work it up.  

The pattern is simple enough--one large bead, then add five seed beads, a small bead, then 5 seed beads.  That's basically it.  Of course, sewing it together requires a particular technique, but that's for the experts to teach.  

Now I really want to make more of everything, especially peyote beaded pieces.  

I know making beaded jewelry isn't needlepoint, but it does involve one half of the needlepoint requirement of “any counted or free stitchery worked by hand with a threaded needle on a readily counted ground” (I have a threaded needle in hand to make jewelry).   So, I'm good with it and will call it "needlework".

Thank you, Dinna V, for supplying me with the beautiful beads, thread and clasp to work up the bracelet pictured below.  


Wednesday, February 22, 2023

Holiday Ornament Gift Pink - 2/22/23

February 22, 2023--In between some of my needlepoint obligations (working on the ANG Master Needlepointer Certificate and putting together a class on stitching ribbon flowers on canvas), I took a break to stitch up one of Susan Portra's Holiday Ornaments--this one being the pink gift.  As with all the other Holiday Ornaments I've stitched, this will get finished into an ornament when the set is all done.   I love how pretty the RG Fyre Werks thread (darker shiny pink) looks--almost jewel-like. 


Ornament Holiday Gift Pink Completed


Ornament Holiday Gift Pink Completed Side View


Friday, February 3, 2023

Floor Stand Clamp Repaired Again - 2/3/23

February 3, 2023--Exactly eight years ago today, I blogged about the clamp to my K's Creations floor stand having to be repaired (see older post below).  Well, it had to be repaired again, but this time I like the new one so much better.  For one thing, the top "Tri-knob" is much easier on my hand when tightening or loosening the clamp than the metal "T-knob" I had.  Secondly, the top portion of the clamp is now made of wood which, in my opinion, seems to "give" just enough to seriously tighten, but not enough to strip the screw.  Lastly, I was given a whole new clamp with an improved bar that attaches to the arm of the floor stand.  Easier to attach and feels more secure.

The leather pieces you see are installed by me with glue dots to help hold my stretcher bars in place.  I stitch "in the well", so the tacks that I use to mount my canvas unto stretcher bars would cause the bars to slip around in the clamp.  This doesn't happen anymore because the tacks "sink" into the leather.

Now, if I need to get this repaired again in another eight years, I hope Brett Schulle of K's will still be able to help me.  He has been very responsive and helpful.


Floor Stand Clamp Repair 2/3/15

February 3, 2015--I really do love my floor stand from K's Creations but had a problem with the clamp.  Discovered I had totally stripped the clamp's screw and it would no longer hold stretcher bars in place.  You can see this in the first picture.  Frantically I contacted the fine folks at K's using the contact tab on their web site and Brett Schulle immediately responded, requesting I mail the clamp to him for repair, after which he would mail it back to me.  

Clamp with Stripped Screw
So off to the post office to mail the clamp, which by the way, was very easy to remove from the stand's long horizontal arm.    And in no time at all, I received the fully repaired clamp in the mail. Easily got it screwed back onto the arm and am in business again, happily stitching.

Newly Repaired Clamp
You may notice there is a piece of leather on the clamp's bottom plate.  I put this in place using "glue dots" and find it really helps to hold stretcher bars with less tightening of the screw.  This is because I stitch in the well, tacking the canvas unto the back of my stretcher bars.  All too often the tacks would slide and slip in the clamp, causing me to overtighten the screw.  Now those tacks settle into the soft leather with no slippage.   Easy solution and hope it may help someone who may have this problem.


2 comments:
  1. I too stitch in the well, and will go and find a leather patch! Thanks!

    ReplyDelete
  2. Great idea! I love my K's stand, too, and am a fellow well stitcher.

    ReplyDelete